Trying something not computer related again (running log – last update: July 4, 2025)
When you’ve been servicing computers in one way or another for 23 years, sometimes it can get a little boring. Something I’ve run into several times over the years and I usually take a break for a week or two and do something completely different. Gardening, playing darts, console games, movies, tv shows, and stuff like that can kill some time but it’s more of a small break than a complete get-away-from-computers, you know?
2020 has been a good year for me computer repair wise but I have grown bored with it, time for another break.
Along comes a friend that tells me (March 2021) “If you pay for the repairs, you can have this lawn tractor”
Well, what’s wrong with it? I asked. “It’s leaking gas that’s all I know.”
The shop this was going to estimated $200-$400 in repairs, maintenance, etc.
If I’m going to spend a few hundred on this, I may as well spend it in parts and tools myself, I figured. Maybe learn something in the process.
“I’ll take it but I’ll fix it myself!”
What I knew at this point:
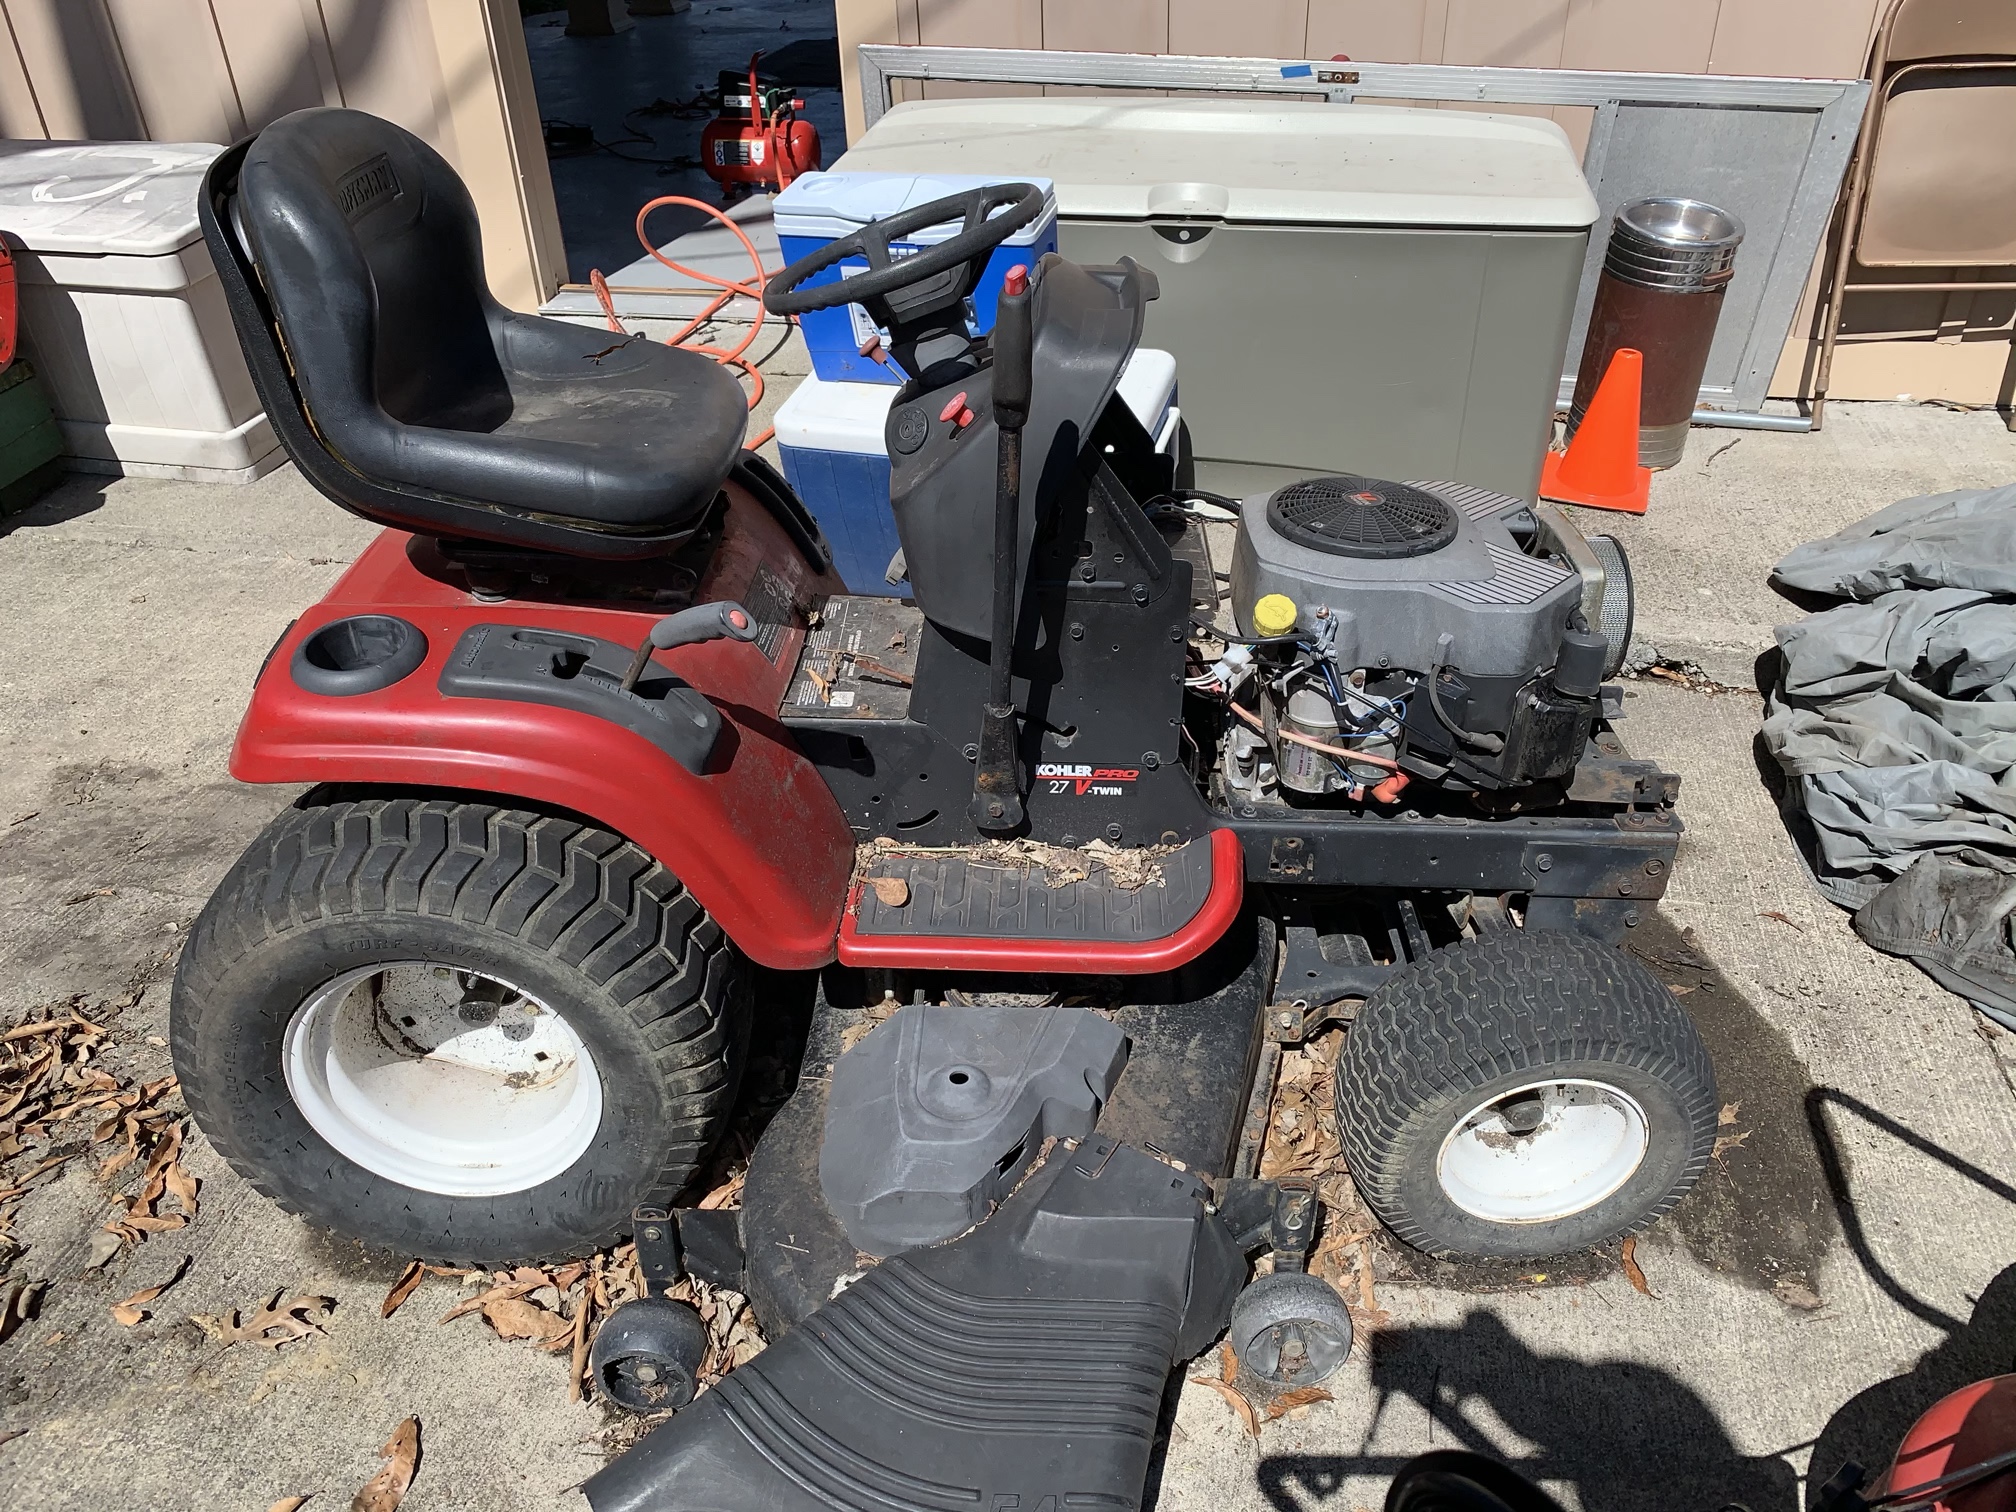
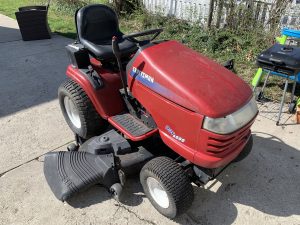
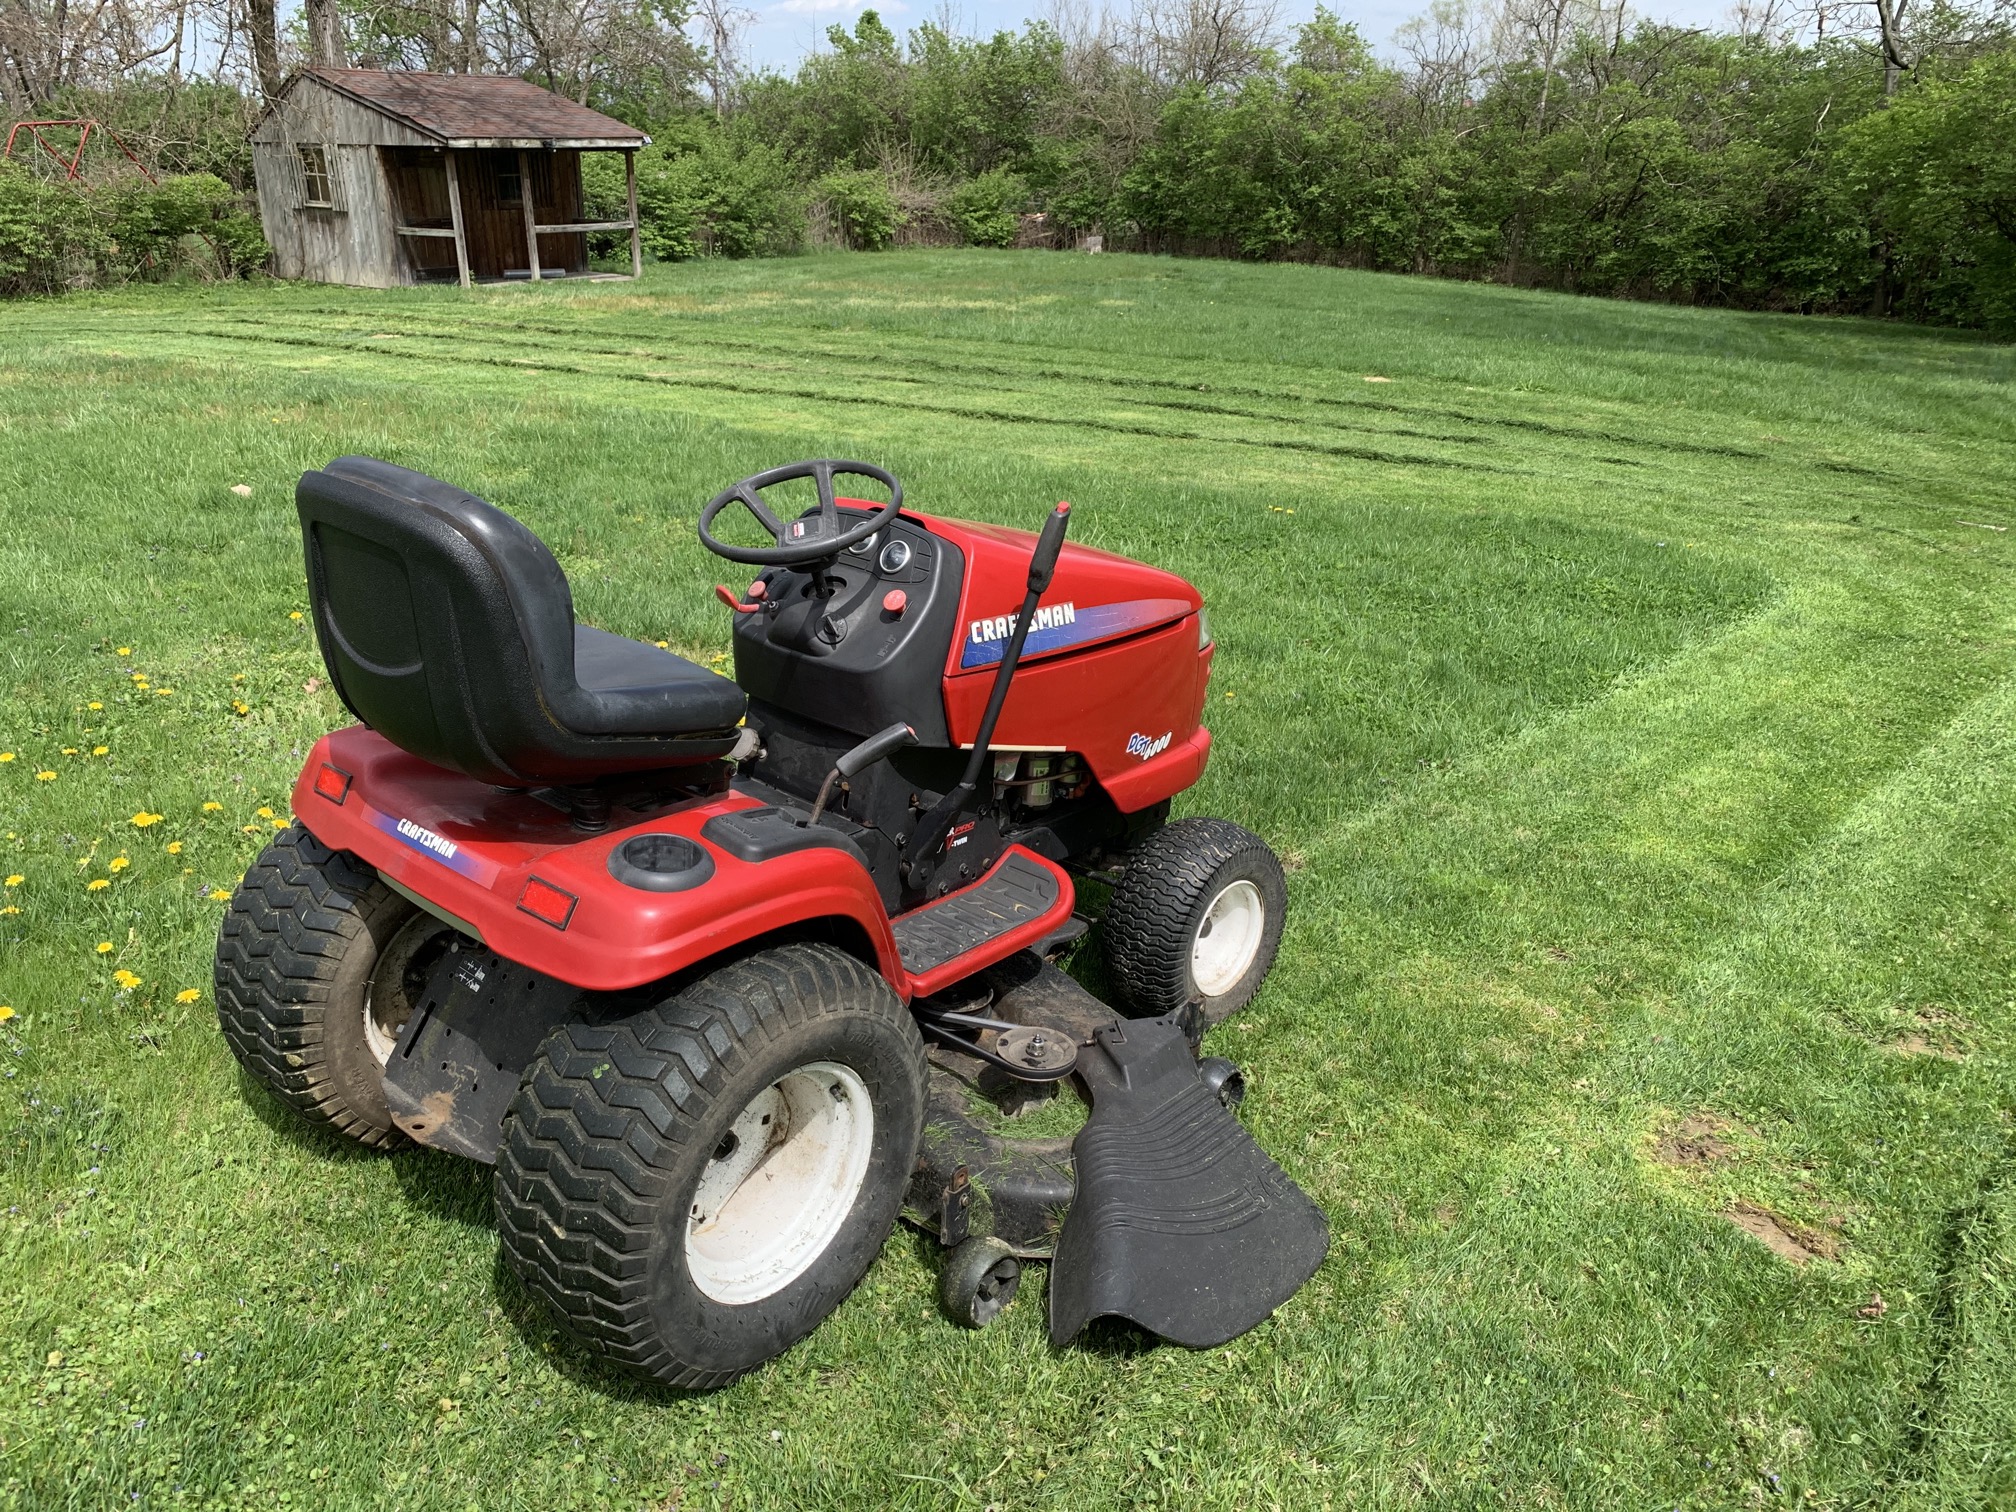
– Craftsman DGT 6000, late 2004
– Kohler Command Pro CV740 27hp v-twin engine
– Leaking fuel so probably a gunked-up carburetor
– Two flat front tires (no inner tube)
– A good comparable used one runs at least $800
– A brand new one runs $2600
– If I can invest $400-500 max, not including tools, I call it a win (hoping to not spend more than $200)
This is a 17 year old tractor that has been outside for at least 1-2 years, why the hell would I invest any time or money in this?!
Glad you asked.
Some research showed that among tractor enthusiasts and people that have been using these kinds of machines for a long time, the DGT 6000 is actually praised as being a very solid model. From a time when the Craftsman brand still meant quality etc. Not unlike the craftsman, one would buy since. The engine is still made today so that’s certainly not something to worry about. All in all, I read enough to tell my friend “I’ll take it”, figuring once this is fixed it will last me a very long time if properly maintained.
Another reason the age is appealing to me; not a single computer chip in this thing, anywhere! No locked firmware, no proprietary code, none of that nonsense the current Right to Repair movement is fighting against. Just plain mechanics, nothing more.
There is one problem though. I have never worked on anything bigger than a Mac. Ever. I have every tool you can possibly need to fix a Mac but nothing that’s required to work on something like a lawn tractor. The difference between a carburetor and a gearbox? Couldn’t tell ya or point out where they are located. The function of a PTO switch? Not a clue. The most basics of basics, I do not know when it comes to this stuff. It’s hard to put into words how STYOOOOOPID (channeling my inner Branchus) I am when it comes to this.
ZERO knowledge on the subject, NO tools bigger than an iFixit screwdriver set, MASSIVE chance of failure and wasting money. Sounds like the perfect ‘doing-something-not-computer-related’ (DSNCR going forward) to me!
Fast forward a few weeks, the weather started improving and the tractor was loaded on a trailer and dropped off at my house. And so my DSNCR began with a trip to Lowes for a new battery. I was just going to tackle each issue as it presented itself and see where I’d end up.
PROBLEM 1: Leaking fuel
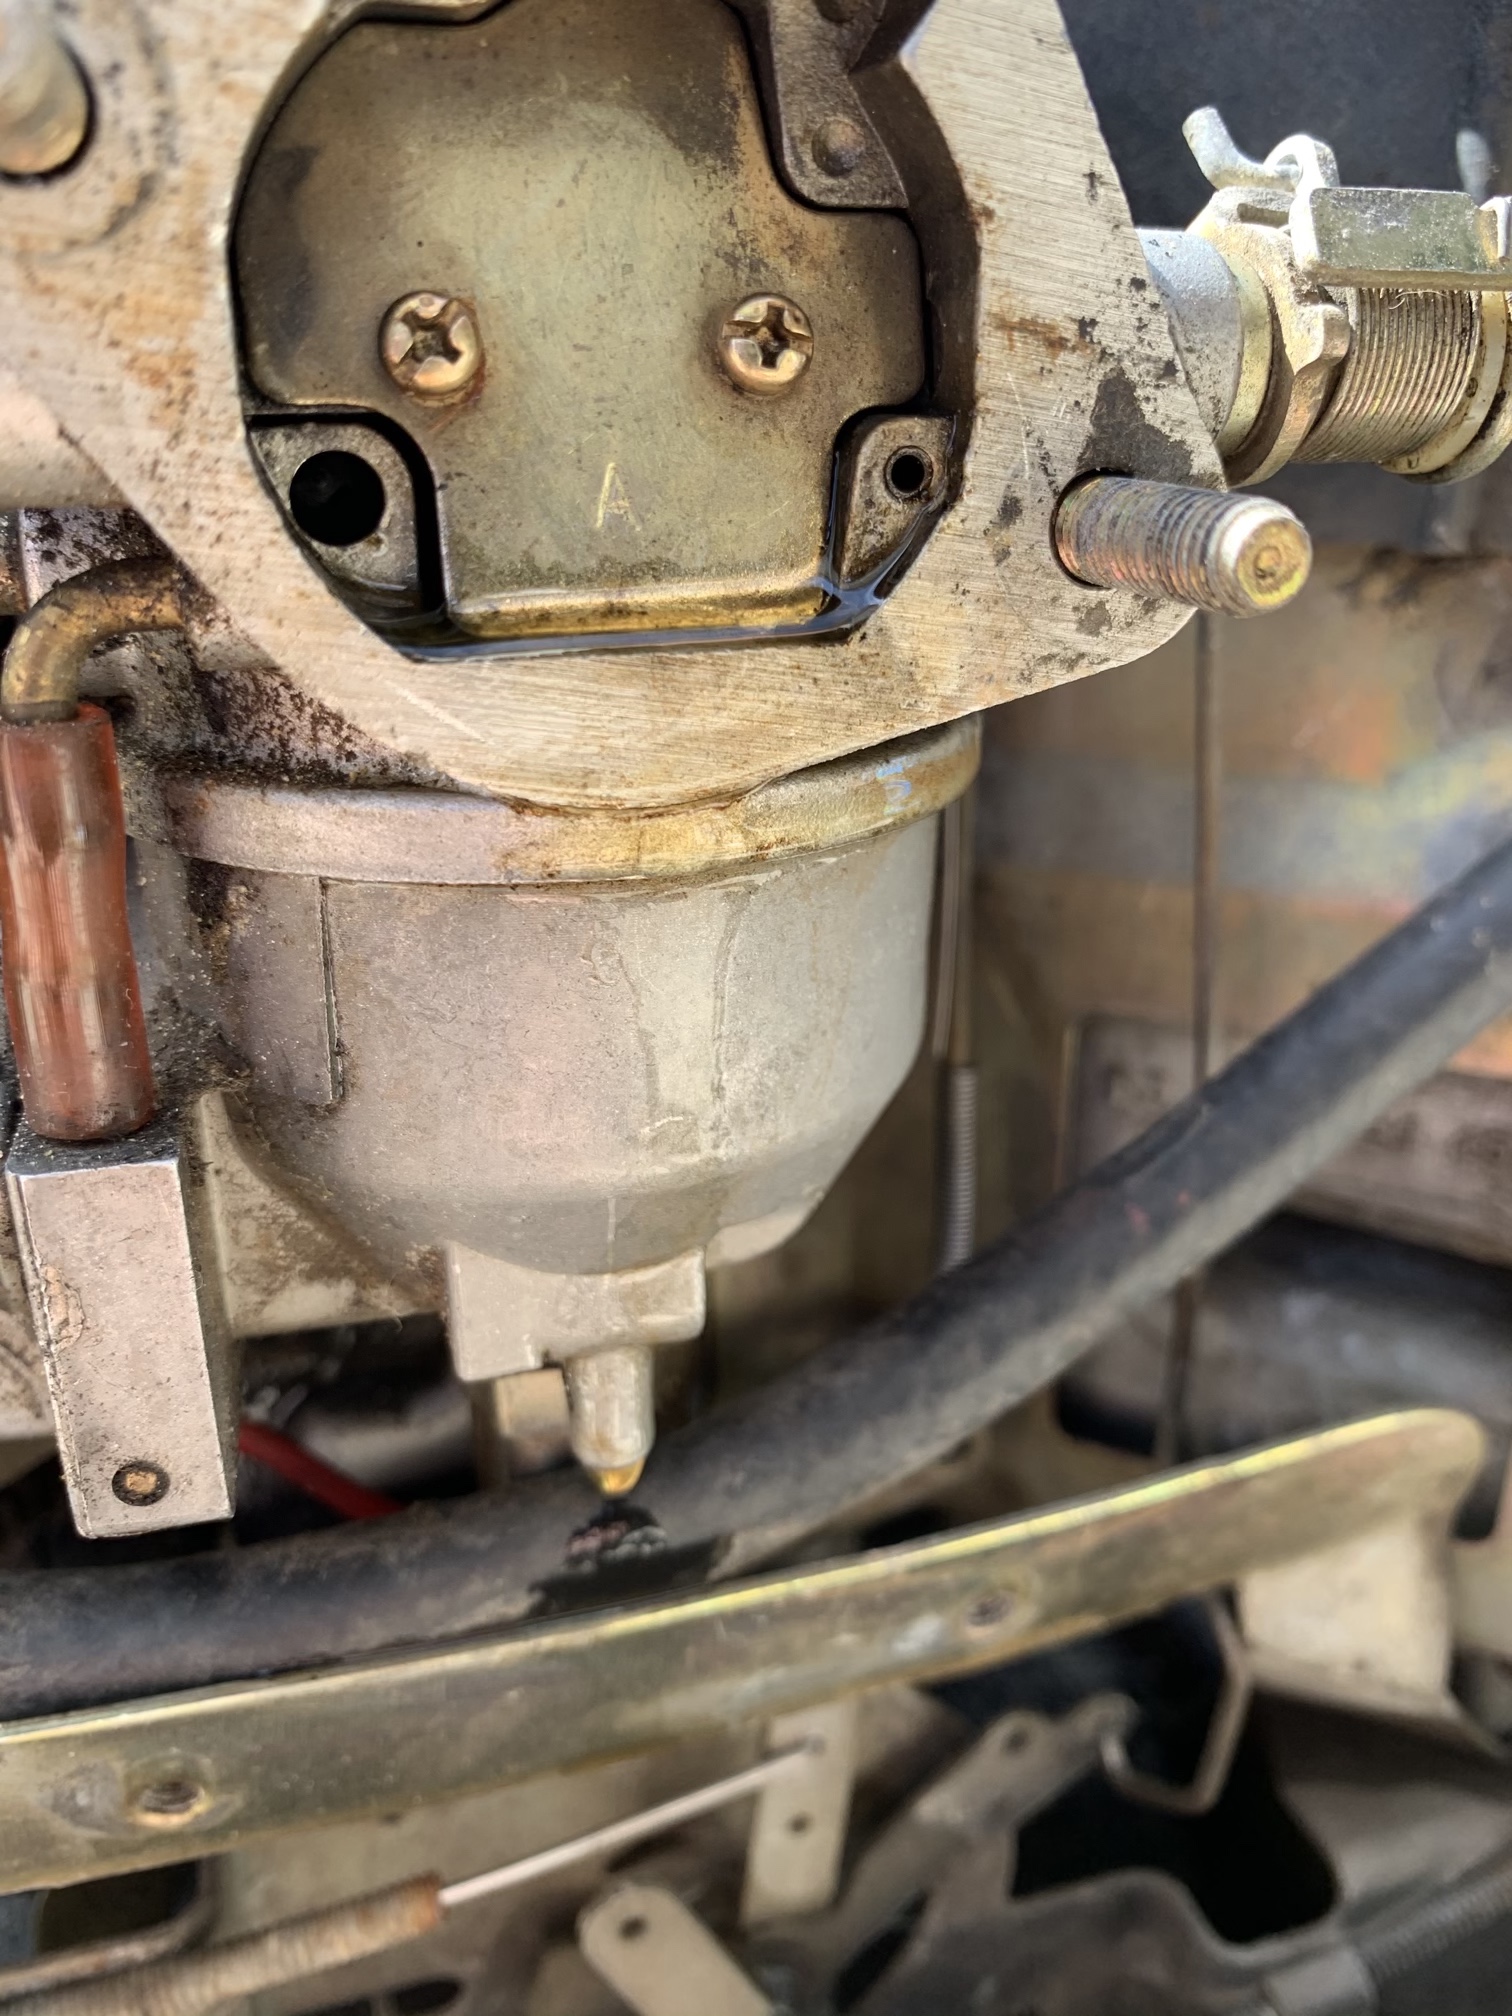 That, it certainly did. Fuel was leaking from the carburetor and it was unable to run with the choke closed.
New carburetors cost $20-$30 on Amazon but they all have pretty much the same reviews; “worked great for 20 hours then self-destructed”. The original carburetor still sells for $400 (not a typo) and apart from being ridiculously priced people have seemed very happy with them for many years. So I decided to buy a carburetor repair kit and fix up the current one, rather than buying a cheap replacement.
The bowl gasket was messed up, gunk everywhere, solenoid stuck, channels clogged, accelerator pump shot… everything that could be wrong with a carburetor, was wrong with this carburetor. By the way, all the names of parts and terminology I might sprinkle in along the way, are things I have learned during this project. I’ll probably get plenty of it wrong but at the time of writing this, I’m just a few weeks in.
Waiting for the replacement parts to arrive I cleaned the whole thing out and discovered the miracle potion called carburetor cleaner. I love this stuff!!! It cleans anythinggggg and I was very tempted to use this in my board repairs as well. Michael Stanhope told me that’s a bad idea and I should just stick to its intended use. The carburetor also took a swim in my ultrasonic cleaner and came out looking ready for duty.
Once fully assembled, I still had major issues running the tractor. I found out that the solenoid (anti-after-fire solenoid) actually has a moving part. Hmm, odd, I don’t recall mine having any moving parts. Turns out it was really, really stuck but some carburetor cleaner and attention to detail got it working right. The tractor now actually ran, kind of. But there were still many issues to tackle.
PROBLEM 2: Engine controls
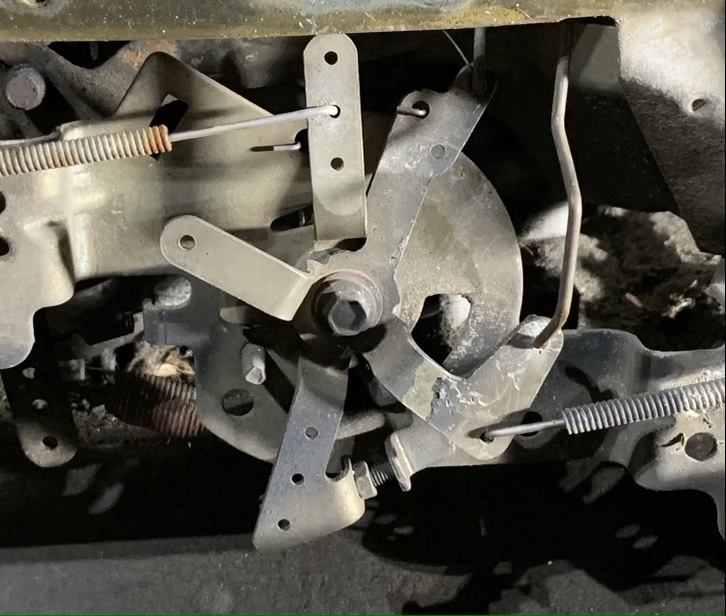 Someone, at some point, took these controls apart and put it all back together the wrong way. Throttle and choke were connected to the same arm, springs were in the wrong position and even the rotating pieces themselves were not in the right order.
I had to piece this all together by looking at youtube videos of others working on these engines/tractors and search engine image results. There is not a single mention or useful diagram of these controls in the tractor service manual or the engine service manual. It took a while and lots of trial and error but I *think* I have everything connected in the right place now.
TEST 1:
With the carburetor rebuilt and the engine controls in *maybe* the right place, it was time to test. It started, it choked at high RPM but ran pretty good on idle. With the choke wide open of course. Slowly increasing the RPM sometimes got it there but whacking the throttle to full quickly cause it to sputter and die almost right away. After playing around with this for a bit I got the hang of it and had it running predictably (not reliably). Time to test the gearbox!
Brake off, the engine died immediately. Whatever I did, as soon as I took the brake off the engine died. Hmm, back to the service manuals.
PROBLEM 3: Safety switches
 This tractor has three safety switches. One under the seat, one on the brake, and one on a button called the PTO. The seat switch (Operator Presence Switch) ensures the engine turns off if I happen to fall off my seat while driving and this switch was missing. I tried to short the wires but it made no difference. The switch by the brake was there (Switch Interlock) but it was covered in all kinds of crud. Through some forums, I found out that the seat switch is the most important one, and without it, there’s no chance of this working, so I ordered a switch for that.
The seat switch arrived, was placed, and…. problem persisted. Guess I have to replace the brake switch.
The brake switch was a real pain to get to but I got it removed. One of the contacts was badly corroded but my good friend carburetor cleaner and a wire brush got it looking like new. Put that switch back and was ready for the next test.
TEST 2:
It started, same weird behavior as before but this time when I took the brake off…. the engine didn’t die! Finally, I could test the gearbox. It drove forward, it drove backward, it moved! Took a lap around the yard, stalled out a few times but made it back to the garage.
Heck, let’s just see what happens when I put the mower deck under it. Did that and fired it up, drove it onto the grass, and hit the PTO switch to engage the blades. The engine wasn’t happy with this load but it ran.
Since it ran, kinda, I started mowing the lawn. Good idea? no. Satisfying? Absolutely!
I got far enough to run out of gas (only put a little bit in for testing) but after adding more fuel the engine ran like crap. Puffs of black smoke when starting, grey/white smoke while running, RPM’s shooting into the red even when the throttle was set to idle… weird stuff. Did I run this thing into the ground? Maybe, probably, but there was more tinkering and troubleshooting to do.
PROBLEM 4: Fuel in the oil
 I think I had more fuel than oil in the crank case, and it was a deep black color. This fuel could have gotten there because of the carburetor issues but it could also be one or two blown head gaskets or bad piston rings. The carburetor had already been rebuilt but I was still using the oil that was in there when I got the thing. Time to drain out the old oil.
But before I did that, it was recommended I do a compression test which should help narrow down if there’s an issue and where this issue is located.
Compression tester was purchased and a compression test was done. 120-ish PSI on both cylinders. The service manual stated this should at least be 190 PSI but then again it also told me to do this test on a warm engine. I tested a cold engine in a 4C (39F) garage. Ran the test several times on both sides and got consistent results. With these results, it kind of ruled out bad head gaskets or bad piston rings, at least from what I read. The fuel in the oil must have gotten there through the carburetor.
The old oil was drained and the old oil filter was removed. The tractor then sat for a few days while I was waiting for new parts to arrive.
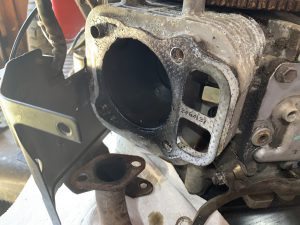
PROBLEM 5: Massive amounts of oil leaking from the breather separator
 The what? Yeah I had no idea what this thing was or what it was for either. Depicted in the image to the left, this allows pressure to escape (coming from the crankcase). Small amounts of oil are caught in the breather which is filled with a metal mesh while fumes are allowed through. These fumes are delivered back to the carburetor where they are sucked in again and combust. Better for emissions ‘n such. The problem here was too much pressure, way too much. Oil was flooding out of it.
In my mind, pressure like this ending up in the crank case could only mean blown head gasket or bad piston rings. Fuel in the oil could be a slow leak from the carburetor but pressure like this could only come from the cylinder. But the compression test was ok… yes it was. But I didn’t do it properly. I should have removed the oil dipstick while doing the compression test. Had I done that, I am sure one or both of the cylinders would have had little to no compression.
The oil was already drained so I could not do a new compression test (maybe I could have but turning the engine over without oil in the crankcase doesn’t seem like a good idea)
Let’s just take it apart and see what we find in there.
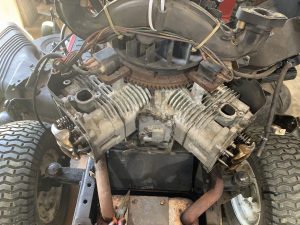
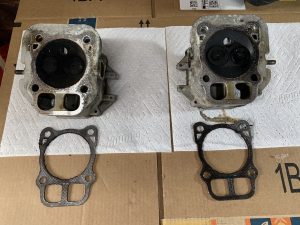
Carbon. Lots of carbon. The valves appeared OK, push rods were not bent, rocker arms were fine. It was all just dirty. Inspection of the head gaskets did not reveal any signs they were blown but looks can be deceiving so who knows, maybe one of them was. No scarring or unusual marking on the cylinder walls which should suggest the piston rings *may* be OK. All the carbon was cleaned up and it was time to focus on the next issue.
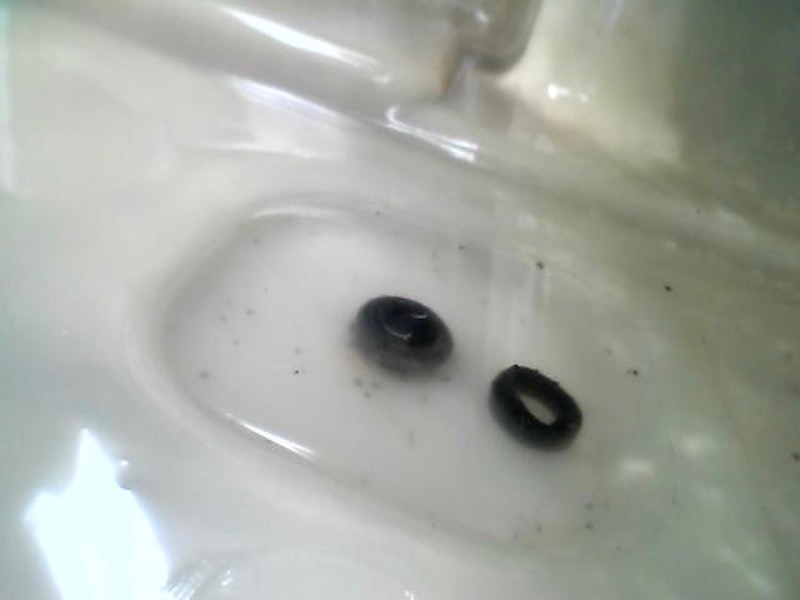
PROBLEM 6: Dirt in the fuel system
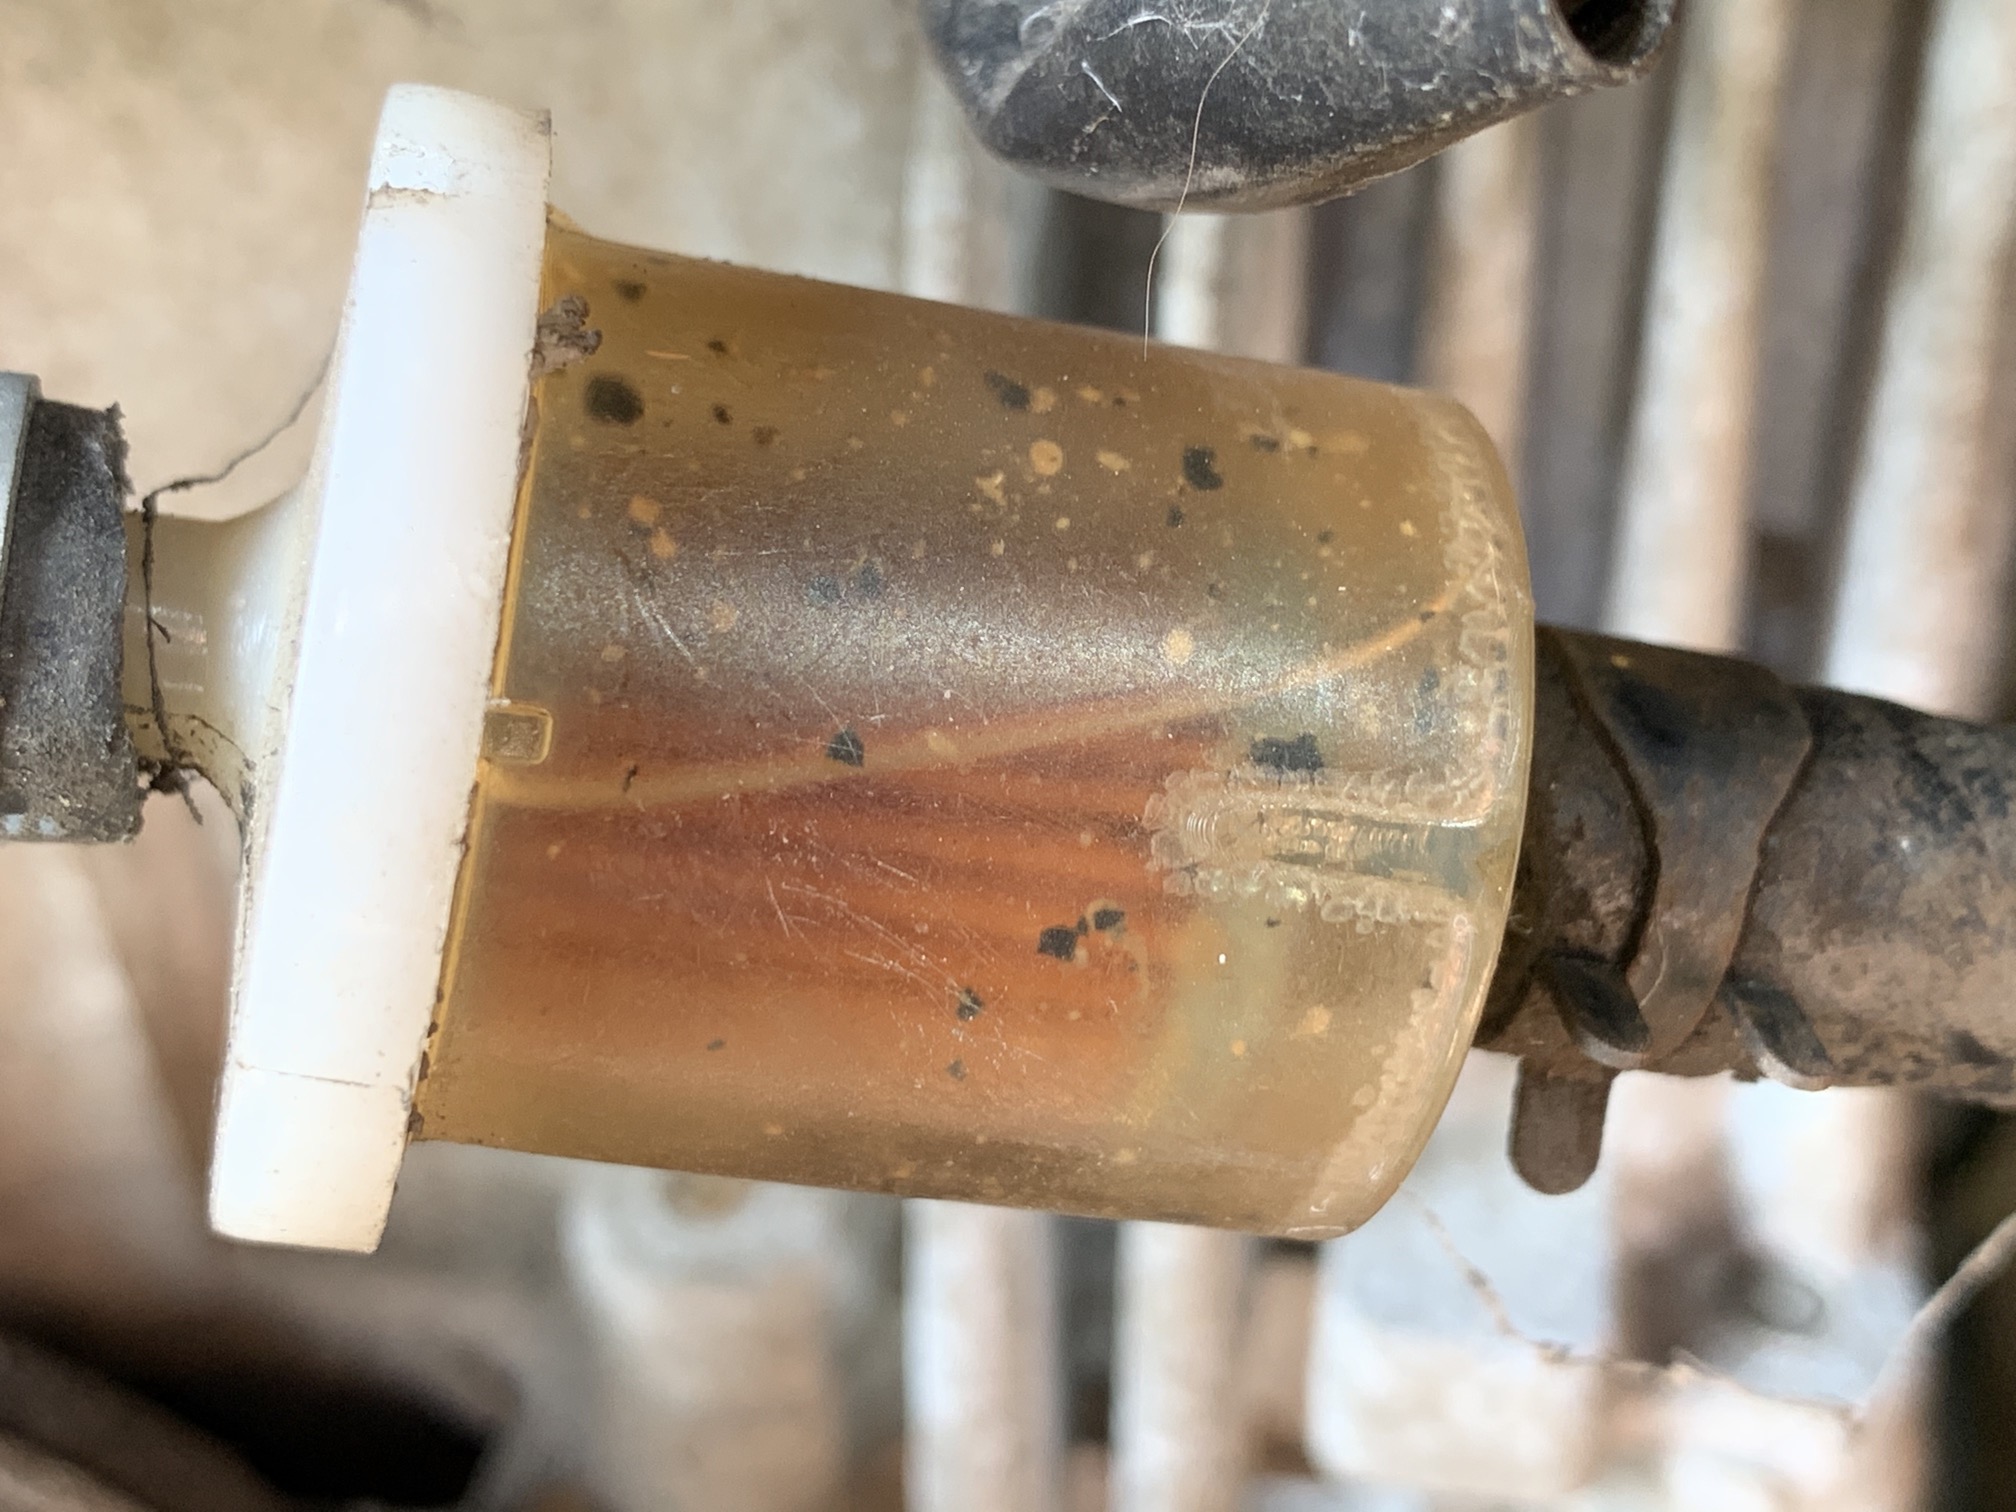 The fuel filter that was on this tractor was nasty. The image to the left doesn’t do it justice, it was gross and full of black soot. With the great idea of adding more ethanol to the fuel, because environment etc, these fuel lines were probably deteriorating and leaving their flakes all over the fuel system. Clearly visible in the fuel filter and inside the carburetor when I took it apart.
I had already put a new filter on as I thought restricted fuel flow was causing the weird engine issues but that new filter filled up just as fast. So the line and/or tank had to be inspected.
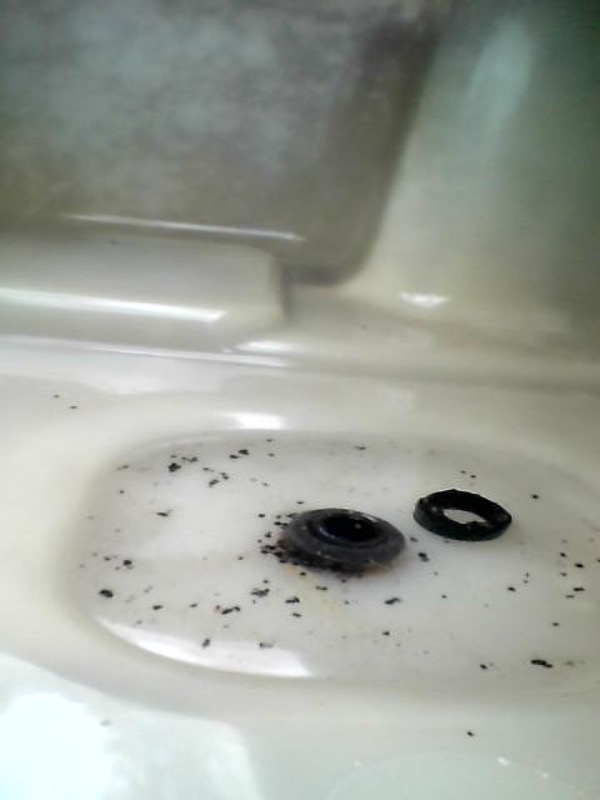
The tank was full of these black flakes. A little mesh that covered the hole the fuel line connects to had come apart and was deteriorating inside the tank. The fuel line itself was also rapidly deteriorating (tested this by just squeezing it with pliers, whole chunks came loose on the inside).
The fuel tank was rinsed and flushed several times with vinegar and while it took a LOT of the gunk out, a lot of smaller flakes remained stuck near the line hole.
Running low on vinegar, and sweating my butt off in the now full sun, I asked my good friend carburetor cleaner if he’d mind taking a shot at this. He certainly didn’t. Blasted the tank with some of that and rinsed it with vinegar once more. Flakes be gone!
 Sure there is some but the fuel filter will take care of that down the line. That piece of the ring will continue to deteriorate as well but there’s no way for me to get to it. I consider the tank cleaning a success!
PROBLEM 7: Self-doubt
New head gaskets, oil filter, oil, fuel pump, muffler and a ton of other parts arrived and I had decided to call someone with more knowledge on the matter, to come and slap it all back together for me. Might as well get it done right, right? I took it all apart and knew how to put it back together but a more experienced person may catch things I’ve overlooked. There are plenty of shops and services around but they all charge a ton and take weeks to get the work done, or even have time to see you. I wanted a local small business to get a shot at this. Many people during the 2020 lockdowns trusted me with their Mac service and repairs even though they could have gone to authorized service providers, so I wanted to pay it forward. A dude was found on facebook, claimed to have 40 years experience and to have this tractor up and running in no time. $30 an hour plus $20 travel fee.
Ok, see you soon.
The dude showed up and he looked straight up backwoods Kentucky. Camo outfit ripped to shreds, marlboro dangling from his mouth, driving a rape van with so many parts on the dashboard he could barely see the road. Not poking fun at the guy, this is exactly what I was looking for! Because say what you want about these types, they know how to rebuild an engine! So after the introductions and reminding him what was wrong with the mower, he got to work.
And this is where sh*t went South…
I’ll spare you most of it but he had no idea what the hell he was doing. Asked me where certain parts belonged. Kept dropping his smoke on his pants so he dropped his tools to stop his leg from getting burned, it was a hot mess. I was planning to go back inside and chill while he worked but quickly decided to stay out there and watch him like a hawk. Glad I did. He was half way through unscrewing a crank case breather cover when I caught and stopped him. That’s the one thing on this engine that didn’t leak, leave it alone! So he put the screws back in, with an impact drill. I’m pretty sure half of the engine service manual is dedicated to each and every screw and their exact torque yet this dude is not using a torque wrench but an impact drill. After 2 hours of rage-inducing mistakes and obvious ineptitude, I told him to hit the road. I was out $90 and would have been able to do everything he did so far, only better and faster. The dude was nice but this was money down the drain, showing stereotypes are not always accurate. I spent the rest of the evening going over his work and assembling the rest of the tractor. At least he gave me a roll of fuel line.
TEST 3:
New gaskets, pumps, filters, oil, fuel, hope, and prayer… time to fire ‘er up!
It started, sounded much better, ran smoothly in max throttle and on idle… it worked! Ran it for a few minutes as the goal was to flush the new oil with some Sea Foam through the crankcase, drain it and refill it with fresh oil again. With the state of the old oil being what it was, this probably has to be done a few times.
Well I didn’t have to drain it, it drained itself. My father flagged me down to kill the engine and pointed underneath the tractor, oil everywhere. How the hell is that possible!?
This all happened pretty fast so I didn’t get a chance to take a photo but 1 1/2 bottle of oil went in, at least 1 bottle of oil was now spilled out on my driveway. I removed the air filter to take a look, it was a blood(oil)bath. The carburetor, engine controls, governor arm, and everything on the front of the engine was covered in oil. The only way to know where this came from was to start it again and see where it came spewing out. So I did and my dad checked, once he found the leak he told me to kill the engine and showed me.
Son. Of. A. %#@$*!
That crankcase breather cover I told the dude not to touch but he touched anyway? That’s where the oil came from, pouring out the top. Did he bust the gasket by taking those screws out? Did he not tighten the screws enough? I thought I checked after he left? I wasn’t sure but I was pissed.
Apart came the front of the engine again. Carburetor, heat shields, shroud, etc. Got to the breather cover and found one of the screws super loose. Maybe that was it! Maybe it was just a loose screw, maybe I’m lucky!
No luck for me. The dude used an impact drill to drive a metal bolt into an aluminum threaded hole, WAY overtightened it and stripped the tread. Not the thread of the bolt but the thread inside the hole. There is currently no way to tighten that bolt up (luckily the other 3 are ok) so I once again am forced to stop while I wait for tools and parts to arrive (Lowes and Home Depot are useless for this kind of stuff).
A lesson was learned, again. If you want it done right, do it yourself! Or at least try to do it yourself first and call someone if you can’t figure it out or if you mess up. I’m out $90 on the dude, some more on tools for tapping a new thread, etc. A costly lesson to be reminded of but I guess I was due. Not making this mistake again, at least not any time soon.
PROBLEM 8: Fixing the Dude’s mistakes
Received the tools needed to turn the M6 hole into a threaded M8 hole (I do metric system, sorry not sorry) and kinda pulled it off. Half of the hole was just filed down, the last few mm got threaded. Juuuust enough for the bolt to hang on to at first but not enough once all the covers and heat shield were in place, damn! So off to Lowes I went to pick up a 25mm version of the bolt. That worked great!
Slapped it all back together, added fresh oil and some Sea Foam (fantastic stuff), said a prayer, and rolled the tractor out of the garage for a test.
TEST 4:
Crank, crank, crank, crank… nothing. Noooooo, what now? Oh, right, I added an in-line fuel shutoff valve. I should probably set that to allow fuel through. Crank, crank, vroommmmmm! Ok, It started. The throttle isn’t very responsive so I probably need to have another look at the engine controls and how everything is hooked up but with small increments, it ran smooth.
Keeping a close eye on the driveway, no puddles started forming. A few minutes later, still no puddles. Time to go for a ride around the yard. A few minutes later I got back to the garage and turned the engine off. I heard dripping. Fuel leaking from behind the air filter, this could only be the carburetor.
Quickly removed the air filter and indeed, the carburetor was oozing fuel but not out the top, out the bottom. A few turns of the anti afterfire solenoid which was so loose I’m surprised it didn’t fall out, and the leak stopped. Took it for a few laps once more and still no leaks. I then figured “why not” and went full throttle maximum speed all over the yard. Moles are a big issue here so there are humps and bumps big enough to send me flying out of my seat. These bumps and a slope at the end of the yard caused the engine to die before but now it took every hump and slope like a champ, never skipped a beat.
Successful test! I just need to tweak the engine controls and wait for it to stop raining so I can do a test mowing the lawn. I also drained the oil again and there wasn’t a hint of fuel there, so I am assuming my piston rings are OK and the head gaskets were the issue before, even though I saw no visible damage to them.
Over the next two weeks, I will put this tractor through hell (if the weather allows, nothing but rain forecasted) and give it a proper workout. If there are no more leaks or other odd behavior, I will start investing in replacing worn parts, making the machine look better, removing whatever rust remains etc. The air filter cover is half melted which doesn’t affect the functionality one bit but you know… it’s going to bug me eventually 🙂 Things like that I will invest in once this machine proves itself.
Meanwhile, my 5 year old is battling me for rights to this tractor so I may not even get to enjoy it all that much!

REAL-WORLD USE:
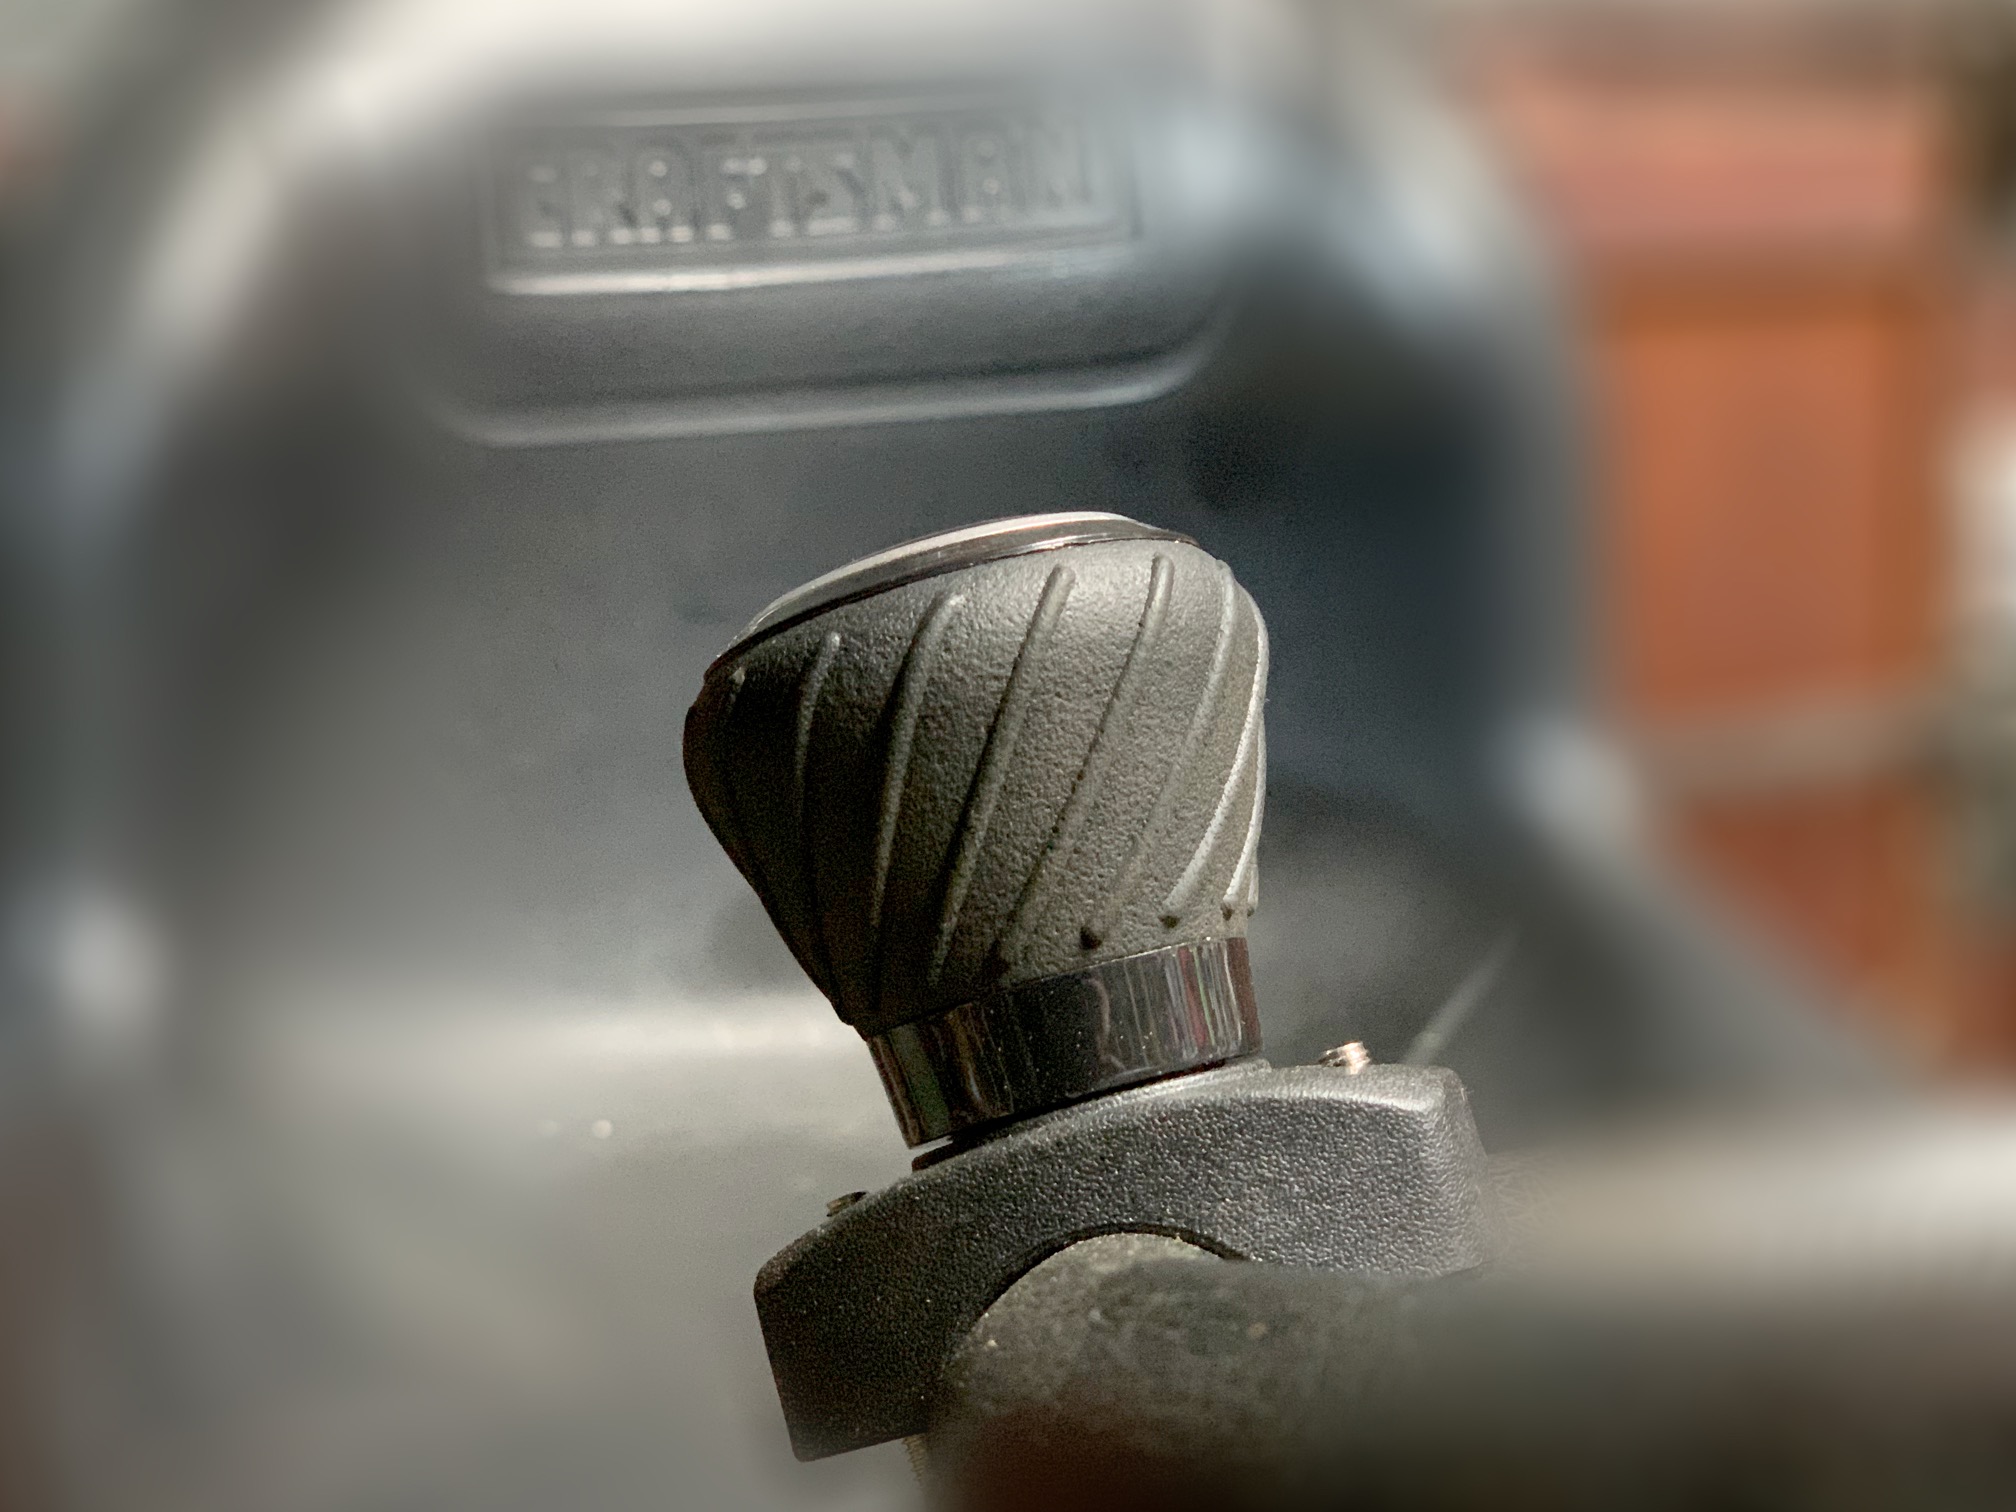
Two weeks in and 3 mows done (It’s halfway through May at this point). Not one single issue with the engine, transmission, or blades. As this is a 17 year old tractor it has zero bells or whistles unless you could the cup holder. Driving this thing around for a few hours is certainly a workout as it has no power steering, so I can definitely feel it in my arms by the time I’m done. A good solution for this was adding a suicide knob to the steering wheel, I zoom around looking like I’ve been doing this all my life!
Some tweaking of the idle mix on the carburetor has the tractor idling at 1100rpm but it won’t reach peak rpm, staying just under the green zone on the rpm gauge. I replaced one of the springs on the governor that had lost all of its springiness and that seems to have helped but it’s still not quite there yet. The governor may need an adjustment.
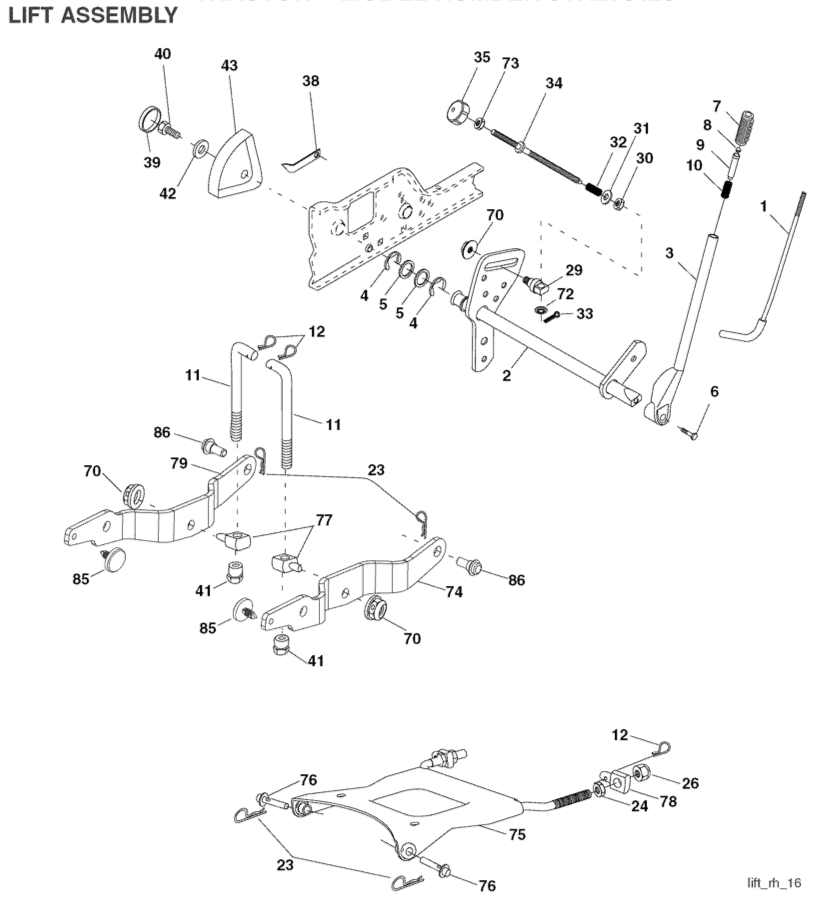 Another issue is the mower deck, it’s not level and when lowered it drags the floor on the left side if I set it to lower than 3”. I tried adjusting the left deck link lift (parts 11 and 41 in the diagram) but the thread on it only allowed for a 4mm adjustment. This adjustment translated in absolutely zero effect on the deck height. So I will try setting the right side deck link lift to +4mm and hope that the 8mm total difference translates into something meaningful.
Meanwhile, the deck gauge wheels that are supposed to sit about 1-1.5mm off the ground, now have been set to be firmly on the ground just to keep the deck from slicing the crap out of my lawns. This works well but is absolutely not the way it should be. And these gauge wheels, while rounded, can still do a good amount of damage to a lawn when taking a sharp turn. Until this is fixed my driving style was adjusted accordingly.
I’ve been doing these tweaks between mows as the machine is perfectly capable of mowing the lawns now and I want to avoid another super tear down that has it out of commission for a week or longer.
Gas prices being on the rise has caused me not to drive this tractor often as it has a healthy thirst for fuel. It’s not bad but any fuel I use for the tractor is fuel that’s unavailable for the car or generator if I need it, so I’m using it only when needed at the moment. Rain is expected for the next week so I’m getting a quick mow in tomorrow and then it’ll be in the garage for a week anyway, plenty of time for me to resume tinkering. Stay tuned!
SOME TWEAKS:
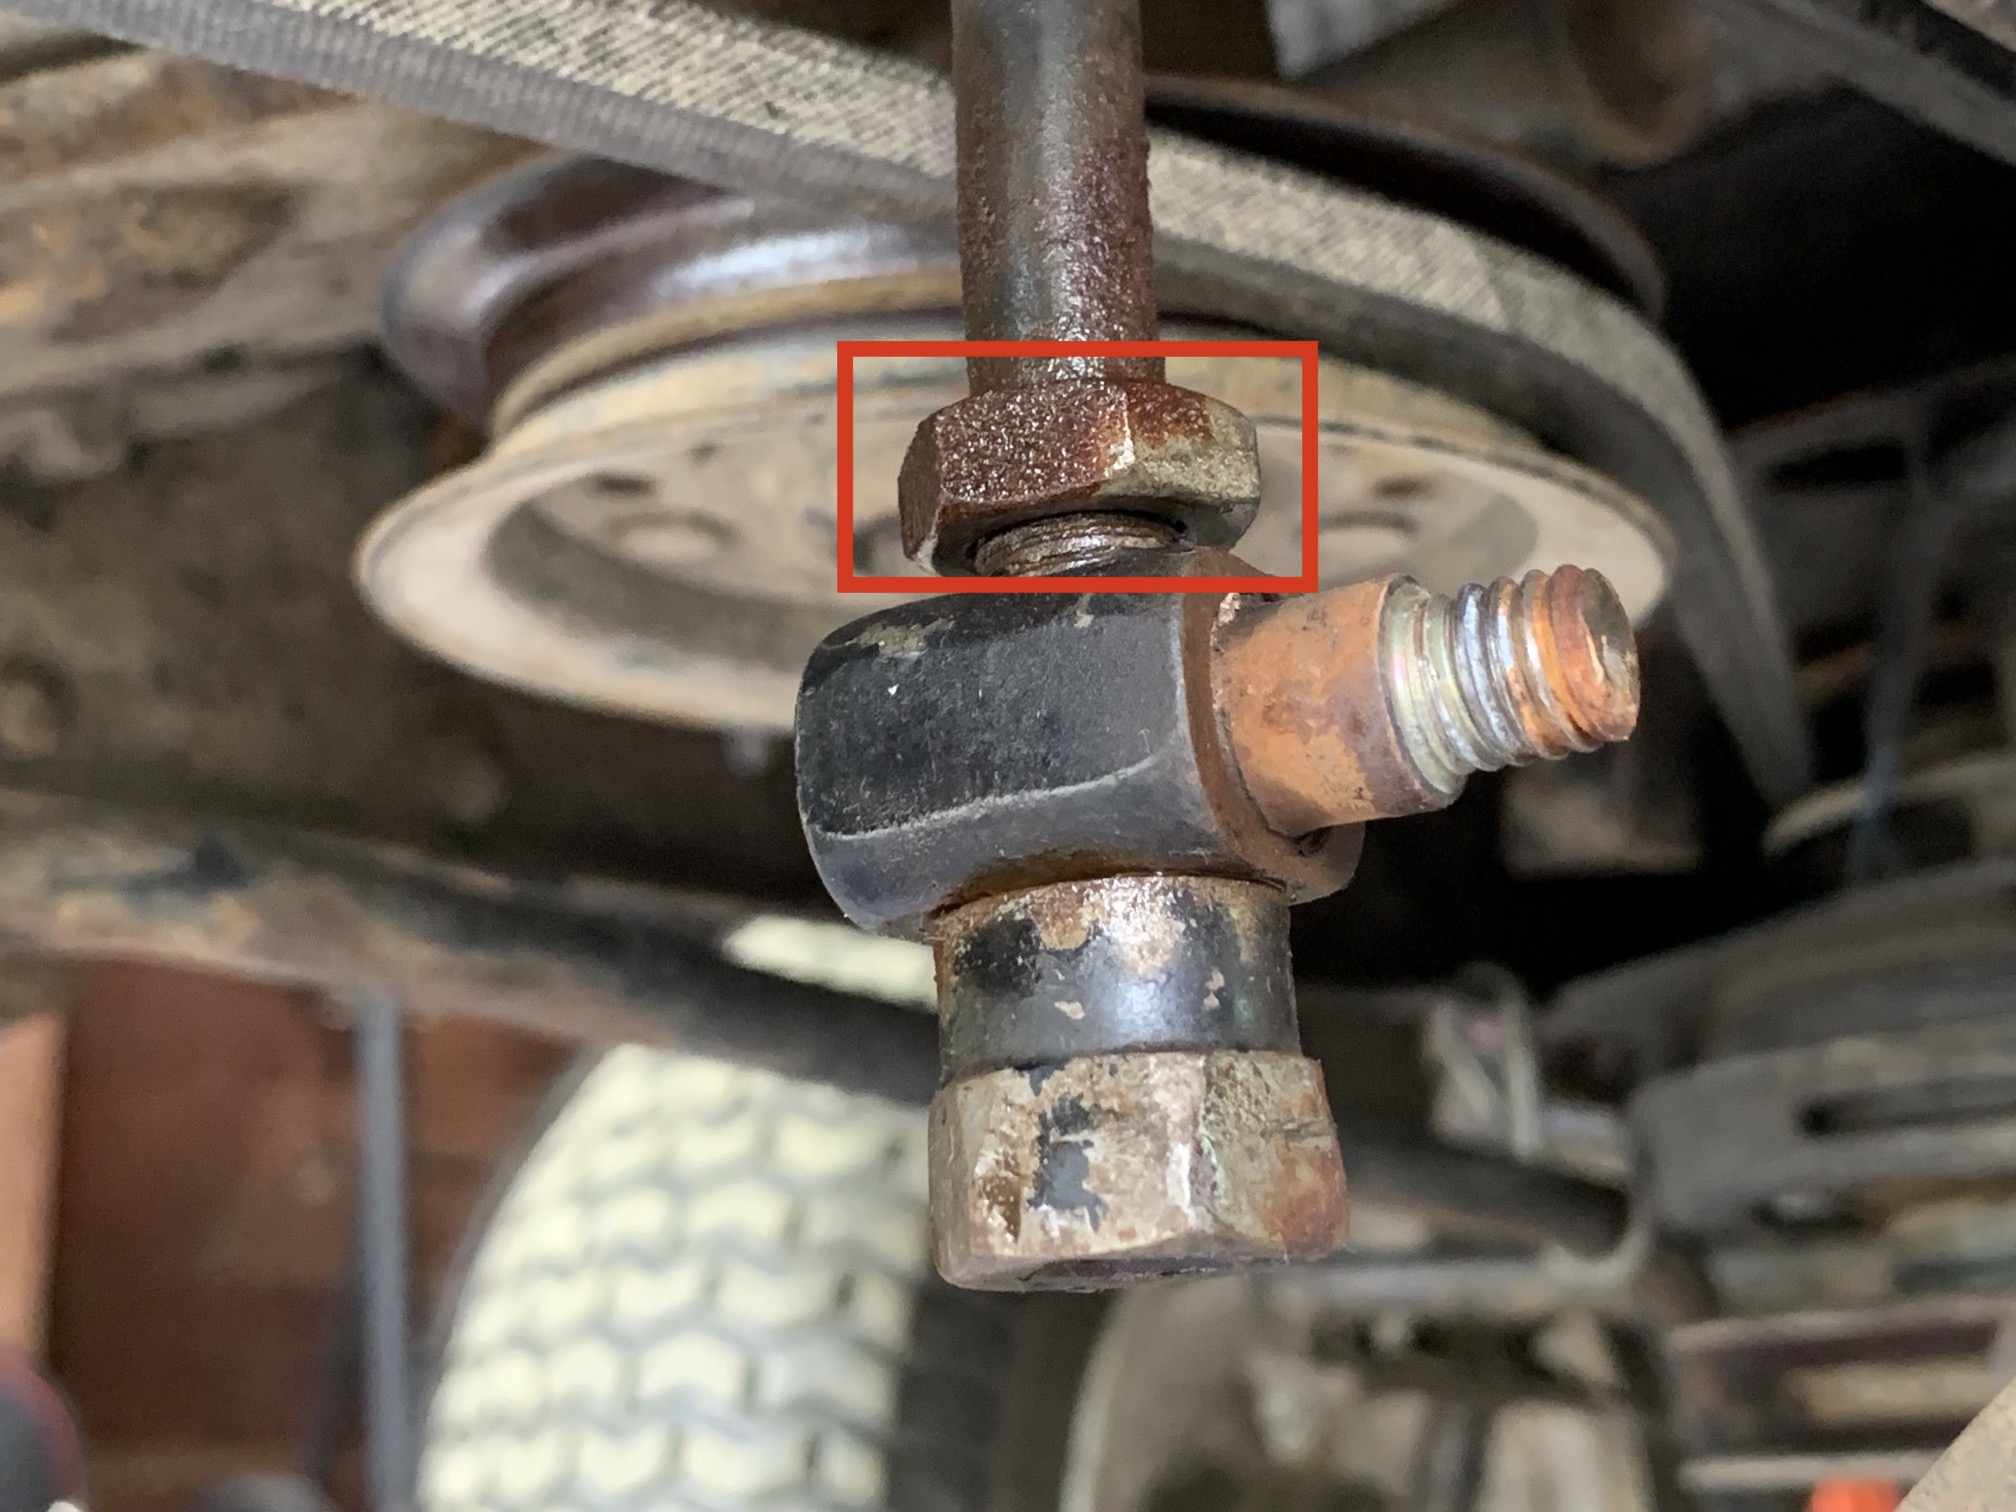 After the last update, I realized why I was unable to adjust the mower deck link lifts by more than a few mm. The diagram in the service manual (see above) shows a few parts to the link lift assembly (12, 11, 77, and 41) but on my link lifts there is a bolt on top of 77! It takes up whatever thread remains for adjusting! It also explains why the deck itself digs into the lawn, it has zero space to move up when it hits a bump. Doh!
Glad I added a picture of the diagram to my last update else I never would have found this.
The nuts were promptly removed, the deck properly adjusted and it mows much better now, no longer digging into the lawn unless I hit a giant mole heap or something. The gauge wheels are able to do their job properly and guide the deck up when needed as it now can with those nuts removed.
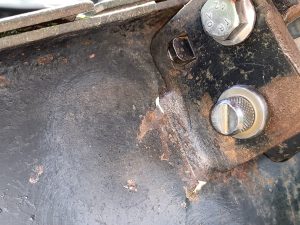
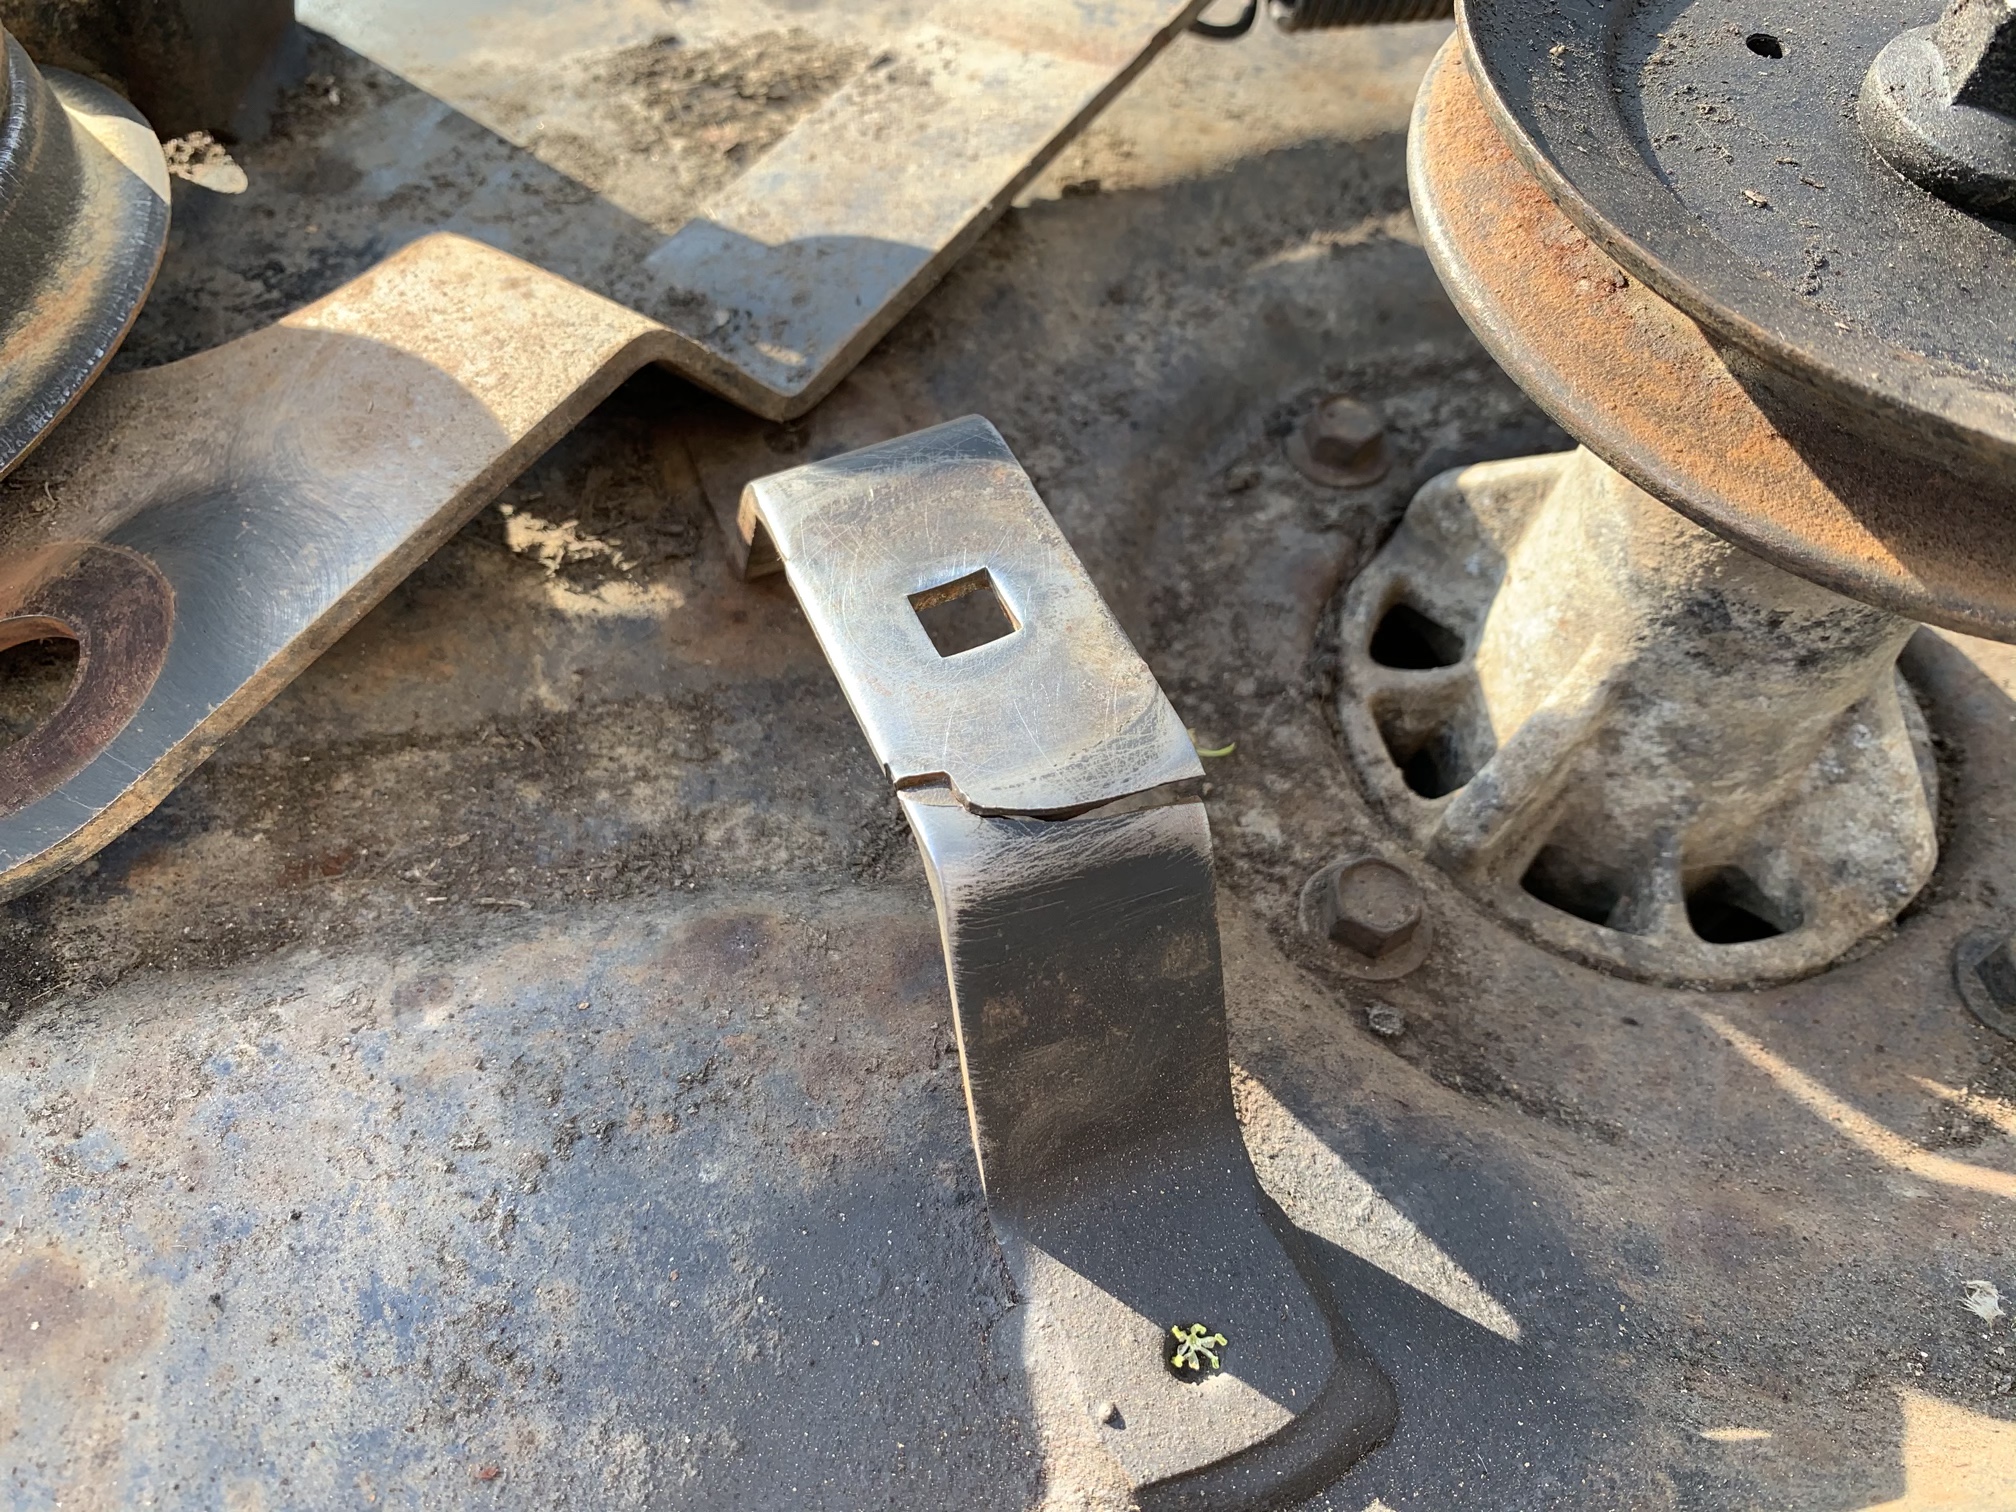 Something that also needed to be addressed was a torn-up bracket on the mower deck. It doesn’t appear to affect functionality but it should be one piece, not two. By chance, a local mom on a Facebook group advertised her son’s skills in mower repair, and he does some welding too. Figured what the heck, let’s give this kid a shot. He was available the next day and only charged $15. His mom dropped him off (he was 14) and he did the work, looking all professional with his welder and tools 🙂 He got the job done, I gave him $30 and that made one less thing on this mower to worry about.
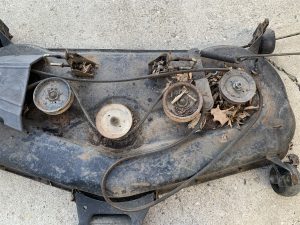
When I hit a large mole heap or something else that puts more than usual strain on the blades, the deck belt tends to run off the pulleys. I cleaned these pulleys out shortly after I got the tractor, they were full of chunky pieces of rust. One of the pulleys needed more work so that got done as well.
One more mow done today (it’s growing so fast I need to mow every 3-4 days) and the belt did not run off the pulleys once. The mow looks better, tractor drives better and I was able to get everything done without having to stop to troubleshoot.
Progress!
UPDATE:
This will likely be the last update on this project in a while. The tractor is working as expected and mowing like a champ. Not going to bore you with basic stuff until something significant happens or is done to the machine. Now that I know the tractor performs well and has survived my abuse over the last few weeks without breaking down, I’ve started focusing on the remaining maintenance and will be updating its appearance as well.
A grease gun was purchased, along with a tube of good grease, and every grease port on the tractor was hit. NONE of the places that needed grease, has any in it. I pumped a whole tube into this thing and used it all. No old grease was pushed out anywhere so there wasn’t any in it!
• Two front wheel spindles: empty
• Two front wheel bearings: empty
• Three deck mandrels: empty
That’s nuts! Today’s mow was noticeably less noisy.
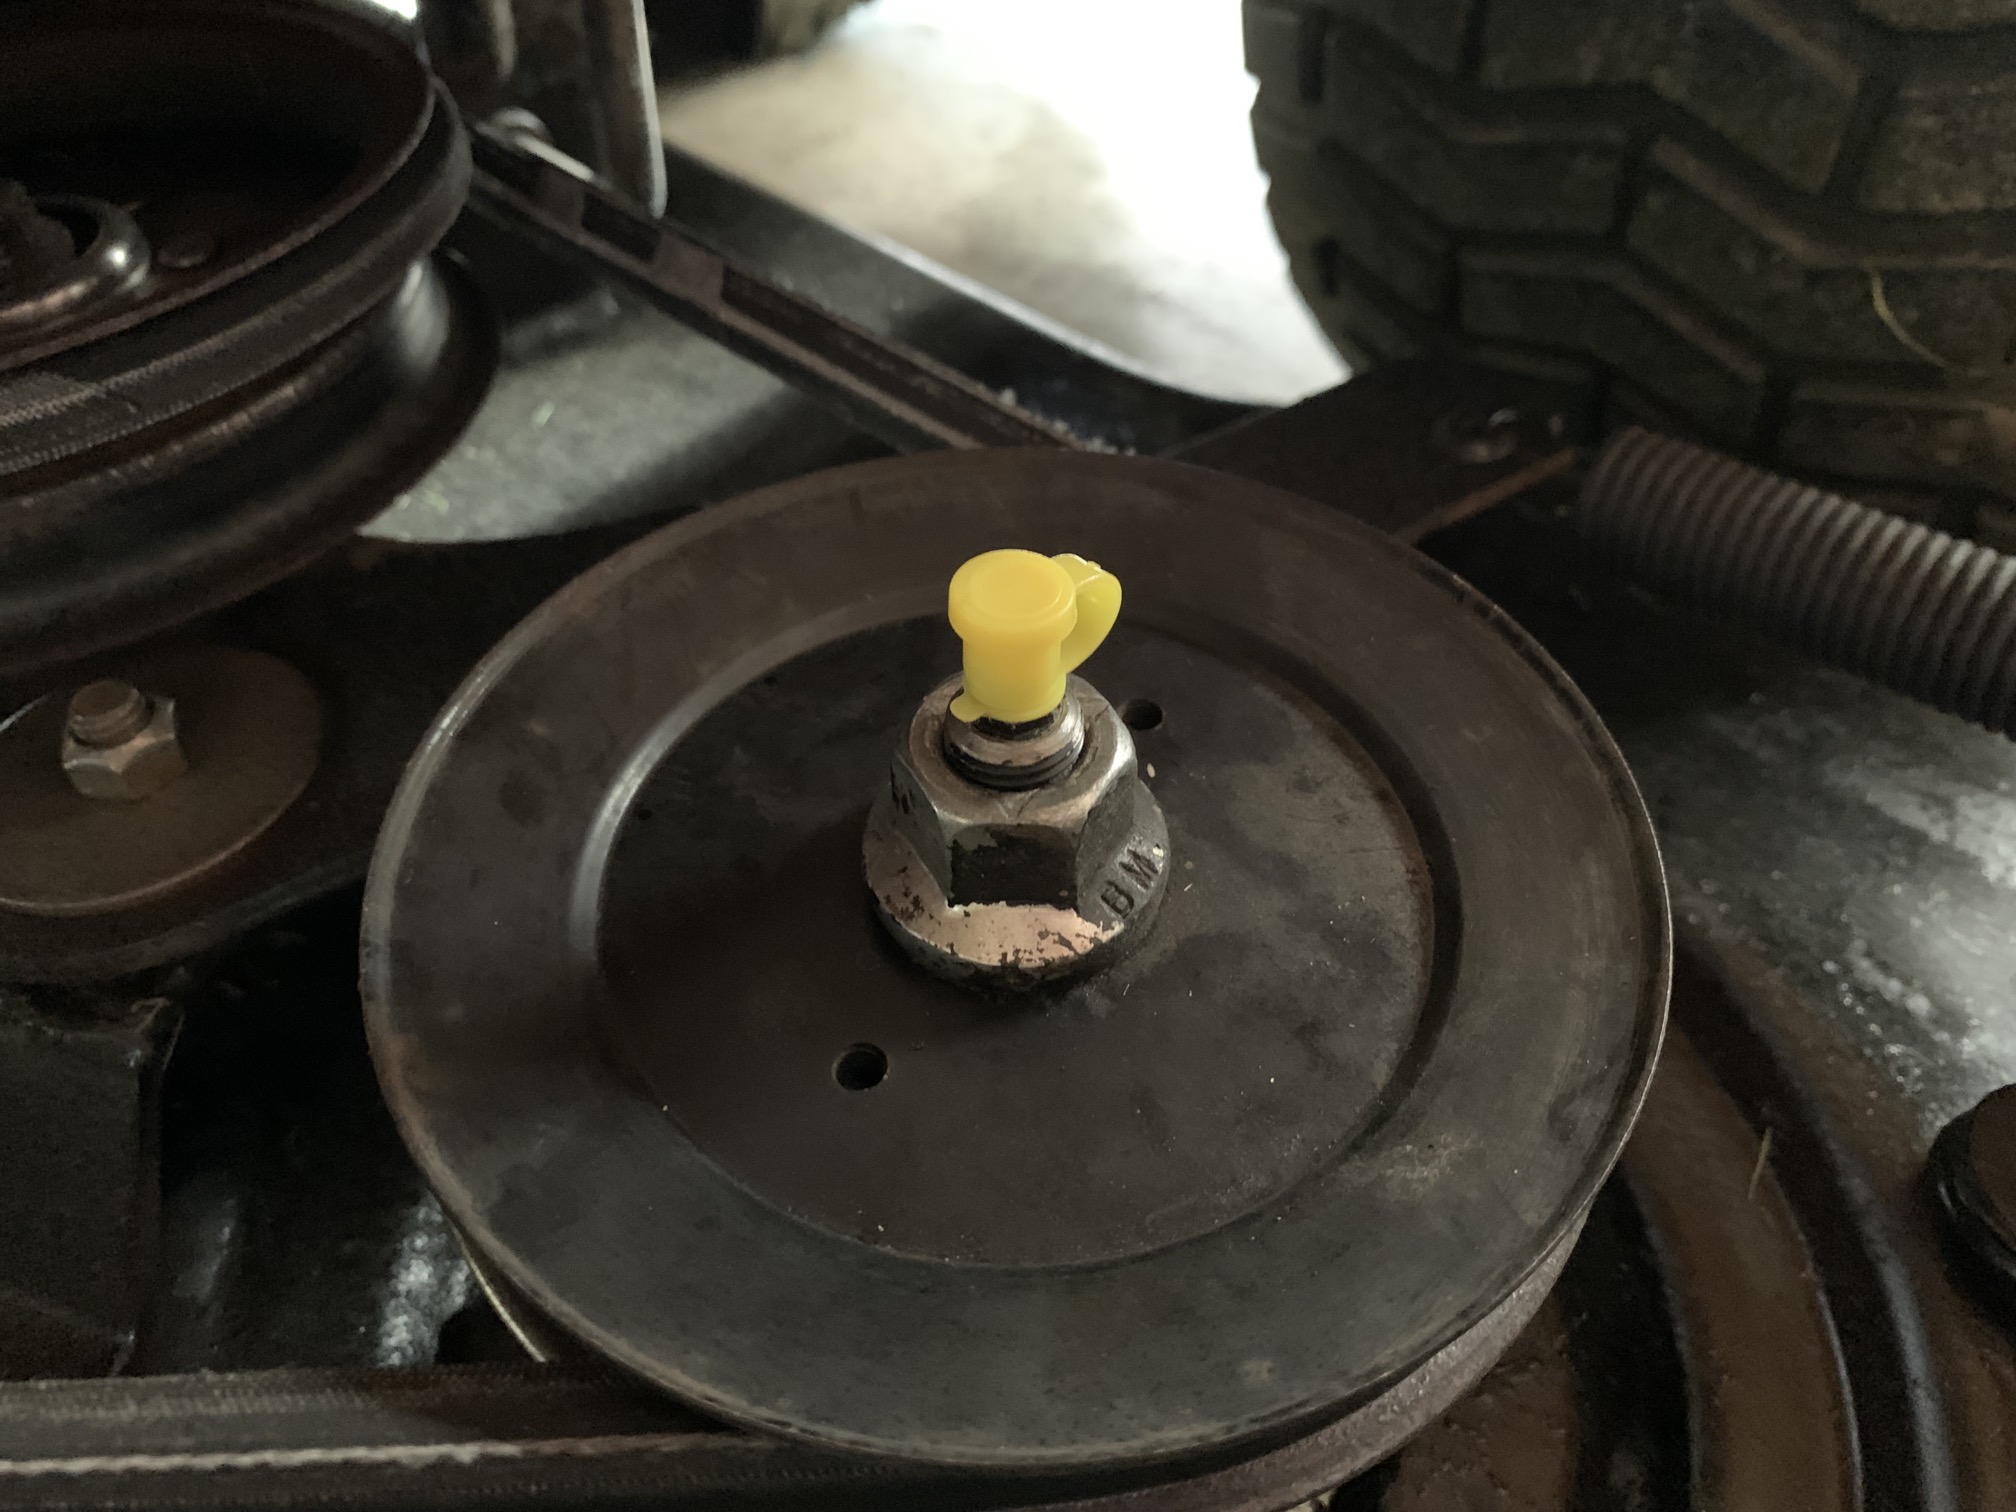
Something I see and hear a lot of complaining about on forums etc is the grease points, called ZERK fittings. They get dirty, clog up, rust over and cause all kinds of problems when you want to apply some fresh grease. Not looking forward to that happening to me so I ordered some caps to fit on there snug and keep these fittings nice and clean.

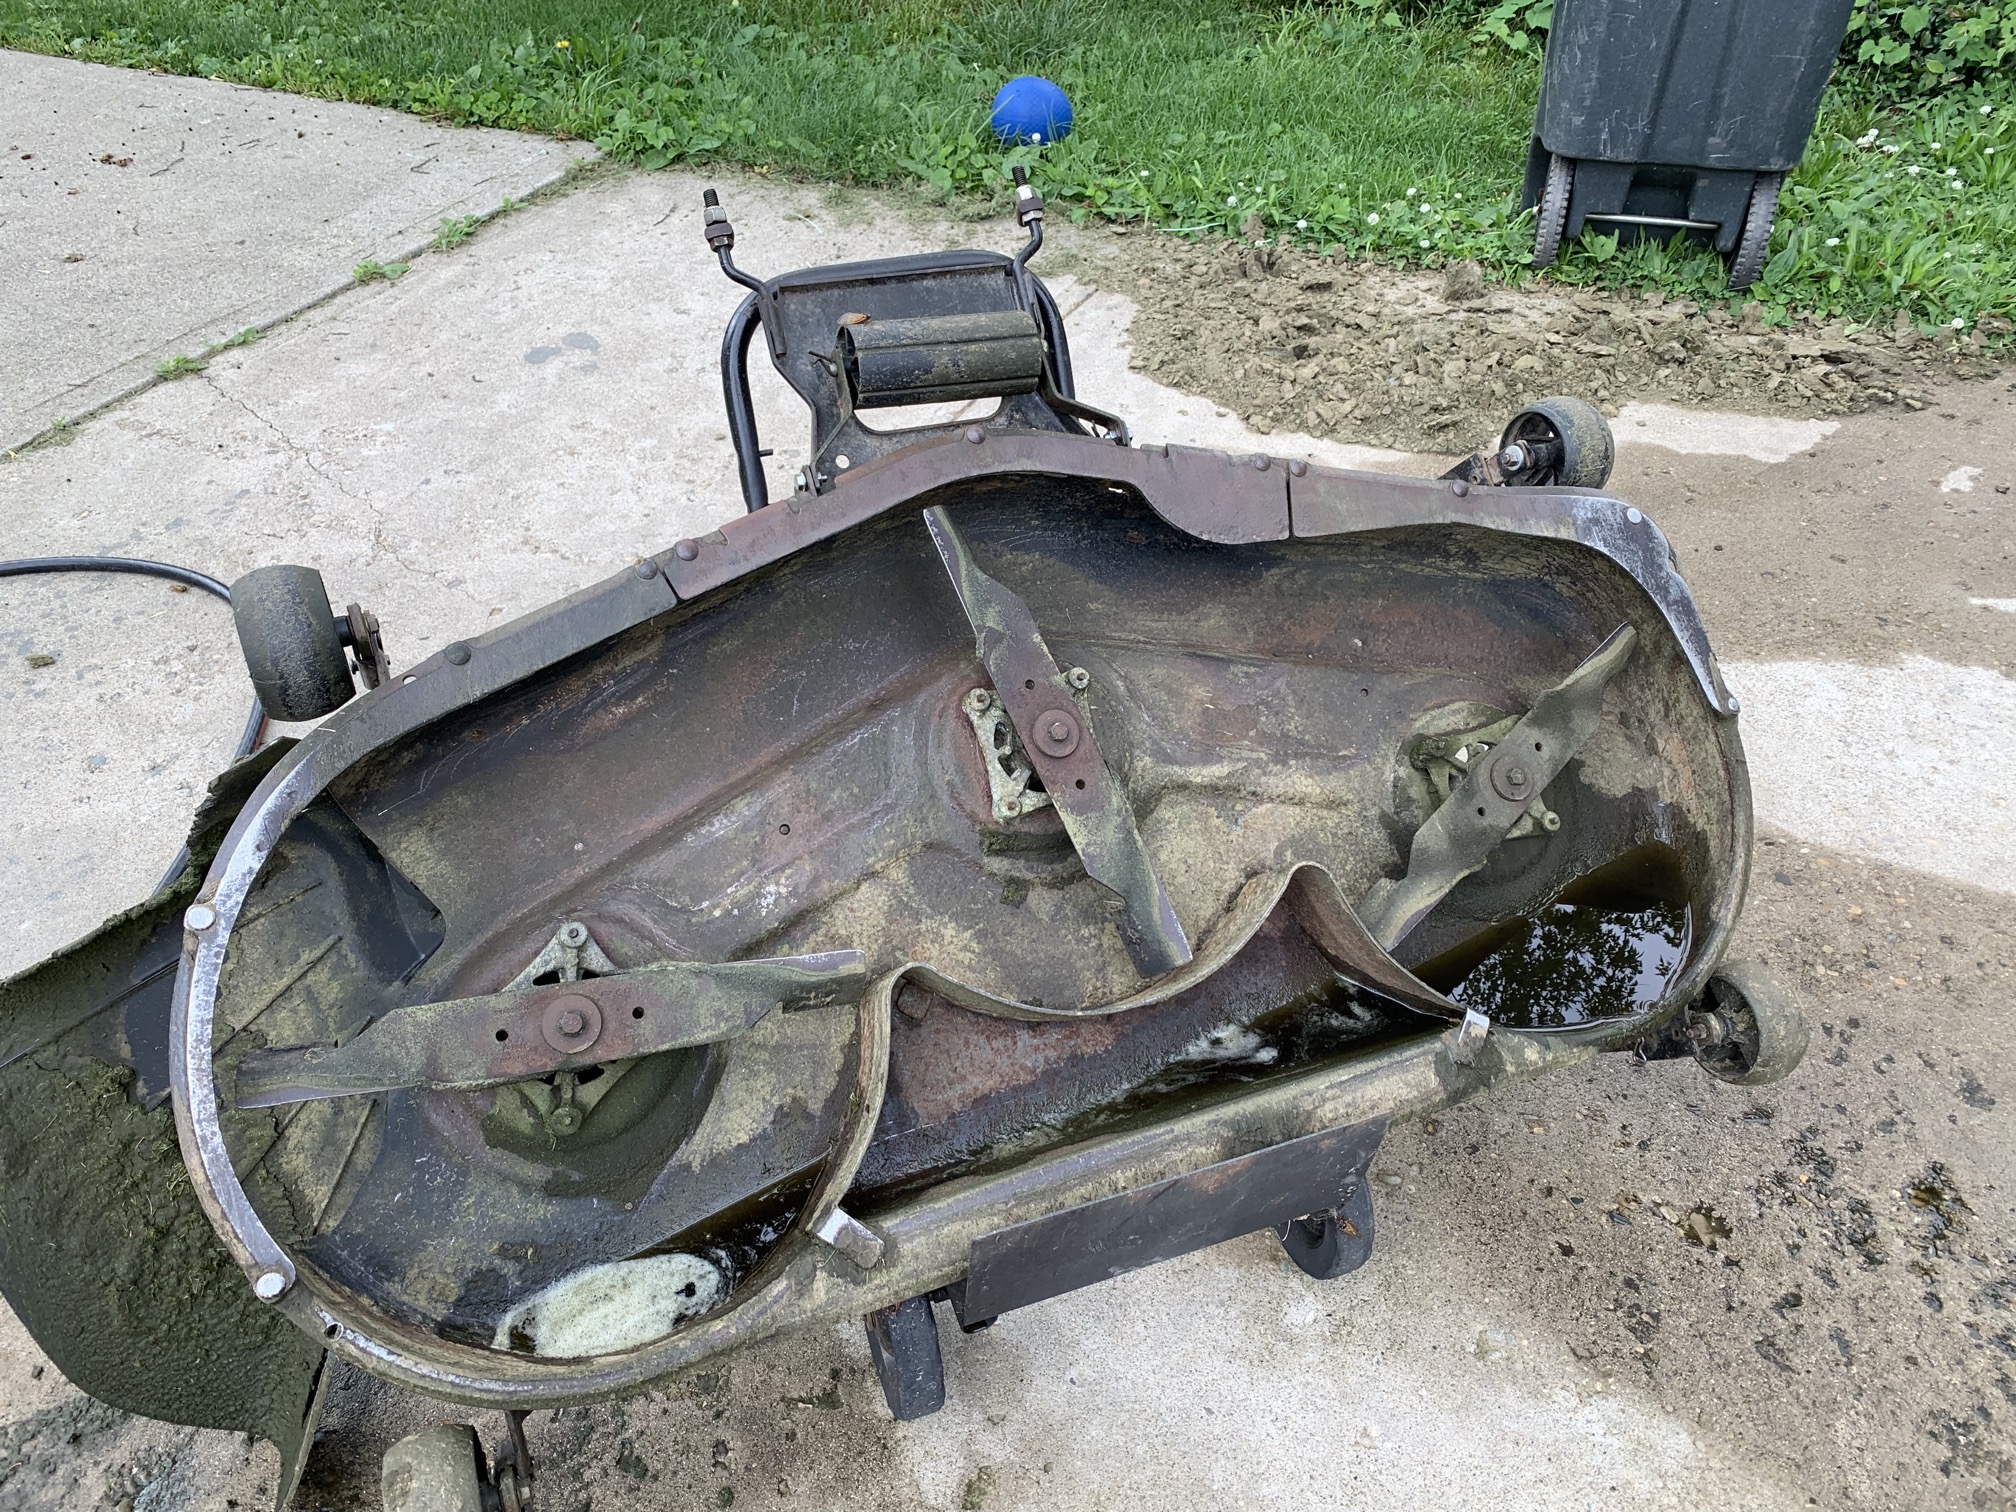
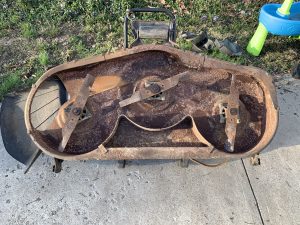
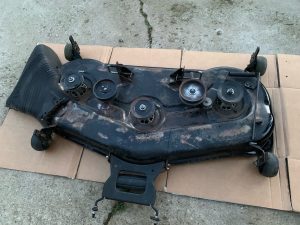
I also finally took the deck off and spent a few hours cleaning it as thoroughly as possible. The underside was cleared of any grass, dirt, and debris and received a thick coat of Rustoleum. The top side received a steel wire wheel treatment in places where rust started looking like it would become a problem, and a thick coat of Rustoleum was applied there as well. The pressure cleaning was something I needed to do first, and until now I didn’t have a pressure cleaner. She ain’t pretty but she won’t rust for a while! Maybe over the winter I’ll take the whole deck apart and give it a proper sanding down and paint job.
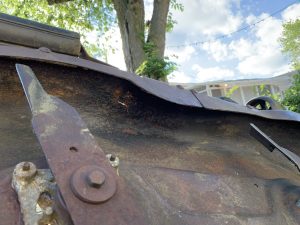
While cleaning the deck I did notice that a part of it that was already pretty rusty and degraded when I got it, has degraded even further. The metal has rusted away to a point where it is no longer strong enough to hold a bracket on that connects the deck to the front of the undercarriage. All the adjusting has put a lot more tension on that bracket so in it’s current state it won’t last another month.
I’m thinking this will be a perfect opportunity for me to learn how to cut and weld to fix this up. Or maybe I’ll just call someone to take care of this properly (I’m definitely interested in getting a welder though, sounds like fun!)

It is now June 1st, 2021 as I am typing this update. The whole project took two full months, from it first standing on my driveway to right now. Tools were purchased, parts were purchased, at least 50 hours (probably on the low end) of video was watched online to learn and understand small engines, common issues and how to troubleshoot and resolve them. More hours were spend on forums where I explained issues the tractor was having and the community offered suggestions on how to fix them. I’ve learned that the community (forums, blogs, and youtube videos alike) for tractors and small engine repairs are no different than what I encounter in the Mac community; the worst case is always assumed first. I was being freaked out by talk about blown cylinders, cracked pistons, and exploded crankshafts. None of these applied to me. I’m glad I went about the troubleshooting systematically as it taught me a lot and made me work up to the point where I was comfortable taking on the more invasive repairs.
How much has this whole project cost me? Not including tools, about $400. This does include parts I ordered that I haven’t used yet as I fixed the existing parts, so those will be on the shelf as spares. Unfortunately, that also includes the $90 I wasted on that twat that did more harm than good. As the oil was heavily polluted I’ve used more new oil and oil filters now than I would usually use in 5 seasons combined. I wanted to be absolutely sure this thing was flushed out thoroughly so that cost me a bit extra. The many years of missed maintenance on this thing cost me more than a well maintained mower would have cost me. Then again I never would have gotten a well-maintained mower for free 😉
Was it worth it? Without a doubt and hesitation; Absolutely!
I’ve learned a ton, have tools now that will be useful for many other things and last me a lifetime and I’m saving about 3 hours per mow. Those hours add up to probably (super rough estimate) 75 hours or more, assuming 25 mows per season. That is a HUGE time saving. Not to mention after mowing for 4 hours when it’s hot as blazes outside, I am down and out for the rest of the day after I’m done. Jay and heat are not good friends and I’ll spend the rest of the day tired with a headache and being completely useless. Usually feeling the effects of it the next day as well. A huge loss in productivity and potential income to say the least.
Last year I didn’t even bring myself to go through that and paid a lawn service to come out and mow for me, that cost me a few bucks too for the season. So all in all, the time savings and financial savings will have me earn the money I spent on this project back this season. And with more time and energy to fix up Macs, I’ll earn more income as well!
Now I could flip this tractor and sell it to make an easy $800, probably more as a 54″ deck is not very common. These things sell like hotcakes and are never on marketplace long. However, I have grown attached to this machine and will keep it, using it until it breaks down. And at that point I’ll probably sink some more cash into it to fix it and keep it going.
What about Mac repairs? Is Jay still bored with that?
Jay is not, and is already starting to ramp up the repair side of the business again 🙂 This break from Macs/repairs was just what I needed and it worked out perfectly.
To those of you that followed this project, thanks for your interest! I doubt much of my audience will read this as this is certainly not what my typical content is but it was fun to share either way. More updates may follow in the future but for now, I’m calling this project closed.
See you at the next one!
July 2025 update:
I’ve had a remarkable amount of folks ask me if the mower is still going over the last few years. Who knew this little DSNCR project was actually being read?! Over 4000 times, actually! The previous update was on June 1st, 2021, so 4 years later and I am happy to report the mower is still getting the job done every season. Here’s a small list of things that were done since:
- Replaced the drive and deck belts
- Replaced all three spindle assemblies as the bearings were beyond shot.
I took the old spindles apart to see what went wrong and found that the bearings were sealed, so even though there are grease ports on them, the grease never actually makes it anywhere meaningful. The wear and tear was too much for me to just replace the bearings so three new spindles went in. These spindles were cheap on Amazon though, and one of them is already due for replacement again. The extreme vibrations that are created when a spindle goes bad, causes the belt to stretch so a new deck belt is being put on as well. - The steering has been loose since day one but now it has gotten to the point where it feels like the gears are just gone. Sometimes even keeping me stuck in a certain position. Could be just a cotter pin that popped out, could be something more serious, I’ll find out soon.
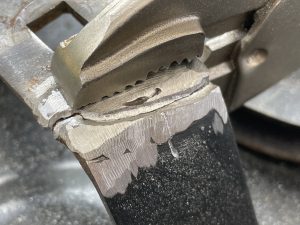
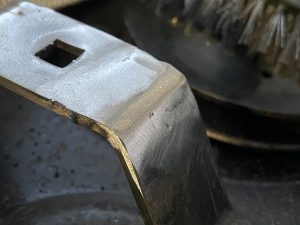
- The weld repair that was done by the 14 year old, did not hold up unfortunately. In July of 2023 I finally decided to buy a welder and fixed it again, this time grinding out the crack and filling it in with a lot of steel. Two years in the weld still holds.
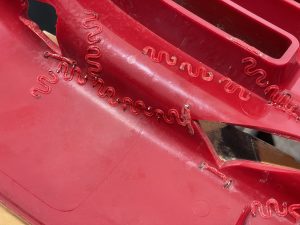
- A start was made on repairing the hood in August of 2023, which had cracks everywhere and several pieces missing. The plastic that remained was welded back together and is holding strong. I’ve not yet had a chance to fill the rest with bondo and give it a proper sand and paint job but hope to get that done this year. Using a plastic welder for the first time was a fun learning experience and since then I’ve used this thing a *lot* to fix all manner of plastic things.


- The headlights were replaced with LED bulbs.
- Changed the oil twice.
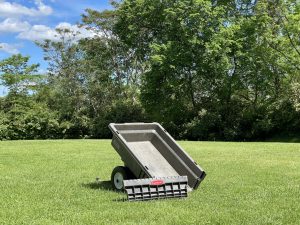
- Got a cool cart for it that I use to haul brush, firewood, dirt, my kid and even my father for joyrides (we’re all kids around here), and other things around.
Now that I rely on this mower every year, I can never find the right time to pull it apart and do major work on it. It’s either too close to mowing season or I get busy with other things. One day it will be done though!
May 2021 – July 2025, four years of loyal service without any major issues. I’ve tried to keep track of it’s use (there are gaps) and it has done 80 mows and a total-ish of 93 hours. The hours include transporting stuff around in the cart. It will be down for a spindle replacement, belt replacement, deck cleaning and (hopefully) steering fix this lovely July 4th weekend but the week after it will be back to finish the 2025 season.
When I really start doing body work, painting and such things I’ll update again with some more photos.
And once again…. until next time!
One thought on “Trying something not computer related again (running log – last update: July 4, 2025)”
Update: Summer 2022 is over and with probably 1 or 2 mows left in October, the mower has survived another season! A new governor spring was put in that dramatically improved throttle performance and RPM’s and two of the tires have had a dose of fix-a-flat that appears to have worked a treat. I had a friend weld a piece of metal over the hole in the deck by the front bracket so the deck is now 100% as well. On to the next season!