Quick guide to installing OpenCore on a Classic Mac Pro (cMP)
OpenCore is, for lack of a better word, amazing. If you don’t know what OpenCore is, read about some of its benefits here. I have no experience (yet) with other versions of OpenCore, such as the Legacy patcher, but I fully intend to explore that as well at some point.
This post is the quick and easy guide that should have anyone up and running with OpenCore on the cMac Pros in minutes. This guide may have steps in it that are not needed for most people, but I include them so that the guide can work for anyone that reads it. Most of the text in this guide is simply explaining stuff, so don’t let the fact you see a bunch of text scare you off, this really is a simple process. Let’s get to it!
What you need:
– 2009, 2010, or 2012 Mac Pro (2009 4,1 must be flashed to 5,1)
– Westmere or newer CPU architecture
– 144.0.0.0.0 Boot ROM (You get this by running the Mojave installer and just doing the firmware update that is a part of it)
– Martin Lo’s preconfigured OpenCore for the cMP package.
For that package, go to this page, scroll down until you see all the attachments. Pick and download the latest one (0.7.1 at this time of writing)
The result will be a .zip file downloaded to your system with everything you need to install OpenCore on your Classic Mac Pro.
Prep:
– If your Mac has multiple displays connected to it, disconnect all but one of them. Most people won’t have to do this, but some graphics cards have issues getting to the recovery OS when multiple displays are connected. So to keep this applicable to everyone, I’ll recommend you only have one screen connected. (Especially if your GPU is an RX580 8GB)
That is it. You’re now ready to install OpenCore.
Unfortunately, this being the world it is, a disclaimer. Your data is your responsibility. Make sure you have backups. Do all of this at your own risk. Noone but you is liable if anything goes wrong. Don’t fart in an elevator, and inhaling toxic fumes is bad for you. Etc. Etc. Etc.
-
Disable SIP
- Even if you have a GPU that does not offer a boot screen, you can get to the recovery partition! But first, it’s a good idea to check if your system even has a recovery partition. To do that, open the Terminal application (Applications > Utilities). With Terminal open, type in the following:
-
diskutil list
- And hit enter/return. Depending on how many drives you have in or connected to your Mac Pro, this list may be pretty extensive.
Each disk will be listed, with under it all the partitions of that disk. - What you’re looking for is the disk that holds your operating system. It will mention the following partitions:
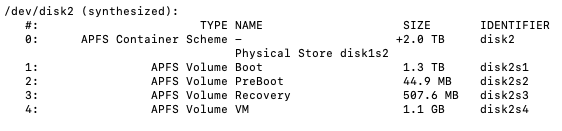
If you see a partition that says: -
APFS Volume Recovery
- You should be good to go. For me, the disk this is on is shown as “disk2”. For you, it may have another number. The recovery partition may show a different size, and that’s ok.
- If you do not find the recovery partition, and it is possible you don’t have one depending on how your macOS was installed, you will either have to create a recovery partition or use an external installer drive. You can create a recovery partition by re-running the macOS installer and installing it over your current system (no user files will be lost but always have a backup. Tools such as Carbon Copy Cloner can also create a recovery partition for you on an external drive.
-
Perform three NVRAM resets before booting into your recovery partition
- Restart your Mac and hold down Command+Option+P+R to reset the NVRAM (Also called PRAM). You’ll hear the Mac chime after a few seconds (this varies depending on the amount of RAM in your Mac). Keep holding those keys to repeat the process until you’ve heard the chime three times in total (or four if you’re not sure, doing more of them can’t hurt). Immediately after the last chime, change the key combination to Command+R to boot into your recovery partition, then move on to the next step.
-
Boot to your recovery partition.
- This is done by restarting your Mac and holding down Command+R as soon as you hear the startup chime. Or you’ve ended up here after doing the NVRAM reset.
- If you have a GPU that is flashed for macOS or natively supported by macOS, you’ll see the startup screen with the progress bar.
If your GPU is not flashed or natively supported, you won’t be able to see anything on the screen. So just hold down Command+R when you hear the chime for 30 seconds and then let go. Booting from recovery can be pretty slow, so you’ll likely end up staring at a black screen for a few minutes. If you still don’t see anything after 10 minutes (being generous here), shut down your Mac and try again. - You should end up in Recovery mode and see this:
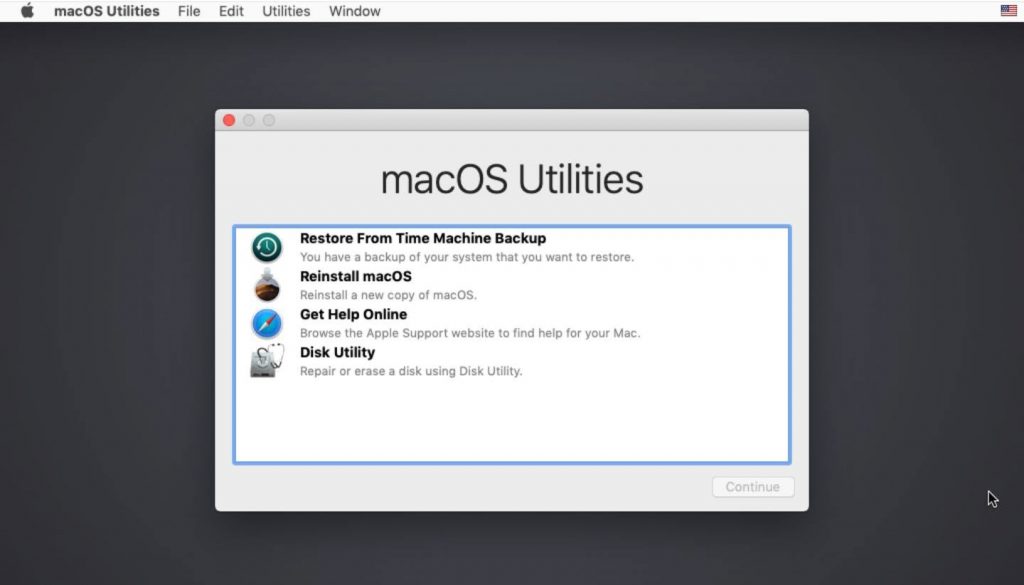
-
From the Utilities menu, open Terminal
-
In Terminal, type the following:
-
csrutil disable
- Followed by the return/enter key. This will disable SIP. Don’t worry; you can re-enable SIP if you want after OpenCore has been installed.
-
Restart your Mac and verify SIP is disabled
- This is done by opening the Terminal application again and typing:
-
csrutil status
- The result should be “System Integrity Protection status: disabled.”
If not, go back to step 2 and try again, as SIP has not been disabled. -
Unpack the OpenCore files by opening the previously downloaded .zip file.
- You should see the following files:

Check out the Readme.txt and just read the first paragraph to check out some of the excellent benefits of OpenCore. Read the whole thing if you want, one can never have too much information! -
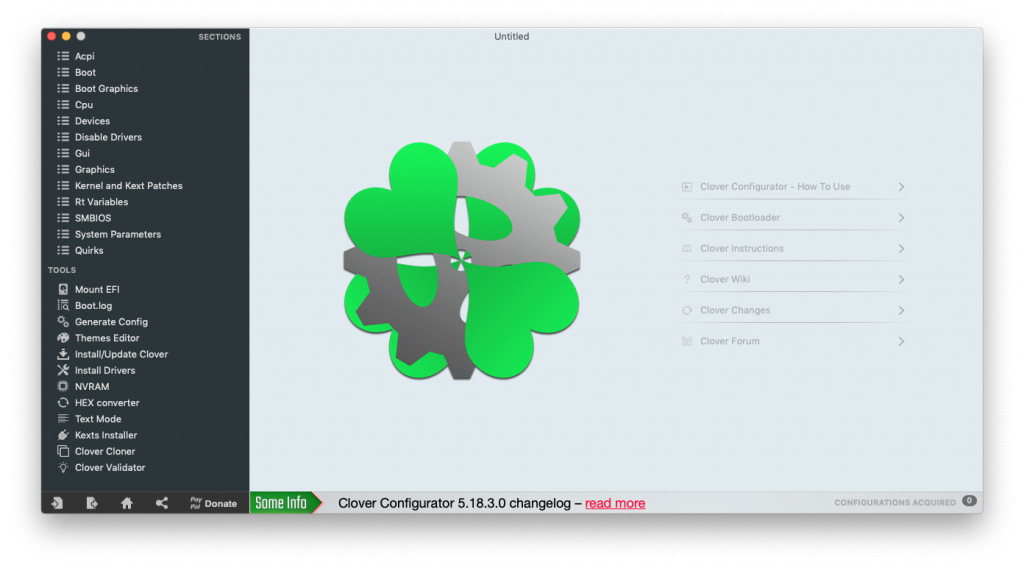
Open the Clover Configurator app
- If you get an ‘unidentified developer’ warning, click OK to dismiss it. Right-click (or control-click) the app and select “Open” from the popup menu. You’ll get the same warning, but this time it’ll allow you to open the app.
-
OpenCore has a lot of options. Don’t be intimidated by this app and its large amount of options. Just read on 🙂
-
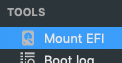
In the left side bar of Clover Configurator, find “Mount EFI” under Tools and select it
-
Ignore the top half of the window and find the EFI partition of your boot drive in the bottom half
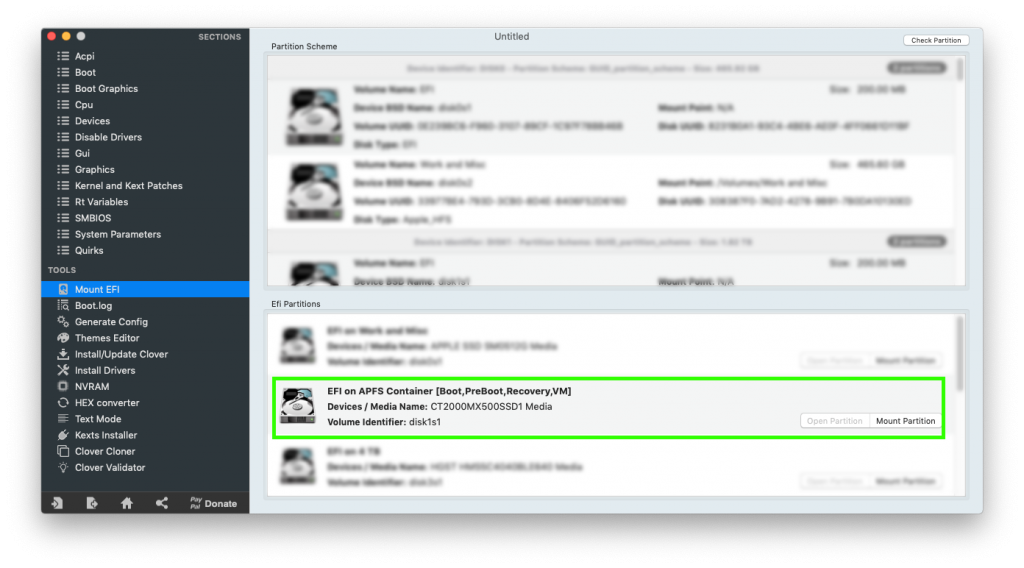
The appropriate boot drive will show the same partitions you saw earlier in Terminal. PreBoot, recovery, etc.-
Mount the EFI partition
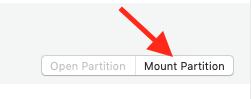
You will be required to enter your administrator password to mount the EFI partition. The result will be the EFI partition showing up on your desktop like a regular hard drive. You can open it there, or alternatively click the “Open partition” button in Clover Configurator.

-
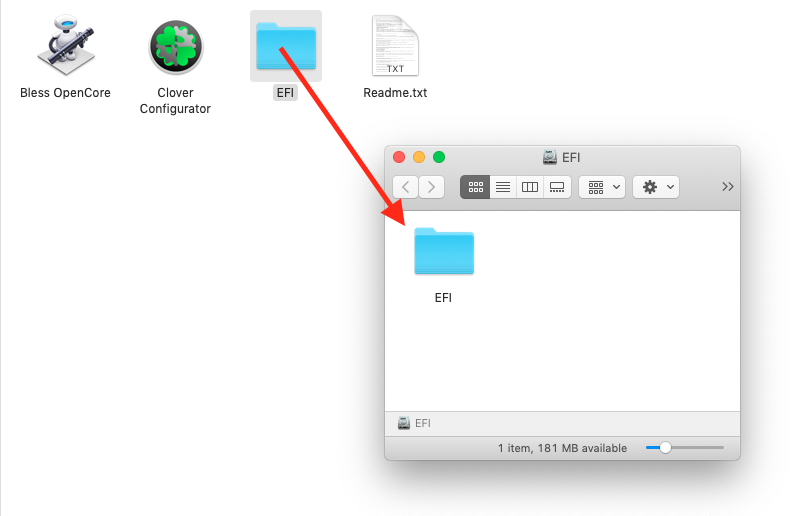
Open the EFI partition
- (This gets a bit confusing so read carefully)
There are a few possibilities of what you’ll see now.
– A blank partition, nothing in it (proceed to step 14)
– A folder named “APPLE.” (Don’t touch that folder and proceed to step 14)
– A folder named “EFI.” If this is the case, open that folder and the EFI folder in the OpenCore .zip file and drag over the contents of that EFI folder (BOOT, OC) to the EFI folder on your EFI Partition.
So, in the first two scenarios, you drag the EFI folder to your partition.
In the third scenario, you drag the contents of the EFI folder to the EFI folder on your partition. Check out the second screenshot below for clarification. -
From the OpenCore .zip file, grab the “EFI” folder and drag it into your EFI partition.
or

-
Bless your OpenCore installation
- Open the “Bless OpenCore” Automator script that you unpacked from your OpenCore .zip file. You will be asked to enter your administrator password to run this script.
- As soon as this script runs, you’ll notice a little gear icon in your menu bar. Once this gear icon disappears, the script has run. You will not see any kind of other notification/indication the script has been completed successfully.
- This is the only time you will need to run this bless script. There is no need to use it again, even with future updates.
-
Using Clover Configurator, unmount your EFI partition
- You are done with the EFI partition, so it can now be unmounted. Navigate to Clover Configurator and click the unMount partition button.

You can now quit Clover Configurator. -
Restart your Mac
- If you could not see a boot screen before, you should see one now. At first, you’ll see your boot drive shown on the screen; just sit back as OpenCore will automatically select your boot drive in a few seconds and continue the startup process. If you’re impatient, just select it yourself with the arrow keys and hit enter/return.
- This screen where you can select your startup drive is called the bootpicker. There are a few things that should be mentioned.
• Some graphics cards will not show the boot picker on a Mac, due to incompatible firmware. On the vast majority of these cards there is a switch that lets you select a BIOS/firmware, just flipping that switch should allow it to display a boot picker screen.
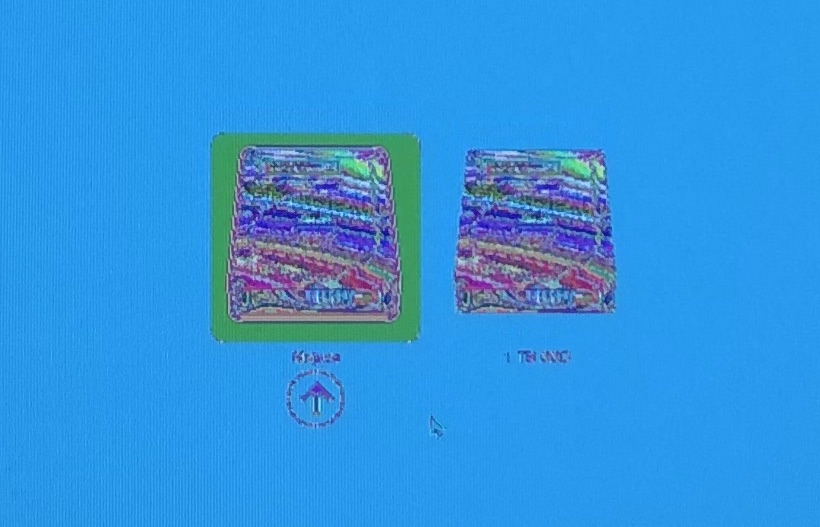
• Some graphics cards may show the boot picker in weird colors and/or distorted. This is also because of a compatibility issue. However the boot picker is still functional and it won’t hurt the machine or the card, but it may look funky. See the image below for an example. Thanks to Mac84 for sharing this photo

You’re now running an OpenCore enhanced Mac Pro, congratulations! If you didn’t read the OpenCore readme text file before, here are some of the benefits it lists:
- Boot screen (via GOP for unflashed card)
- Boot picker (only support EFI operating systems)
- Firmware protection (e.g. to run UEFI Windows. BootROM version will be spoofed to 9144.0.7.1.0. This is normal, and safe for the cMP)
- Ability to watch DRM streaming content (Mojave and later)
- NVMe and SATA drives on a PCIe card show up as internal drives
- TRIM (regardless of trimforce status)
- Support for Apple USB SuperDrive
- Enable Continuity
- Ability to run non-GUI 32bit software in Catalina
- Ability to run any natively supported ancient OSX with modern graphic card (e.g. Radeon VII in 10.6.8)
- Ability to boot Catalina / Big Sur Recovery Partition
- Possible to run 8x32GB RAM in macOS [WARNING: on the first time you enable this memory config, you may need to let the cMP keep rebooting itself for 45min or even longer before all 256GB RAM can work properly in macOS]
I suggest you join the following Facebook groups:
– Mac Pro Upgrade
– OpenCore – On the Mac Pro
You’ll hear about the latest release of OpenCore as soon as it’s available and are able to ask questions, get support if needed etc. Updating OpenCore with a future release is as easy as re-doing steps 7-17 in this guide with the exception of step 15, the Bless script. If you want, you can now also turn SIP on again. To do this, boot into your Recovery partition, open Terminal and type “csrutil enable” followed by enter/return. restart your Mac and SIP will be enabled again.
I have asked Martin LO, the creator of the cMP OpenCore package, to read this guide before I published it. If you read this guide, it means Martin Lo signed off on it 🙂 Thanks to Martin Lo and Steve from Mac84 for their time proofreading this!
For the installation of macOS Catalina and Monterey, additional steps are required. Please refer to the abovementioned Facebook groups for more information. macOS Big Sur will install without issues using this guide.
27 thoughts on “Quick guide to installing OpenCore on a Classic Mac Pro (cMP)”
I had no idea this package was available.
I have a homebuild Hackintosh, so am familiar with the use of Clover, etc. but to be able to improve the performance of trusty MacPro 5,1’s is awesome.
Thanks for posting this very useful how-to and guide.
Thank you very much. I always feared opencore, I successfully installed OC on two cheesgraters. Thank you! Very very valuable.
regards
Viktor
Thank you, Nice and clear. Worked a treat. I had an issue with the wifi being disabled after I’d installed OpenCore (very common) which can be fixed by editing the config file in the EFI file just altered. Once I’d done that, rebooted and all was good. Boot time is slow though. Ten minutes. Got any thoughts?
MacPr mid 2010, 2.8gz quad core intel xeon, 32gb RAM, Radeon RX 580 graphics card
Hello. I operate a Mc Pro early 2009 flashed to 5.1 currently running 10.14.6 . Additionally I have a mac book pro running 10.15.7. If I clone my 10.15.7 mac book drive onto a blank drive installed in my Mac Pro, then do the open core install onto that same drive, would that process enable me to run Catalina (and updates) on my Mc Pro 5.1? Could my other boot drive with 10.14.6 reside together with the option of select boot the OS / drive I wish to run? Thank you.
Thanks. I followed your steps and I can choose from the boot picker. Monterey stops installing with “a required firmware update could not be installed” and goes back to Mojave. I tried the steps on doritana but they didn’t work. I reformatted the drive as AFPS, but I still get that error. I guess I need to change the smbios but I’m unsure how that works.
You’ll have to use OpenCore if you want to go past Mojave
Great article was just wondering if you erased your ssd mistakenly. Still have Mac Monterey installed but it’s corrupt and your Wi-Fi is now off because your suppose to install the post patches but can’t because the installer it’s corrupt “, What should you do in this circumstance? Any suggestions would be greatly appreciated…PS is there a way to use opencorelegapatcher without downloading it?
This is an amazingly clear guide, thanks so much!
I am currently running Mojave on cMP 5,1 with RX 580 8GB. Firstly is it okay to proceed with the above into Mojave? Secondly, if so, can I get directly from there to Big Sur? Would that require making a USB installer disk?
There seems to be a lot of stuff out there now, which is great, but I’m getting a bit confused sifting what I actually need.
All the best.
Jay
Nice job of explaining the process! Thank You
I also have a High Sierra hard drive I need for certain apps that have stopped supporting future MacOS updates. Will I still be able to “option” boot after doing the Martin Lo install?
Yup! High Sierra and any other local boot drives/netboot drives will show up as they always did.
what if used dosdude for catalina? could it be upgraded?
great, worked like a charm!
anybody know if 256gb ram and nvme support are available in ancient osx like 10.6 – 10.9?
All good (Mac Pro 4,1 upgraded to 5,1) with a Big Sur install, however I have run into issues with a Windows installation — I have successfully created a GPT Windows disk that boots from EFI, however it will only show the sign on screen via the DVI port of my Nvidia GTX 770 (flashed for Mac). Both HDMI and DVI show the OpenCore boot select screen, and MacOS will load properly via either, but not Windows. Is this due to some incompatibility between OpenCore and the GPU? Would this behavior go away (and boot both windows and macOS via HDMI or any other port) if I were to upgrade to an AMD RX 480+ GPU? (Reason I want HDMI is for 60hz at highest resolution)
Hi
At Step 35/36 quote:
Open the EFI partition
(This gets a bit confusing so read carefully)
There are a few possibilities of what you’ll see
now.
– A blank partition, nothing in it (proceed to
step 14)
Should this say step 37?
Step 14 would be disabling SIP which it is already
Best to make sure!
I am having difficulty following these instructions.
FIRST PROBLEM:
Step 19, restart your Mac. Should this be in recovery mode or normal. I have done this in normal mode, but am worried that this may not be correct. Please make this explicit in your instructions.
SECOND PROBLEM:
I have reached step 36. I see a blank EFI folder. I am supposed to proceed to step 14. But step 14 is long past, and in the middle of recovery startup. This cannot be correct. To which step should I proceed?
There appears to be a typo on step 47. The test is “boot picker is still functional and it won’t hurt the machine of the card…” but I think it should be “… the machine or the card …”
Fixed!
Basic question.. I do not want to risk anything on my current MP 4.1 – 5.1 I bought it on ebay as upgraded to 5.1…
It runs fine..i have mojave on it.
I do not want any risk, so can I ..using something like ChronoSync..create a clone of my boot disk and once close is verified as working..try this OpenCore install and if it goes wrong go back to my original HDD….
OR
Does this Open Core install change/ modify some basic Firmware on the machine itself… or is it solely HDD based ?
Opencore runs from memory and can be uninstalled as easily as it is to install to get the system back to its old state 🙂
Not too familiar with ChronoSync for whole drive/bootable clones, I use Carbon Copy Cloner for that. But Chrono is super capable so if it offers the option to clone a whole drive it should be more than capable to pull it off.
I’m trying to update from Catalina to Big Sur and having problems. I cannot boot in recovery mode at all. Nothing I do helps. The Boot ROM is 144.0.0.0.0. When I get enter csrutil status from terminal it reads “protection status: unknown (custom configuration)”. What should I do? Thanks.
I’m rather new to this and everything seem to be going pretty smoothly until (Monterey up and running on my Mac Pro 5.1, Radeon RX 580, most up to date boot rom) after resetting the NVRAM my Mac starts up gives the chime and then shuts itself off after approx. 2 mins. Possible missteps: When advised to disconnect all monitors except for one- I removed all USB accessories including the Monterey flash drive. I can still get 3 Chimes with NVRAM reset but nothing happens if I just let it boot normally black screen and if I attempt the recovery mode it just shuts off. I varied when and how long to hold the keys but nothing seems to work.
Hello, I have an unsupported Radeon RX 580 8 GB, did anyone with the same GPU run into issues? Is it showing the boot screen after the installation? Thank you.
So whats the difference between doing it whit the “Martin Lo’s preconfigured OpenCore for the cMP package” or with the “OpenCore Legacy Patcher” from the official website.. im confused…
Martin Lo’s package is a lot less intrusive and primarily focuses on keeping Mojave boot support. Legacy Patcher is a bit more intrusive but allows for running a macOS newer than Monterey which Lo’s version does not. But both products are evolving incredibly fast so for the latest info ask on the “OpenCore – on the Mac Pro” facebook group.
After I install OpenCore and Monterey on my cMP 4,1 -> 5,1, the Energy Saver control panel is missing the scheduled sleep and power off/on panel. Any others experience this, and any solutions?
Thank you! this is the easiest step by step i have found and really appreciate it!
Thanks!