Making a recovery and diagnostics drive
One day, your Mac will stop working or experience some kind of issue. This may happen suddenly without warning and when it does, you want a recovery and diagnostics drive handy. This drive has to be external and must match the interface your Mac(s) offer. For example a FireWire (FW) drive is not going to do you any good for a MacBook Air. A PPC will not allow you to boot from an external USB drive (even on the G5 getting this done is a hassle, though technically possible). A USB 2.0 drive will work on a 2015 iMac but it would sure be a lot faster if that drive had USb 3.0, etc. With that in mind, find an external drive that your Mac can boot up from in the fastest way possible. As a general rule:
FireWire 400/800 – PPC Macs will boot from this. I recommend a FW 800 drive and a FW800<->FW400 cable plus a FW800<->FW800 cable. With this, you will be able to connect it to pretty much every PPC.
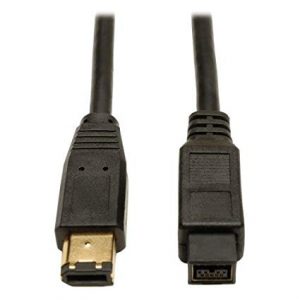
USB 2.0/3.0 – Intel Macs will boot from this. I recommend a USB 3.0 drive as those are backward compatible with older, and slower, USB versions.
You may need multiple drives of course depending on your situation.
On this drive, you want a few partitions. I’d say at least:
One or more OS installers – Again this depends on your needs. I keep drives around with installers for 10.6, 10.11, 10.13 and whatever the latest OS is. For PPC my drives have 10.4 and 10.5.
Several ASD versions – Preferably for each Mac you have, you want Apple’s official system diagnostics image. There are not easy to find but some creative googling will get you to them. ASD is not to be confused with AHT. Apple Hardware Test (AHT) is very basic whereas Apple System Diagnostic (ASD) is very extensive. Each ASD version will have an OS and an EFI version. I prefer to run both hen troubleshooting but if drive space is limited, go for the OS version. Keep in mind there is no ASD available for Macs past 2015.
Troubleshooting OS – This is a full install of your OS of choice, loaded with all kinds of utilities that can help you test and troubleshoot a machine.
Storage – leave a partition that allows you to store log files, screenshots or even an image of a failing drive (need a big drive for that)
Depending on your situation, you can end up with just 3 or over 30 partitions. If you do need a lot of partitions, it may take some time to get it right but it’s worth it. Get a drive that has enough space for growth.
“But the Mac already has a recovery partition”
Not if the drive has failed or your Mac pre-dates that feature.
“But there’s always internet recovery”
Not if there is no internet or your Mac is too old to support it.
Apple’s recovery option also does not give you any useful tools apart from Disk Utility and an OS installer. It may be good enough to get a Mac up and running again but there are no diagnostic tools. If you want to troubleshoot a Mac quickly yet thoroughly, Recovery is not going to be much help. If you are out looking at a used Mac and want to test it before purchasing, Recovery is not going to be much help. There are many scenarios in which it pays to have a recovery and diagnostics drive.
Making the drive.
Once you have selected a drive that will serve as your recovery and diagnostics drive, it’s time to create the partitions. use Disk Utility to split up your drive in to as many partitions as you need. Don’t worry, even with the best planning you’ll likely have to re-do this many times as you’ll find certain partitions to be too small or maybe you didn’t create enough of them.
With the partitions ready, an OS installer is the first thing you’ll want to create. There are two utilities that can help you with this (OS X/Intel); Diskmaker X and Install Disk Creator. For the last few macOS versions I find Install Disk Creator to be more reliable, for older OS X versions Diskmaker X may be better. You’ll have to try both and see which one you like best and which one works for you.
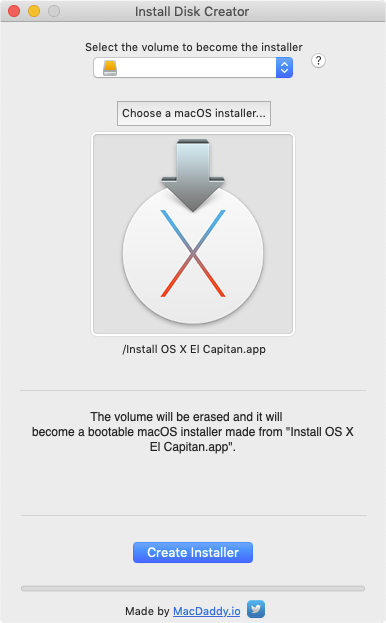
For both these apps, the concept is very simple. Select a drive or partition on which you want to create the installer, then choose the installer of the OS version you want and click go. The app will create a bootable installer of that OS on the partition you specified. Nothing to it! Repeat this for each OS you want an installer of.
For PPC, you will have to go a more traditional route. Take your OS installer (CD/DVD/Image) and image that to your external drive using Disk Utility. It’s a good idea to have disk images stored for each OS you need. Personally, I have 350GB worth. This includes images of every OS version (sometimes multiple versions of one OS), combo updates, latest security updates etc. You can go as crazy as you want but I can’t tell you how many times my archives have saved the day.
Next up is the ASD partitions. Once you find the ASD versions you need, read the included documentation. It will tell you the minimum storage space requirements for each partition and how to restore those images to your external drive (Disk Utility).
Moving on to the troubleshooting OS partition. This is a full OS you can boot from (so not an installer but an already installed system). From there you can unleash any diagnostic utility you want. Fire up your OS installer of choice and install it on one of the external drive partitions. When done, boot from it and configure it as you would any new OS install. Then install your troubleshooting and test utilities of choice.
Keep an eye on my “Tools I Use” series for ideas on that.
Start off with the basics such as DriveDx to test hard drive health, a virusscanner such as Intego Virusbarrier to do a quick scan and Carbon Copy Cloner to make a backup of a failing drive if needed. Geekbench, Prime95 and other utilities can help you stress test a system to find potential weaknesses.
My preferred way to make a Troubleshooting OS partition is by using TechTool Pro. It has a feature built in called TechTool Protogo (pro-to-go) and will help you create such a partition. Of course it will include TechTool Pro itself which is an awesome troubleshooting utility with many features and tests but it also allows you to add your own apps. This will use the OS that you are currently running though so if that is Mojave, for example, older Macs may not be able to boot from it.
Finally there is the storage partition. Use this to store combo updates for the various OS’s for example. Combo updates can be installed over existing installations (even if they already run that OS version) and fix some system issues. You can also use this partition to store disk images you create from failing drives, screenshots and whatever else you need.
That should get you started. There are many ways to build on this and as I mentioned you may have to do this process a few times before you create a drive you’re happy with. Remember to keep your recovery and diagnostics drive up to date in case you need it! When a new version of an OS is released, download it and recreate your OS installer partitions. Keep the latest combo updates available, update the OS on your troubleshooting OS partition etc. You don’t want this drive to have an old OS installer which will cause trouble if you have to re-install your OS and import a backup. This will fail because the backup data OS is newer than the outdated OS on your recovery and diagnostics drive. A lot of hassle to straighten that out so just keep your stuff up to date 🙂
With one of these drives at your disposal, you’ll find yourself wondering “how did I ever live without this?” soon enough.