Recapping an Xserve G5 power supply – Part 1 – Preparations
A few weeks ago I picked up a whole stack of Xserves.
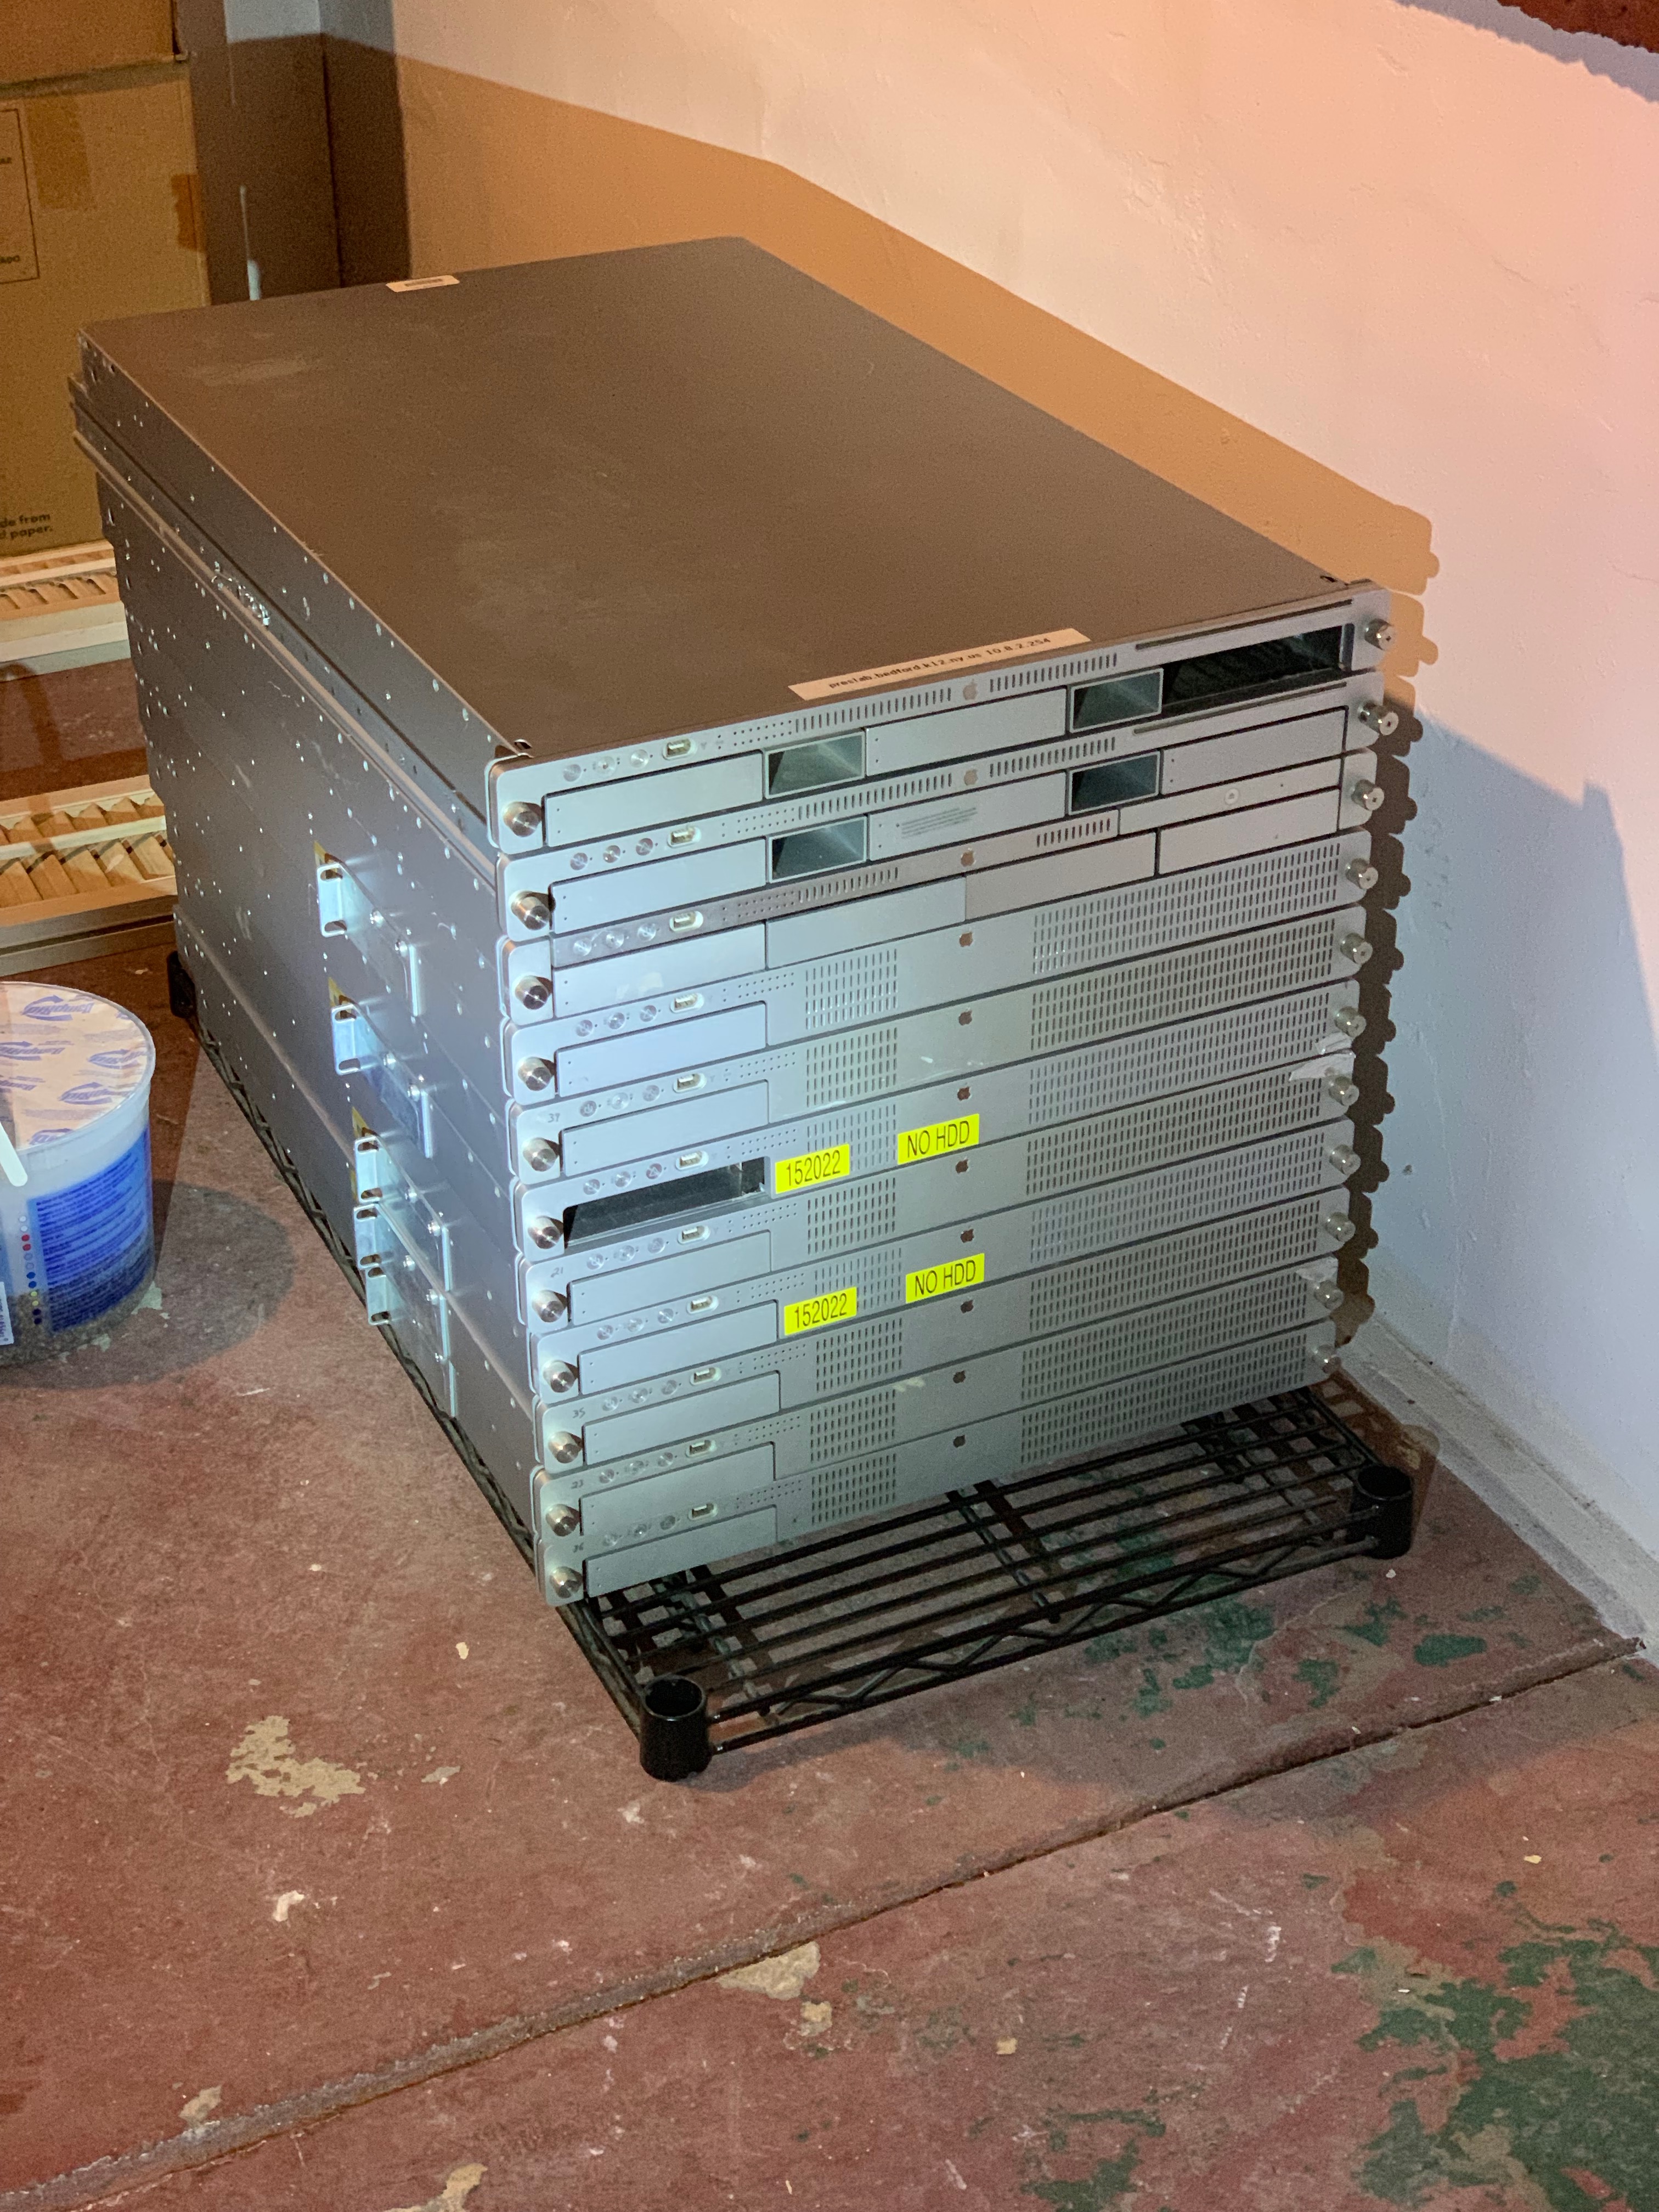
I had been looking for a first gen G4 Xserve which has the tray load optical drive instead of the slot load and the rest of them were believed to be all G5’s. Never having had a Cluster Node model either, I was happy to see 8 of them in the stack. The purpose of this was to make some cool videos for my YouTube channel.
When I started working on a video I found that the Cluster Node I grabbed had a dead power supply. Bummer but I have 8 of them so I’ll just grab another one. Unfortunately out of the 8 Cluster Node Xserves, only 1 has a working power supply! This certainly wrecked my plans to get this whole cluster up and running so I could show you all what this tower of power was capable of back in the day.
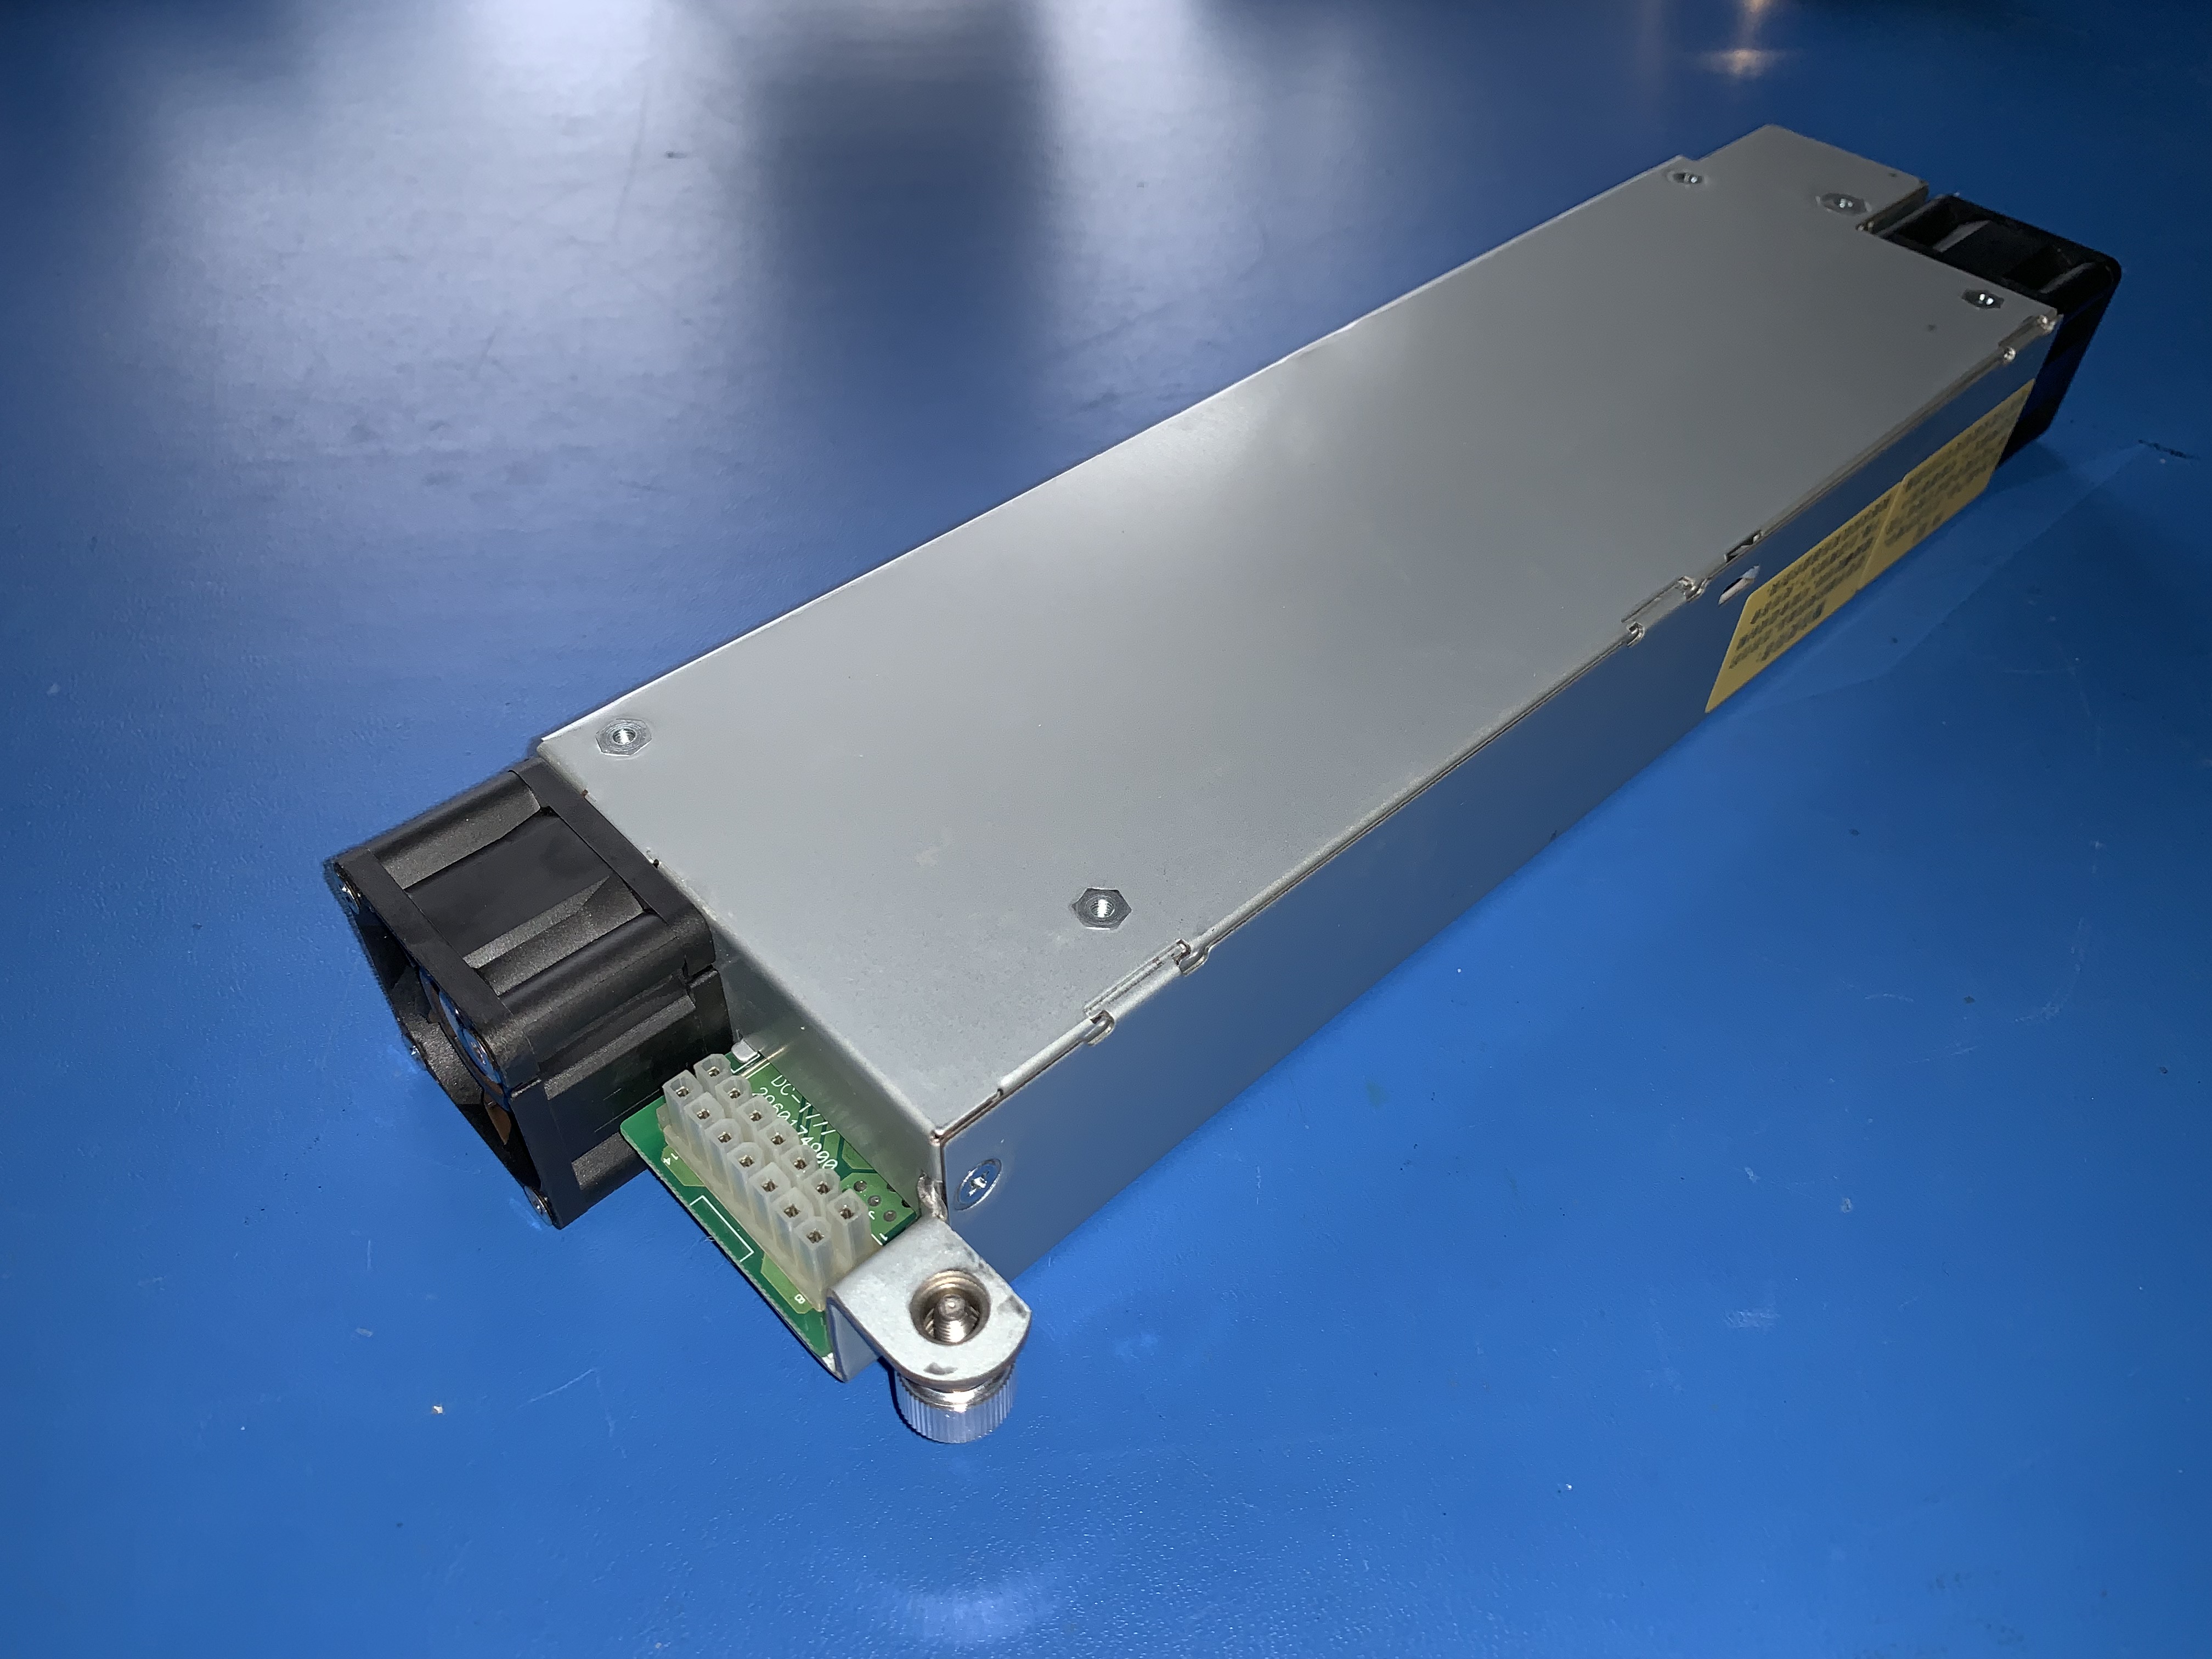
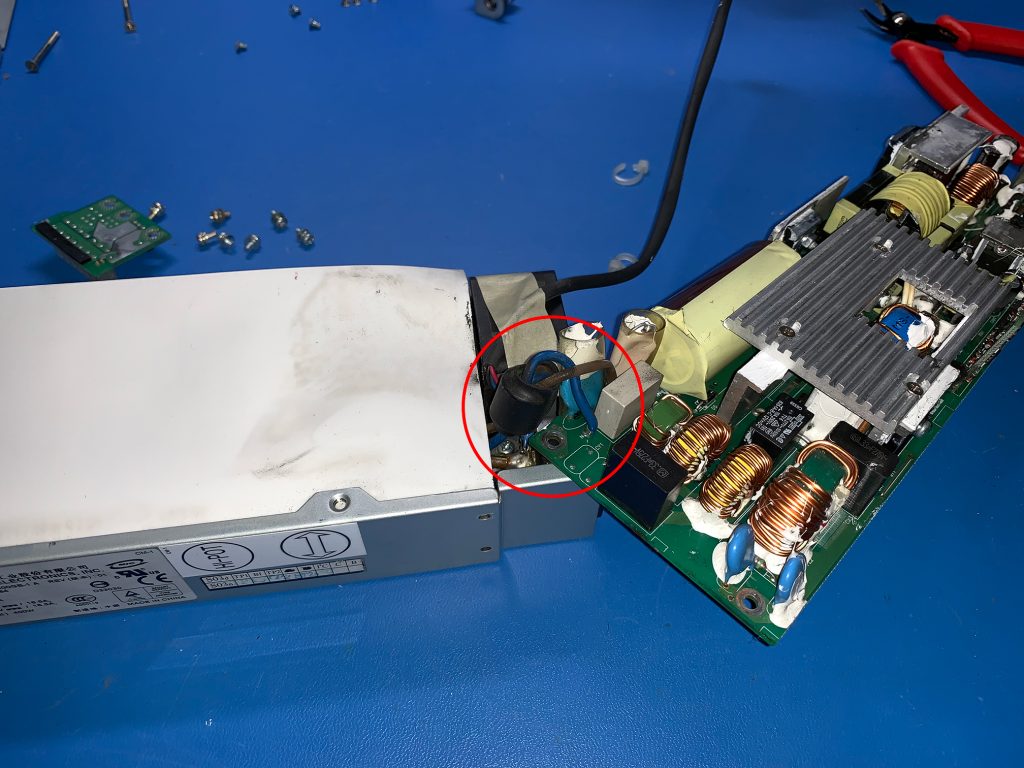
A look on eBay shows these power supplies costing between $150 and $300 so even if I got them all at the lowest price, that would still be $1050 to get all these servers up and running. I’ll need a lot more Patreon supporters before I can make that happen! So this project died a sudden death before I could even get started. But then I started thinking, why not fix the ones I got? Opening one of these up you can see there isn’t much to it.
NOTE: These pages are about the:
Power supply model: Delta Electronics DPS-400GB-1 A
Revision: 02
Apple Part Number: 614-0338
Revision 01 has 13 capacitors, read more on that in Part 3.
April 2020: I found a Rev 02 PSU with 13 capacitors. This is the first out of dozens I’ve opened up so far. While rare, it does happen.
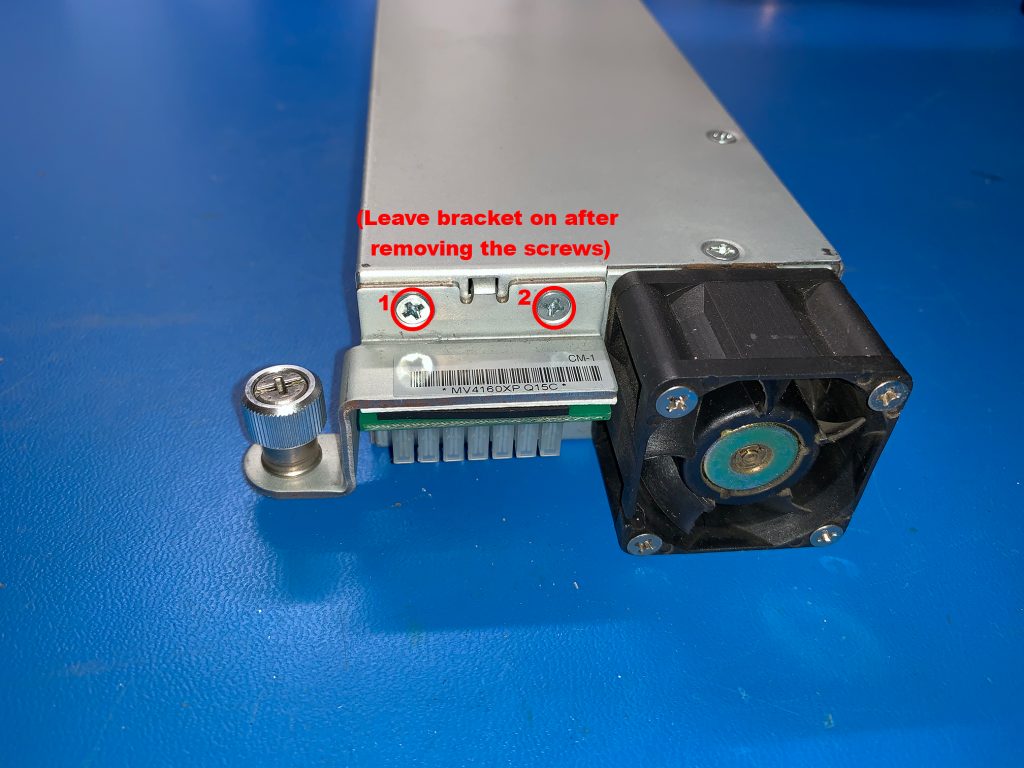
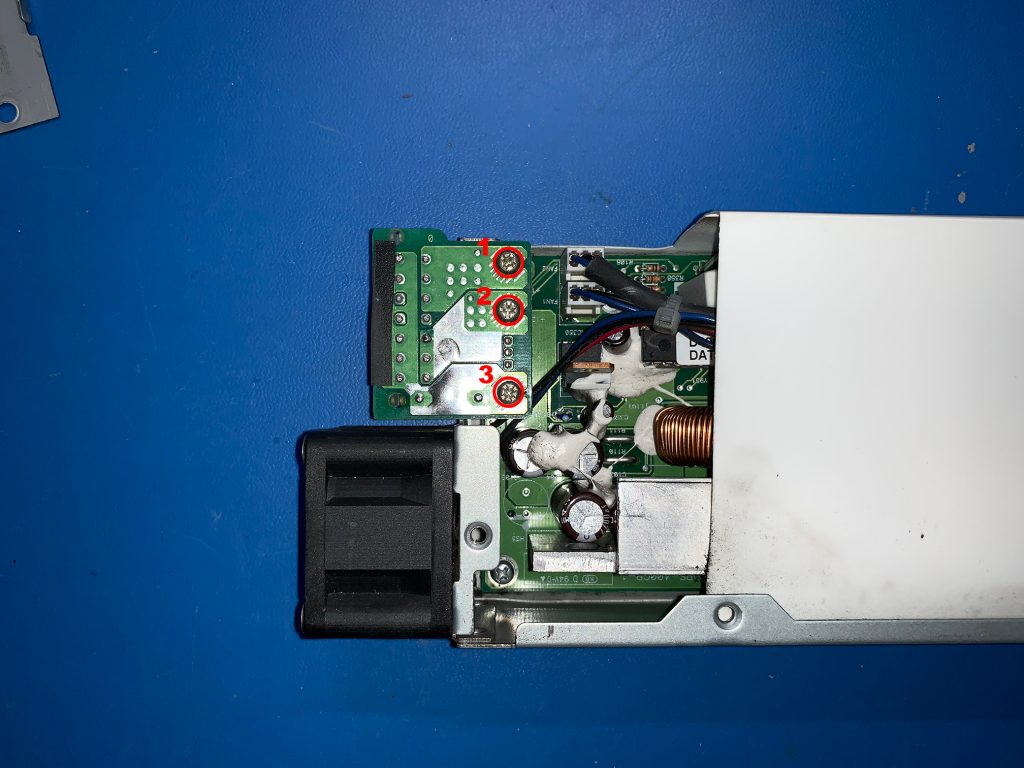
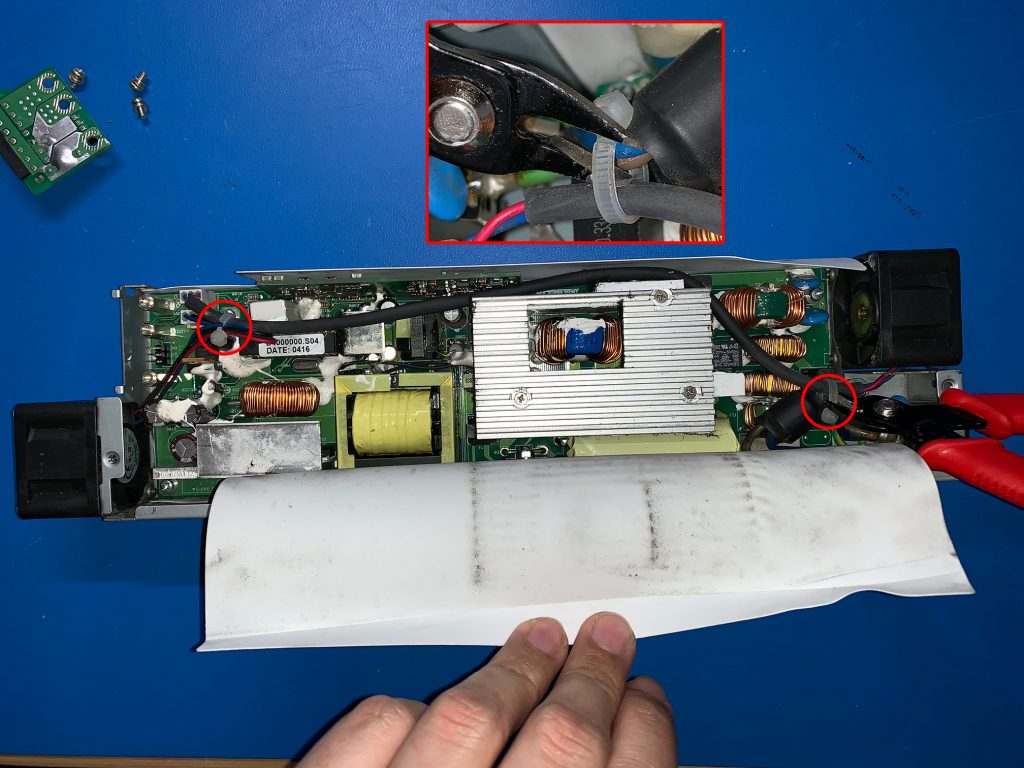
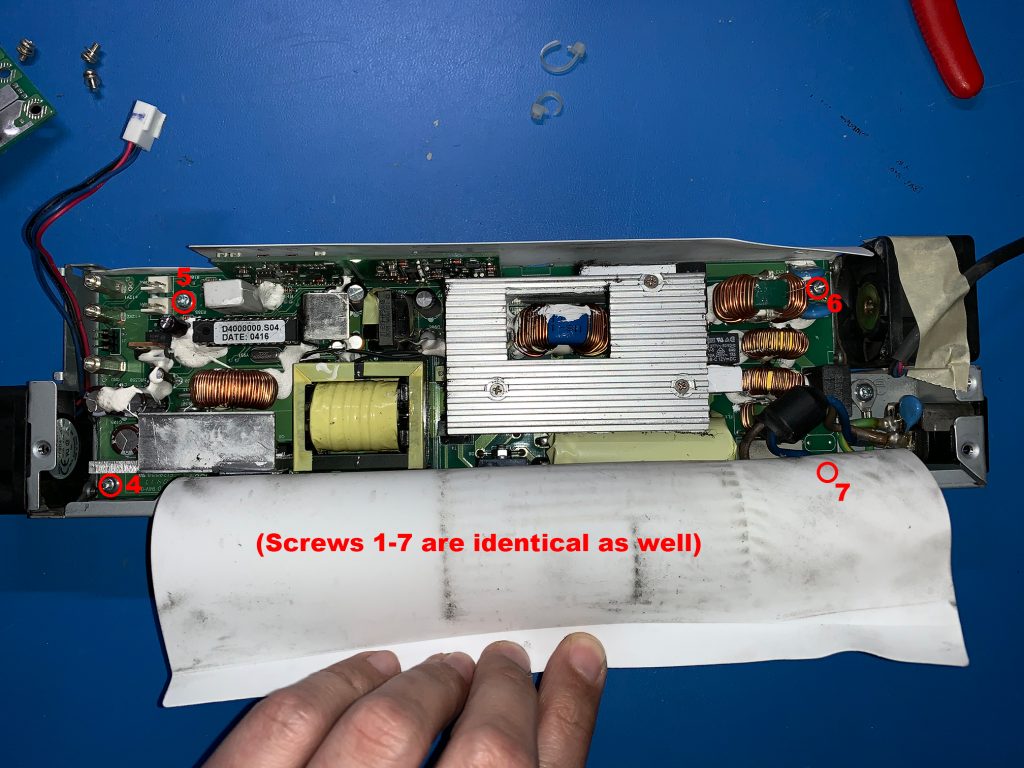
A small take-apart guide was requested, here it is (Opening any kind of electronics requires caution and common sense, make sure you have both before proceeding!):


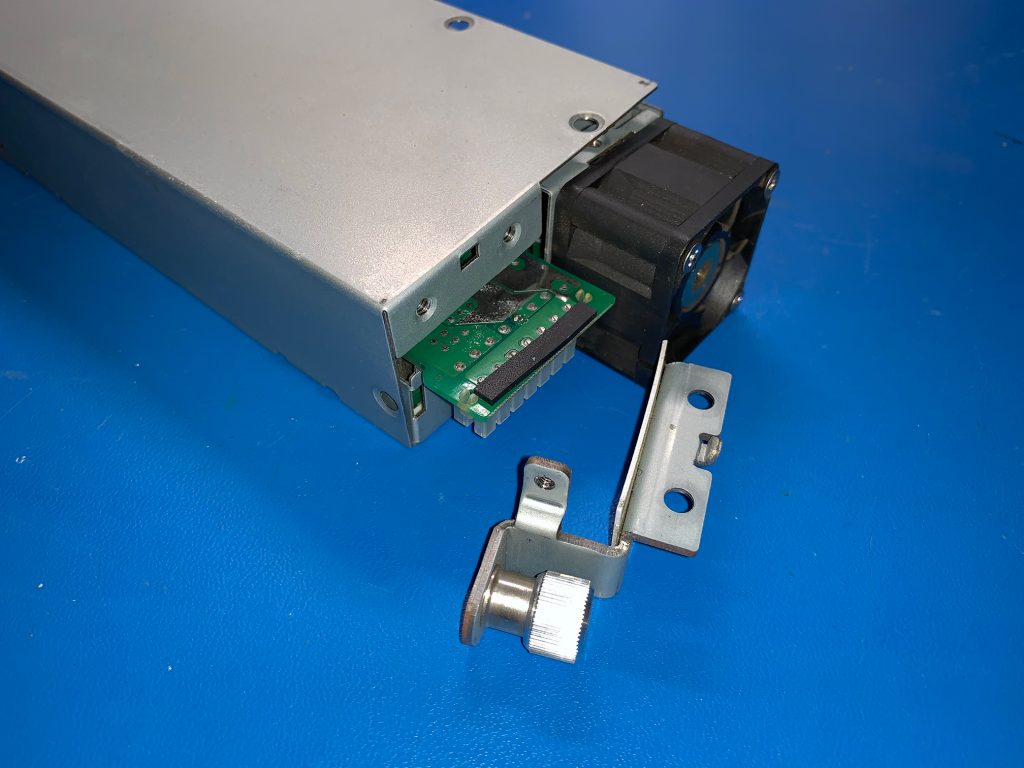

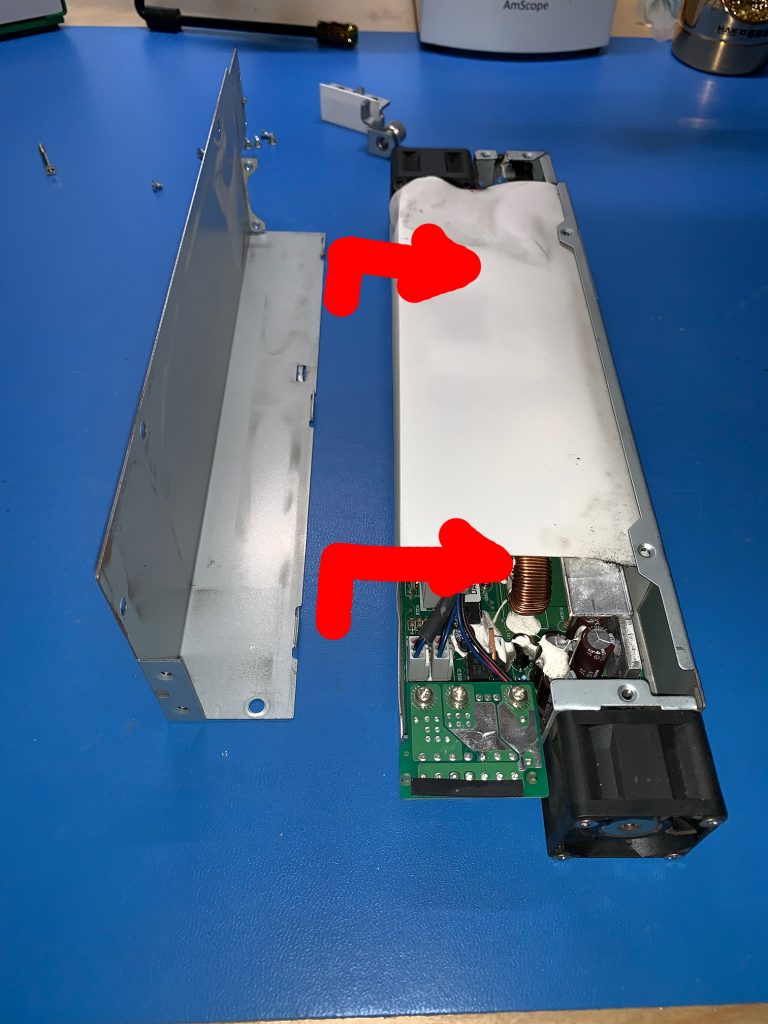
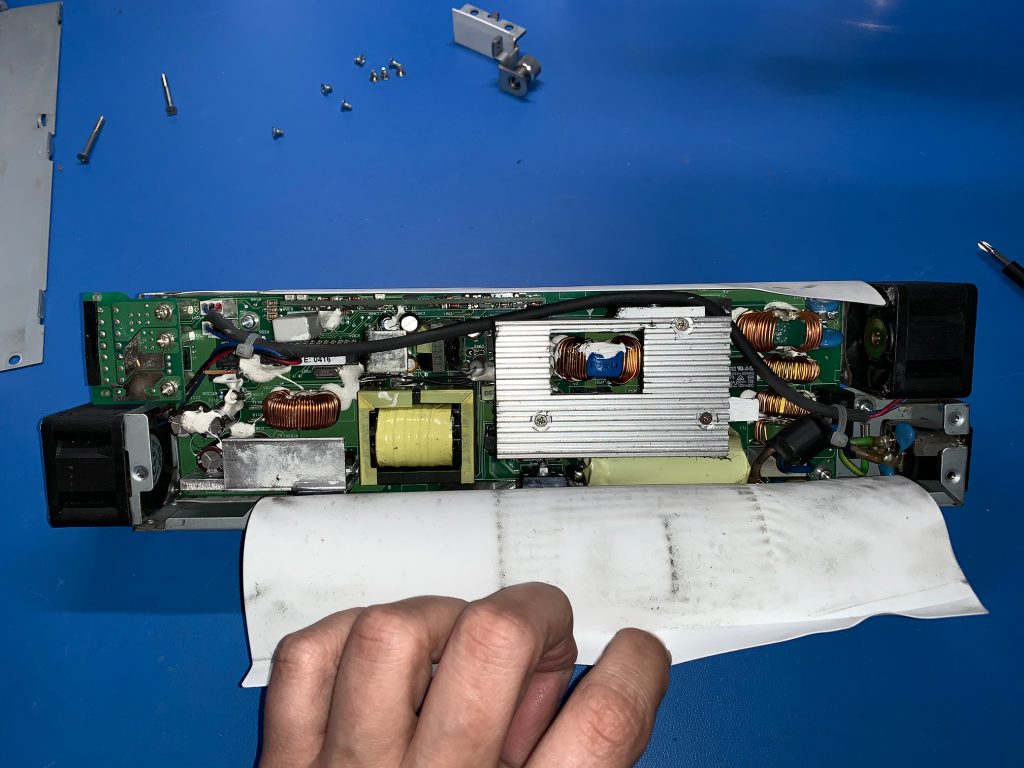
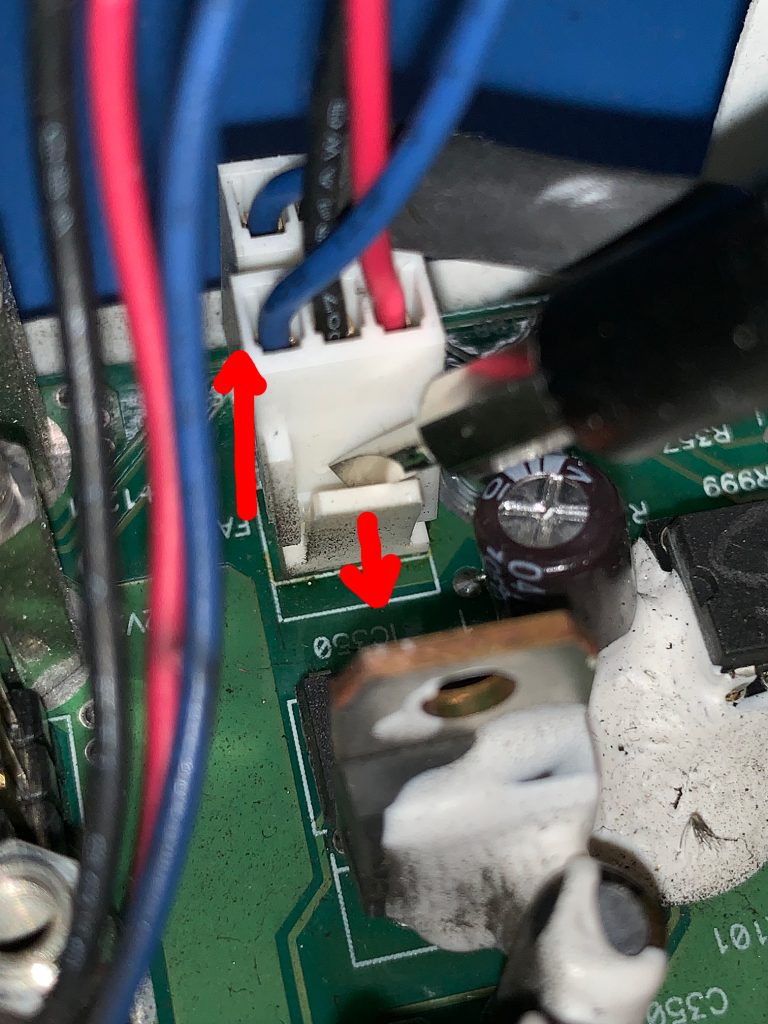
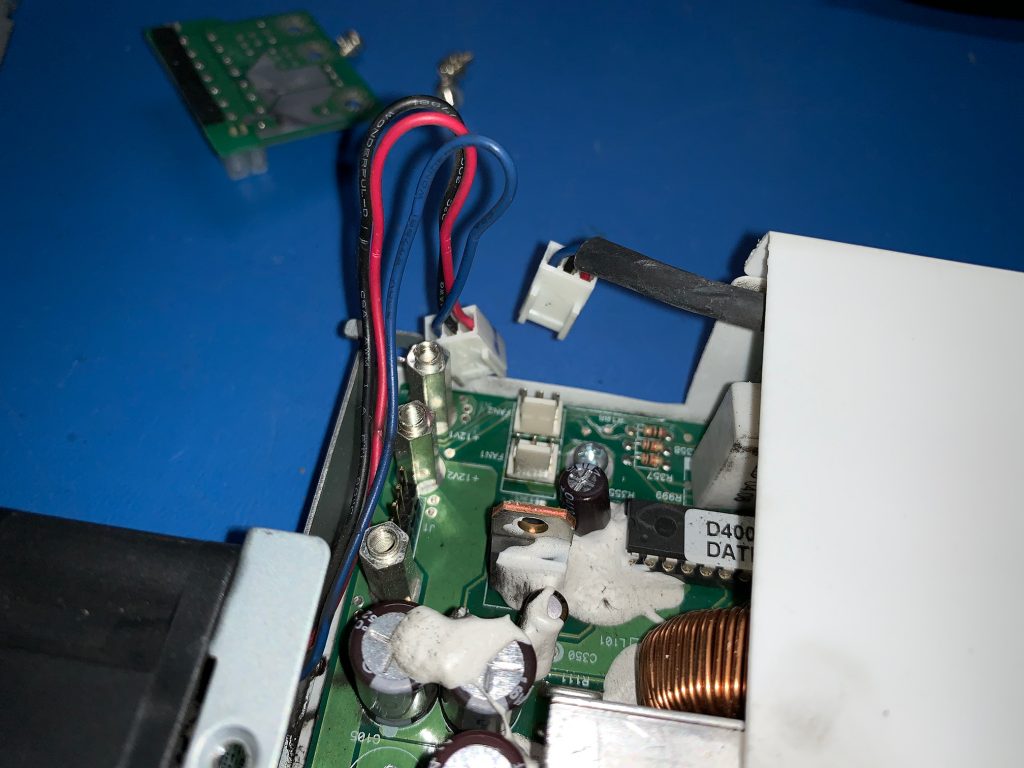
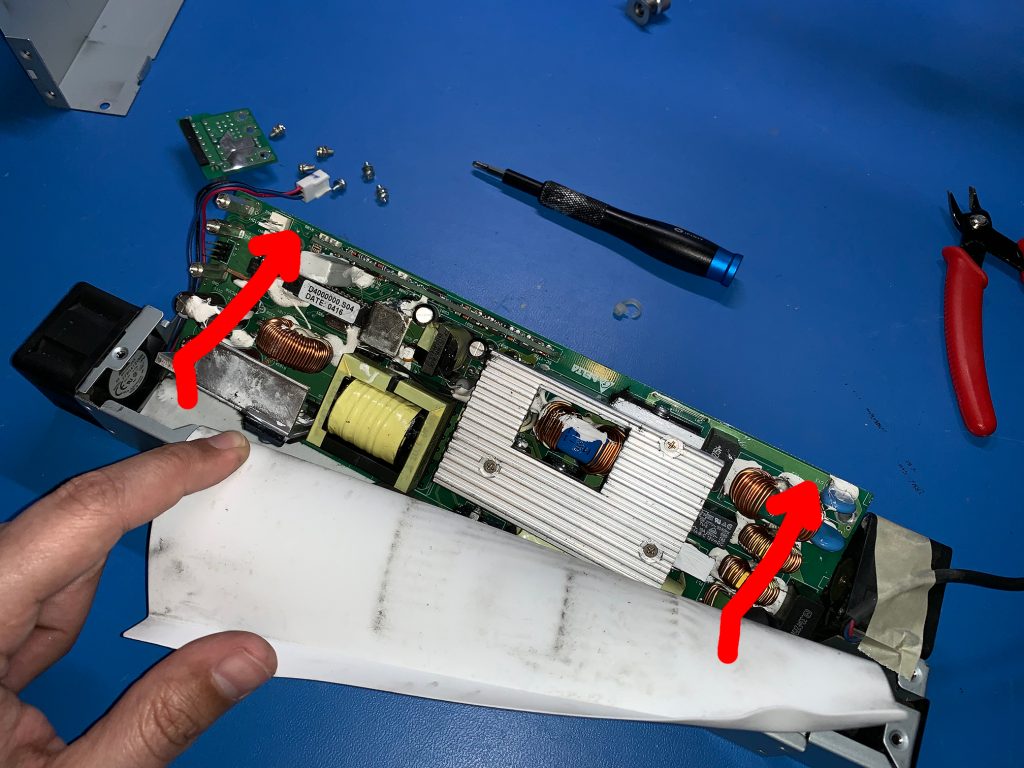

And we’re in!

I can try to recap this thing and see if that makes it tick again. If it fails, ah well, it was already broken anyway. There are 12 capacitors in this power supply so replacing those is not a terrible amount of work but what will make this time consuming is the white paste that’s slathered all over everything I need to get to..
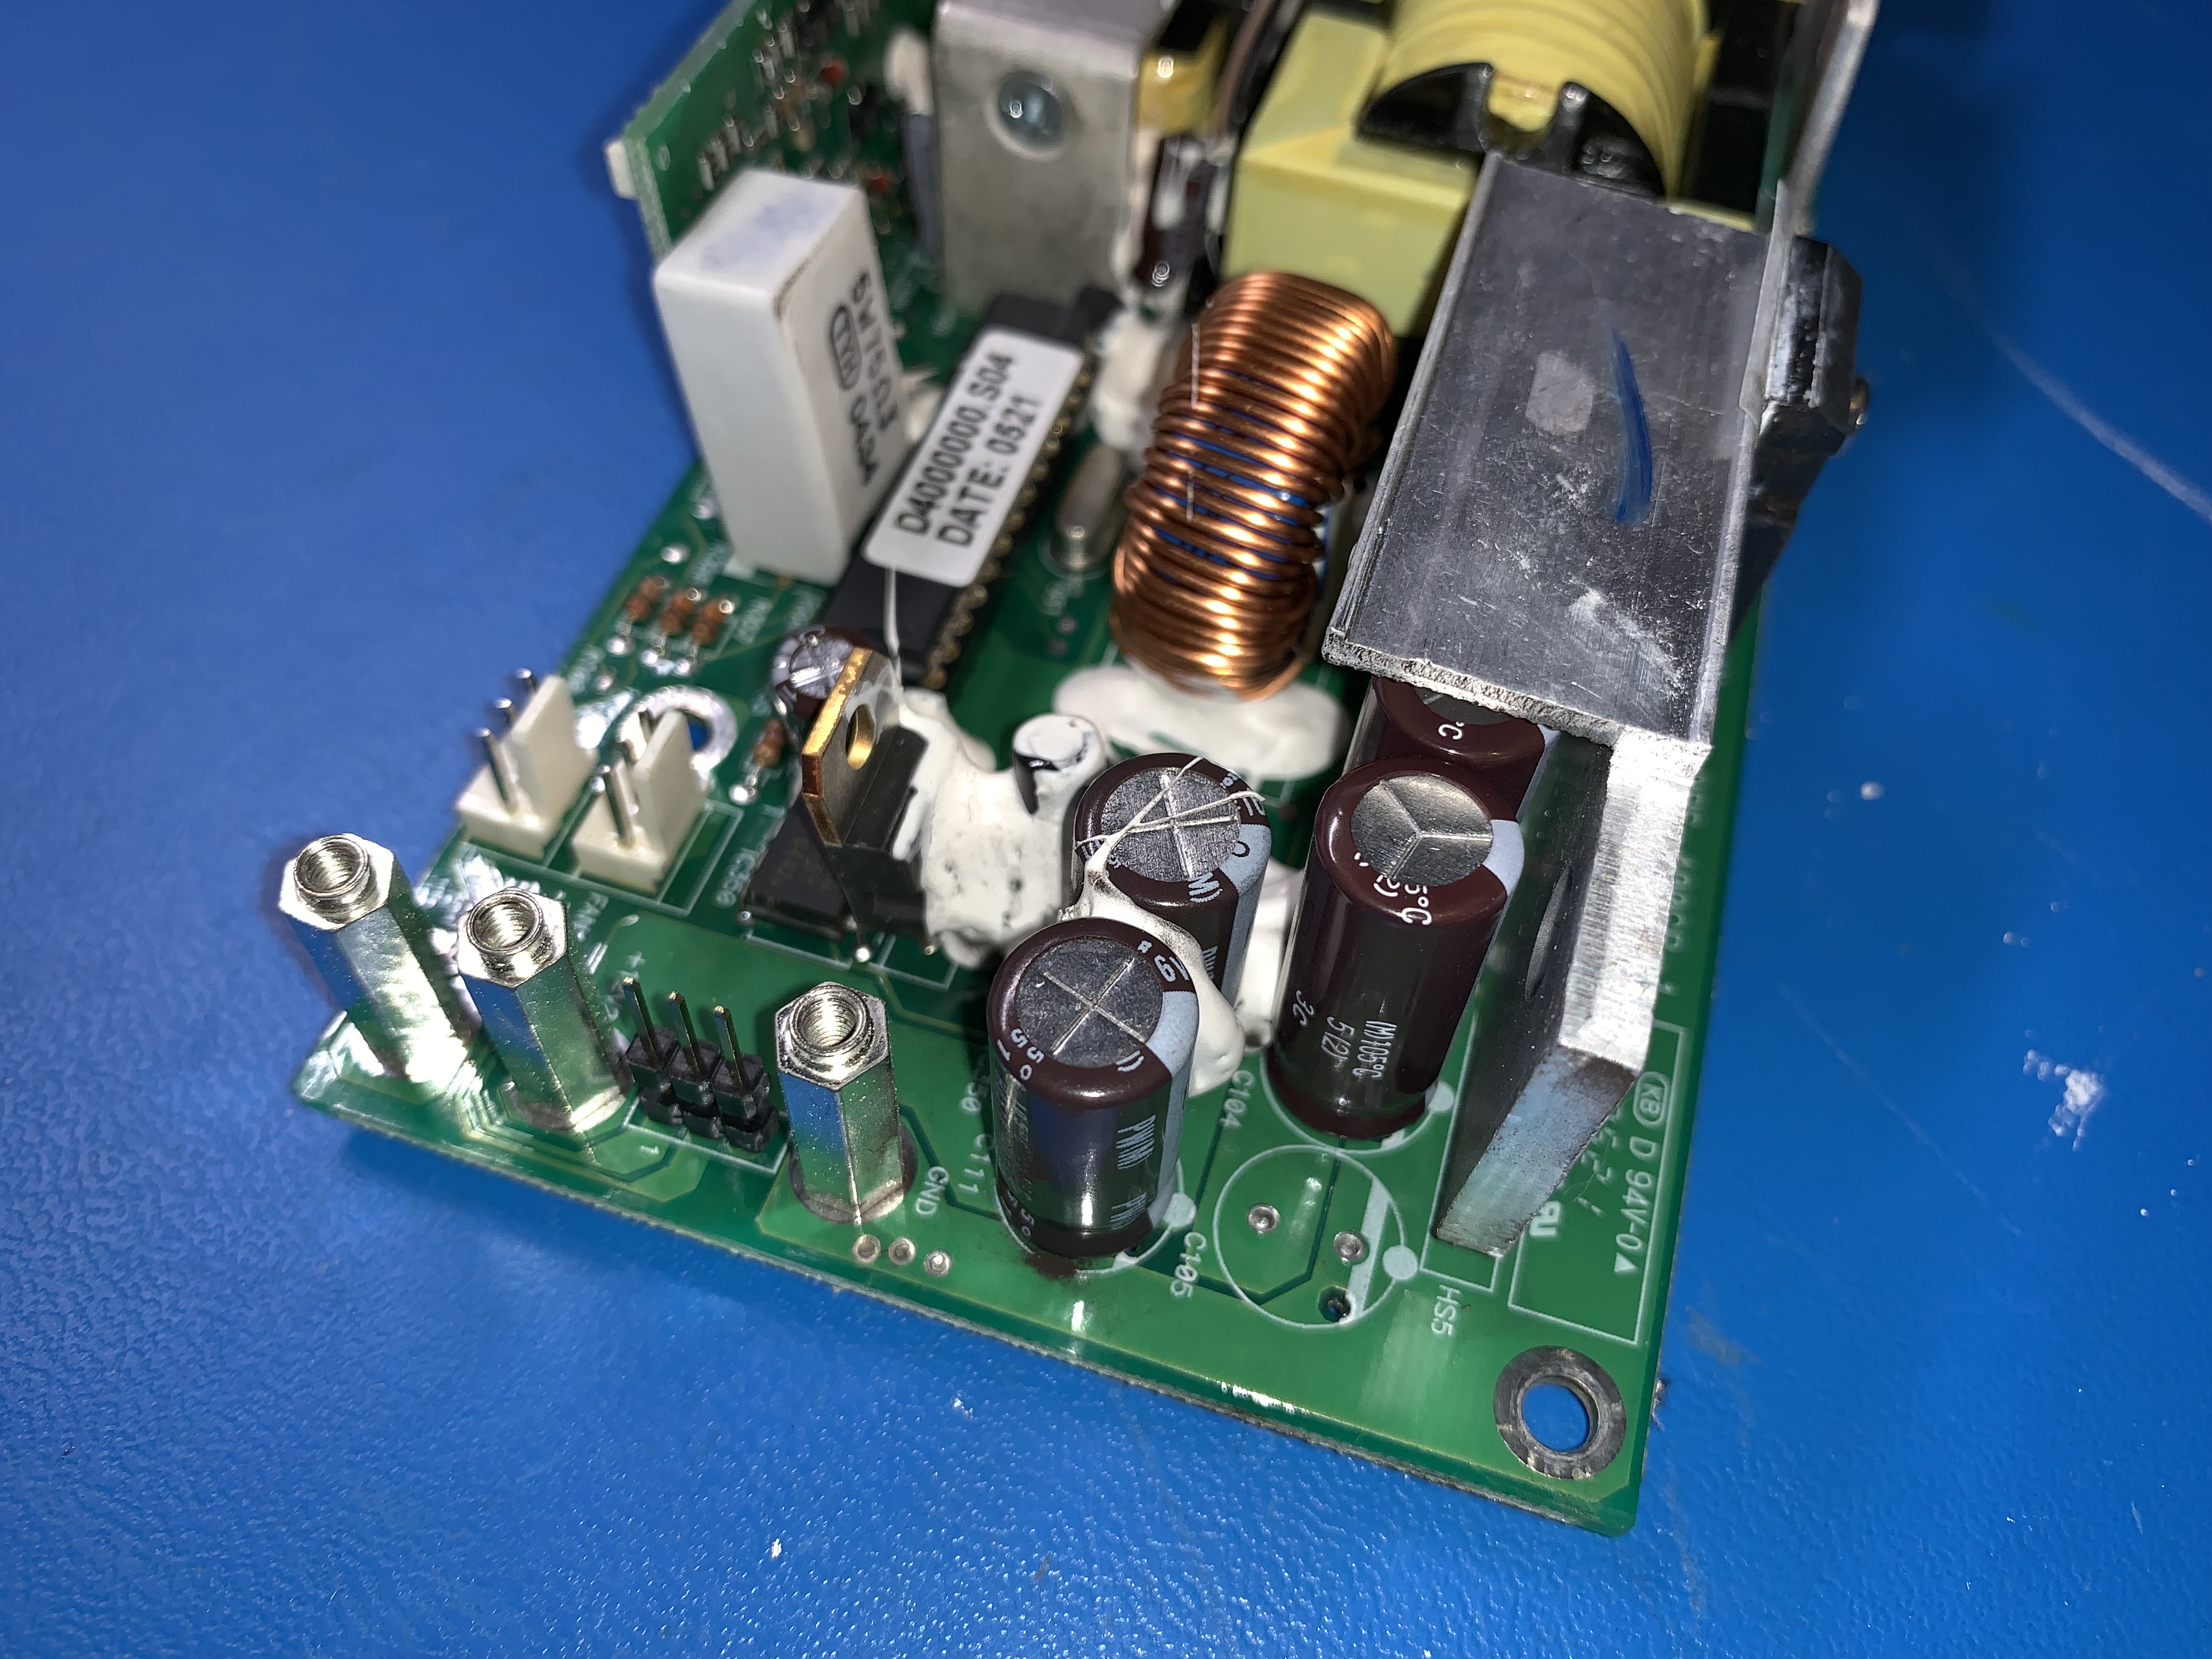
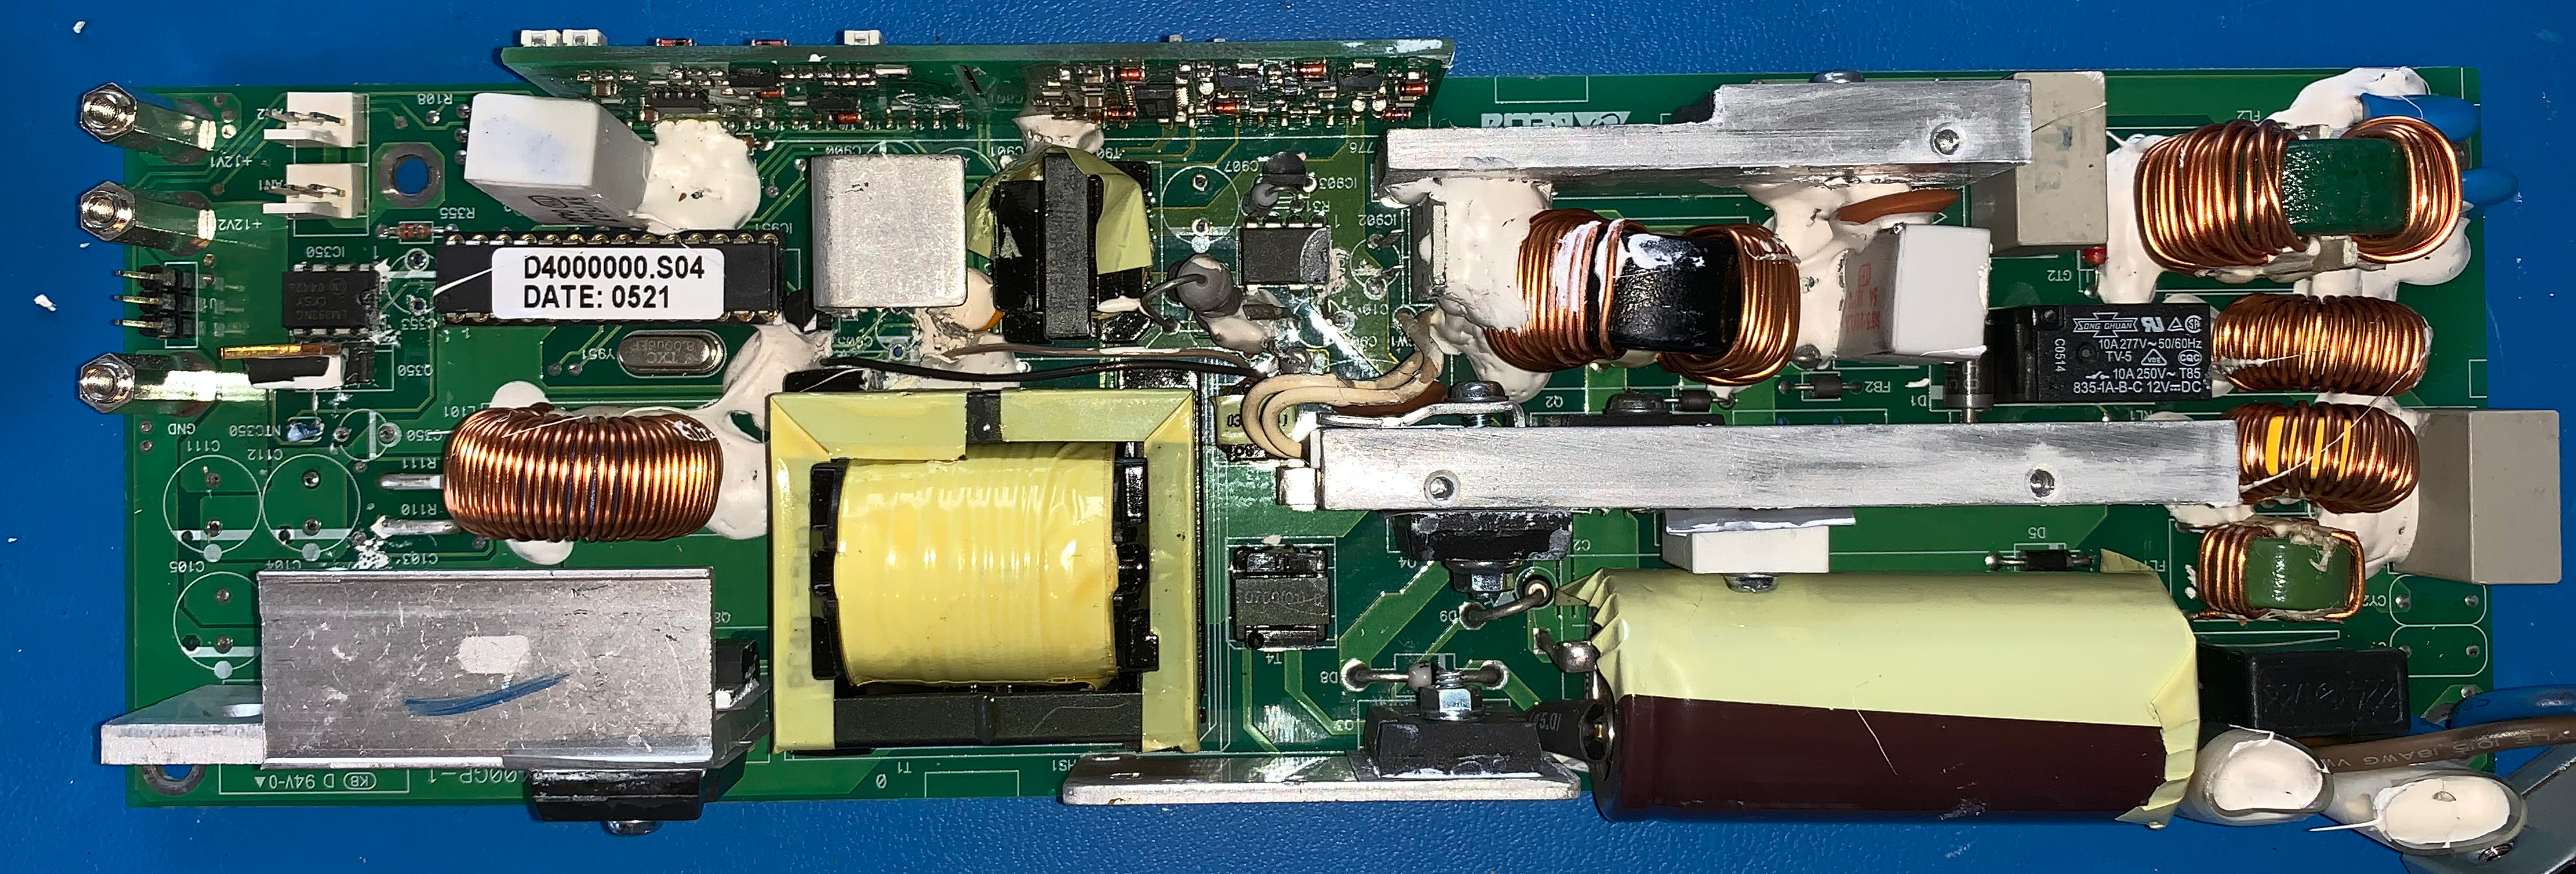
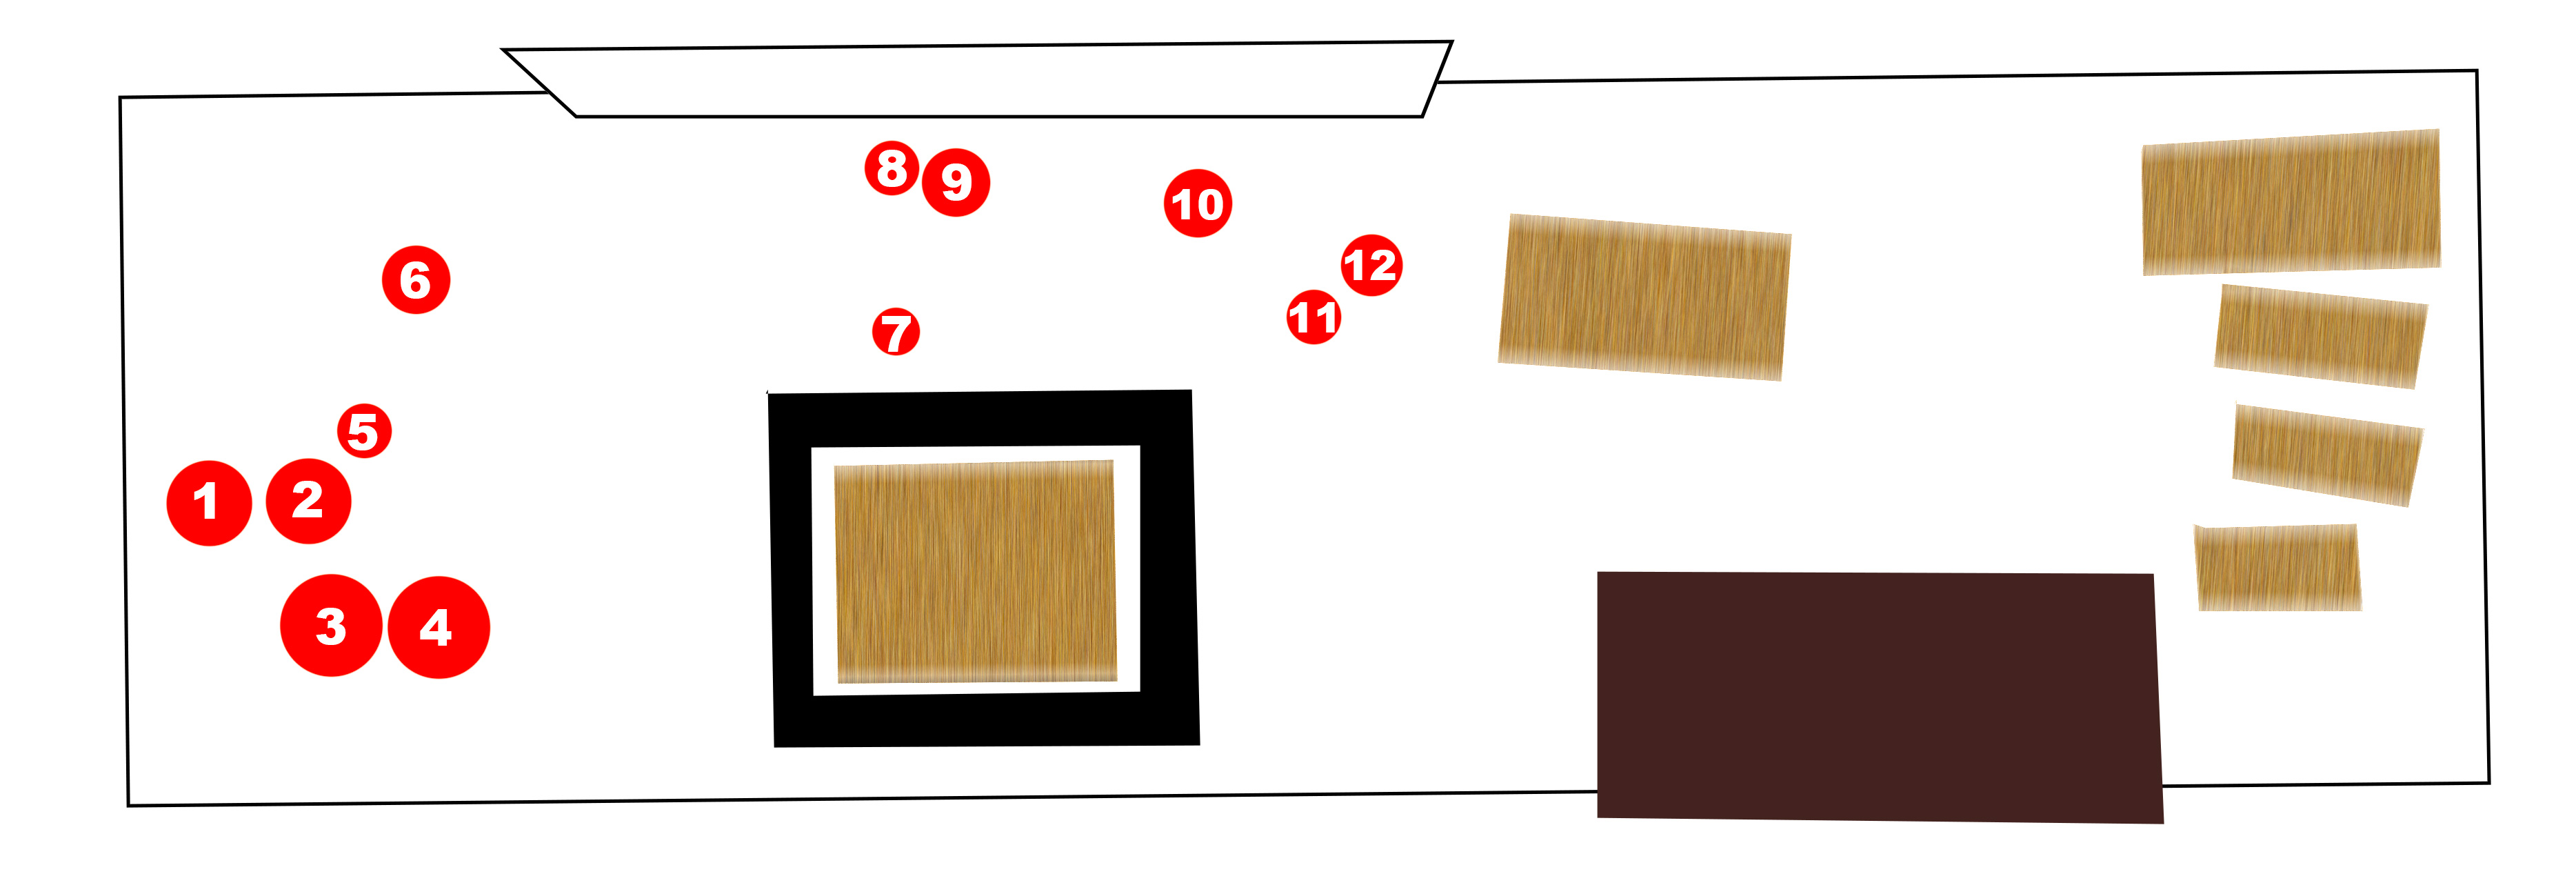
This stuff is called Silastic (Silicone elastomer), thanks to Britt Dodd for educating me on that, and is a real pain in the ass to remove. A lot of prying and scraping which adds considerable time to the whole process. If it can save me $150 – $300 though… probably worth it so the prying and scraping begins. With the caps reasonably goop free they can be removed. Here are their locations and values:
You can find a downloadable cheat sheet to print at the end of part 3.
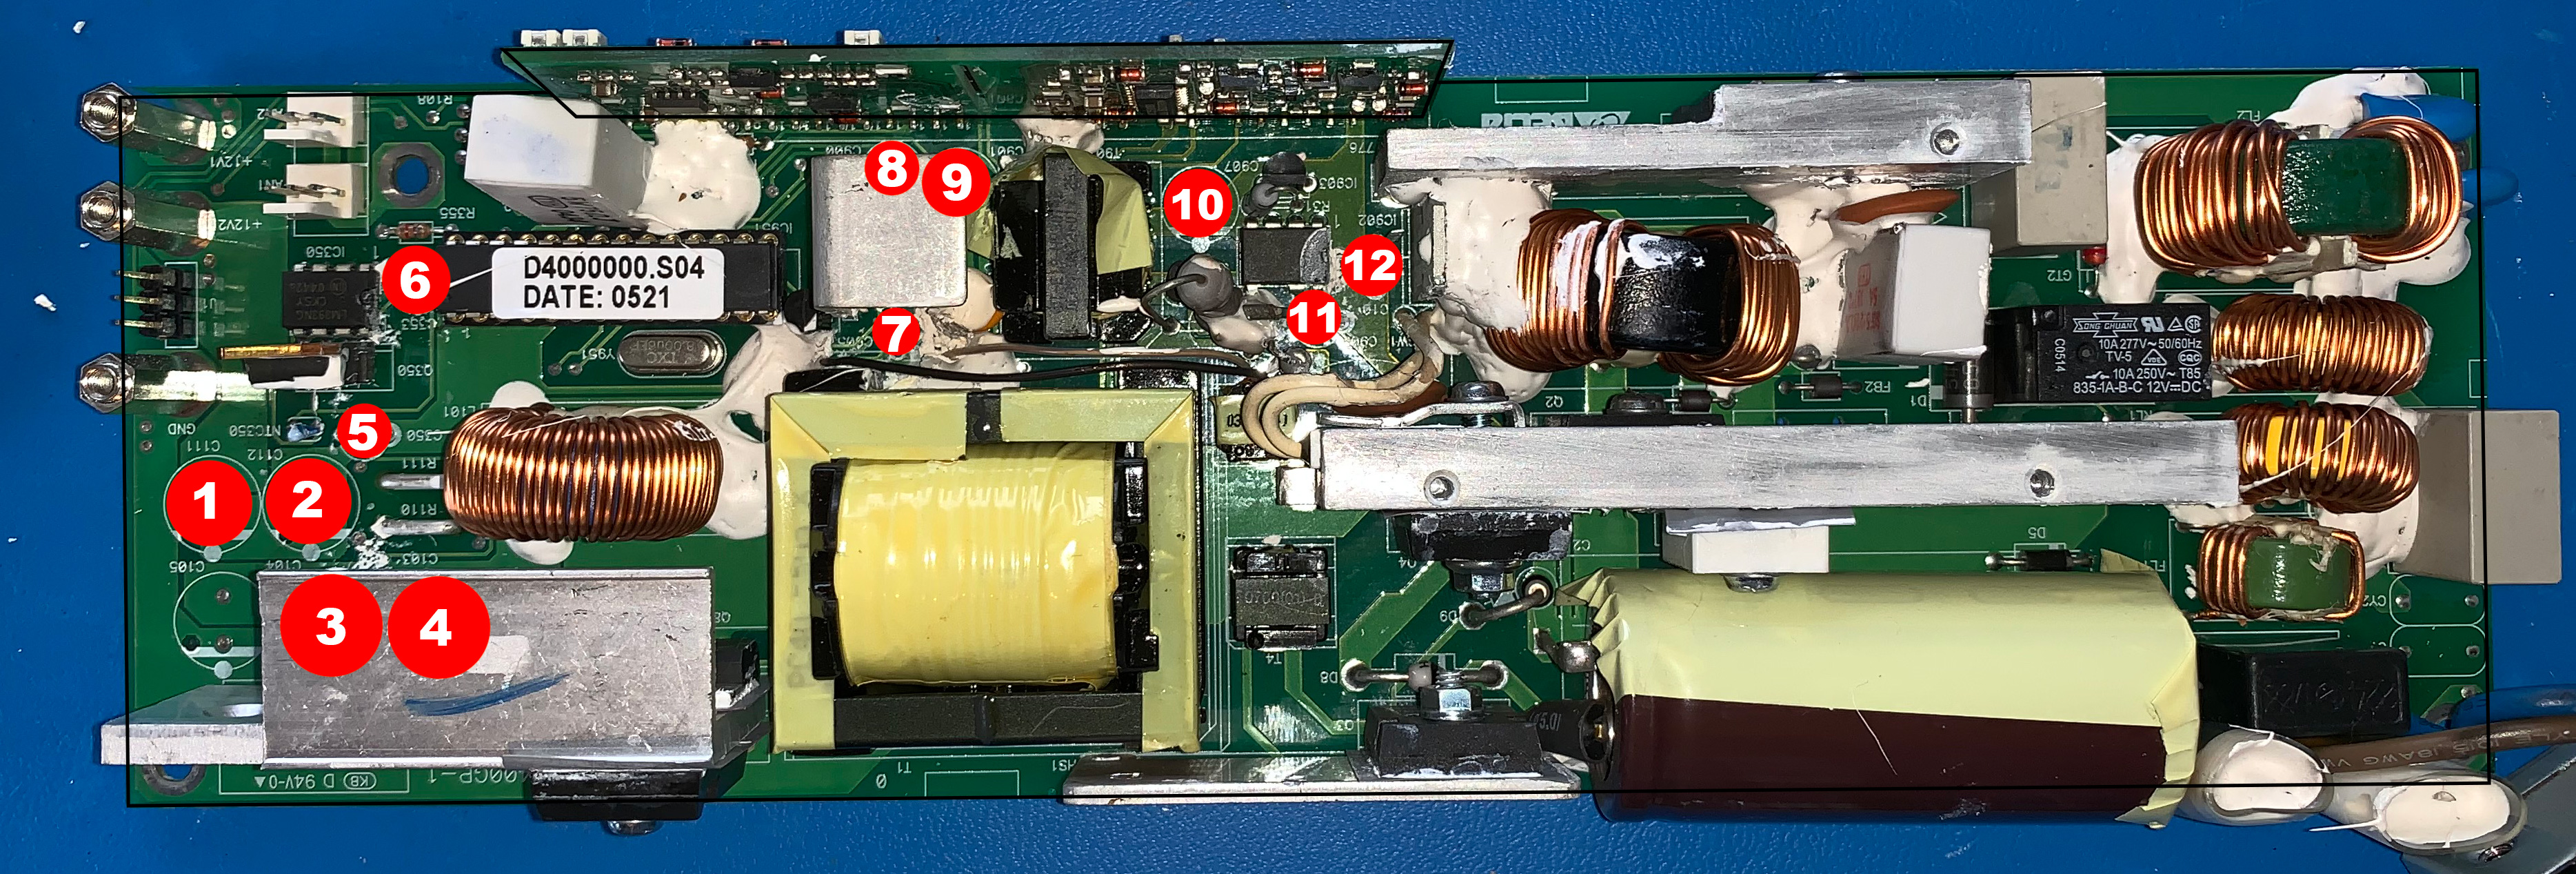
When you’re done marveling at my mad Photoshop skills, here are the values:
1. C111 – 1000uF, 16V
2. C112 – 1000uF, 16V
3. C104 – 2200uF, 16V
4. C103 – 2200uF, 16V
5. C350 – 1uF, 50V
6. C353 – 100uF, 25V
7. C905 – 10uF, 25V
8. C900 – 100uF, 25V
9. C901 – 100uF, 35V
10. C907 – 100uF, 35V
11. C909 – 22uF, 25V
12. C10 – 47uF, 50V
At least 4 of the caps on this board were branded “TAICON”. Put the words “taicon” and “capacitor” together in a conversation with someone that frequently recaps stuff and you’ll quickly find out they are never spoken of in a positive manner. So, good idea to replace those anyway apparently.
Now, to source replacement parts. My go to for most of the components I use in my daily boardrepair job is Mouser, so I checked them out to see if they had everything I need for this project as well. A search for the above values spits out hundreds of results. I want to make sure that:
1. I get the caps equal in size, certainly not bigger
2. They are rated for 105C like the current caps were
3. They have a reasonable lifespan
4. I get them as cheap as possible (from Mouser, not the ultra cheap aliexpress stuff)
With these search parameters the caps that are rated for 85C, last 2000 hours etc are all weeded out. We don’t want caps that will melt down because they are not adequately rated temperature wise or that die after a few months of use after all. I came up with a list that satisfied my needs (list with links in Part 2)
The total of all these capacitors is $6.29.
Yes, I could order more for all the power supplies and get even lower pricing but I want to see if these work first. I may order caps that are too big and won’t fit for example. If this works, I’ll bulk order the rest later. $6.29 for the caps, $7.99 for FedEx Ground = $14.28 and if this fixes the power supply that saved me $136 – $286! Definitely worth a try no?
Some of the caps do not have the lifespan rating I’d like to see but honestly I rushed through browsing the site. I’m impatient 🙂 If it works I can look for better alternatives or just recap them whenever they fail.
The order was placed… delivery on February 21st… stay tuned 🙂
Part 2 is now available and can be found here. Part two includes links to the parts I used including a complete Kit, a guide on how to recap the revision 02 PSU and will give you everything you need to get this recap done! Part 3 includes the power supply pinout, alternative ways to test the PSU and additional information if your PSU is a revision 01.
Did you like this content? |
|

11 thoughts on “Recapping an Xserve G5 power supply – Part 1 – Preparations”
Cant wait!
Gonna be a good video.
Hello,
just for info attached my nomenclature and for C104 just move C105 (by opening the holes) and to change C2 must reverse the position of the fuse because it is longer than 5mm
https://www.sfrcloud.sfr.fr/web/app/share/invite/Ob3IijeKyY
Thank you, Vincent, for the notes about C2 !
Great write up Jay. I’d like to also see one on repairing a 2006 -2008 and a 2009 – 2012 Mac Pro PSU.
Thanks! And I’d like to see that too 😉 Give me some time and I’m sure at some point I won’t be able to resist 😀
Hi
After having some work done on the house, short story the Xserve was overheated. The Xserve does boot and led is off. How can I test the power supply with a multimeter?
Check part 3 on how to test your PSU
Thanks for putting this all together!
Is there a reason why you didn’t replace The Big Capacitor? I’m not seeing it on the parts listings. Did you happen to catch the size and ratings on it?
Looks like it’s liable to be cooked by that power transistor next to it, and if I’m taking something apart, I’d rather not go back later just to save 10 bucks now. 🙂
I’ve never seen that big cap fail, not once. So figured no need to spend the cash on a replacement part 🙂
Fair enough, thanks for the reply!